GOOD SAINT
  • CLASSES
  • BLOG
    • HEALTH
    • LIFESTYLE
    • TRAVEL
  • PODCAST
  • SERVICES
  • RECIPES
    • BREAKFAST
    • APPS + SNACKS
    • MAIN DISHES
    • SALADS
    • SOUPS
    • BREADS + SCONES
    • SWEETS + TREATS
    • DIPS + SPREADS
    • DRINK UP
  • RESOURCES
    • BRAND PARTNERS
    • SHOP

EASIEST LEMON SUGAR COOKIES (NO FRIDGE REQUIRED!)

4/14/2020

0 Comments


EASIEST LEMON SUGAR COOKIES (NO FRIDGE REQUIRED!)

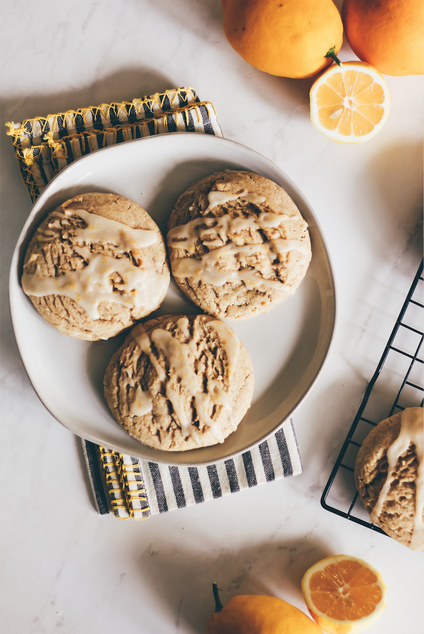
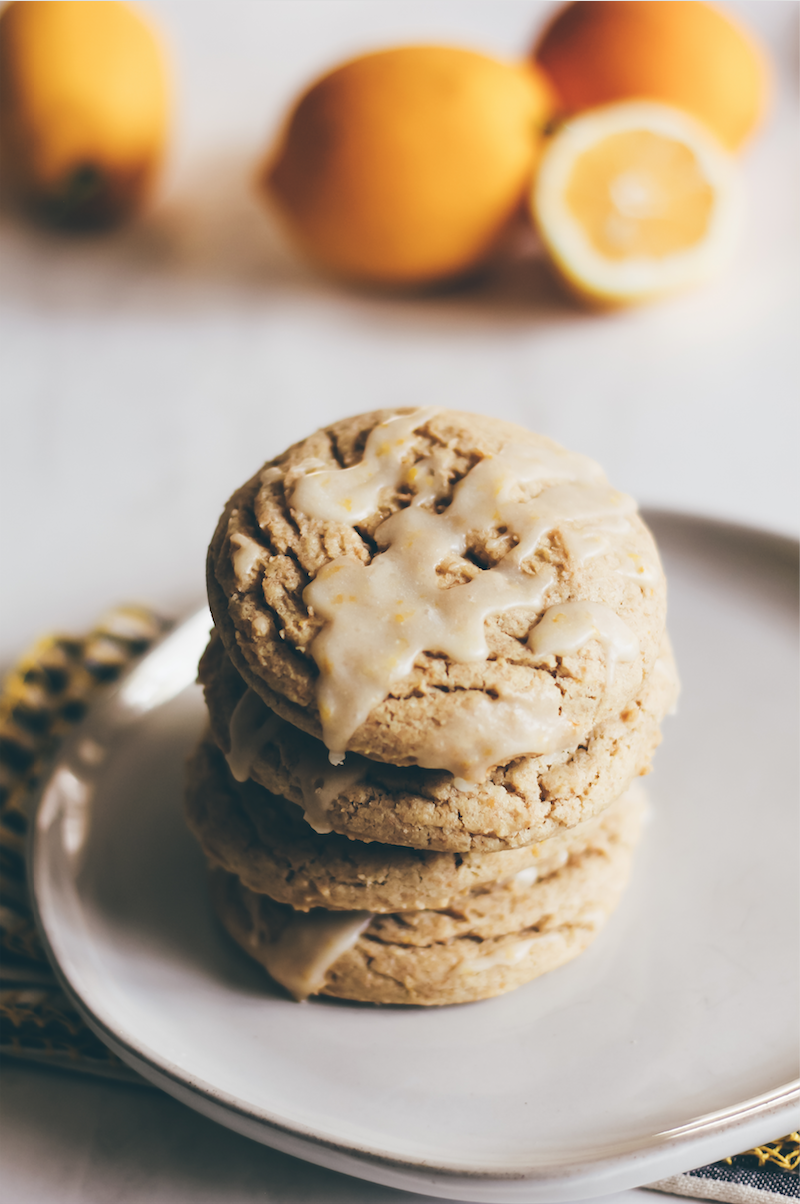
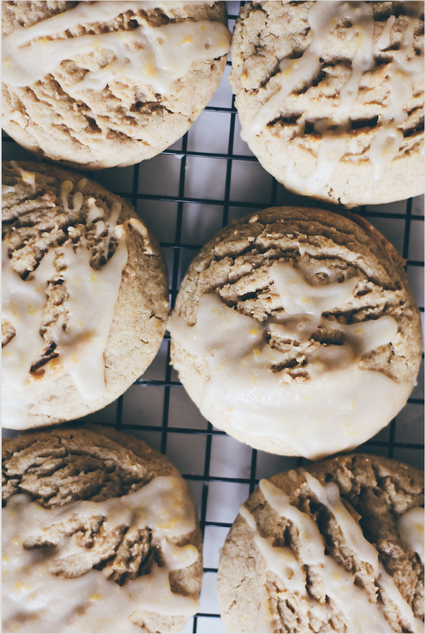
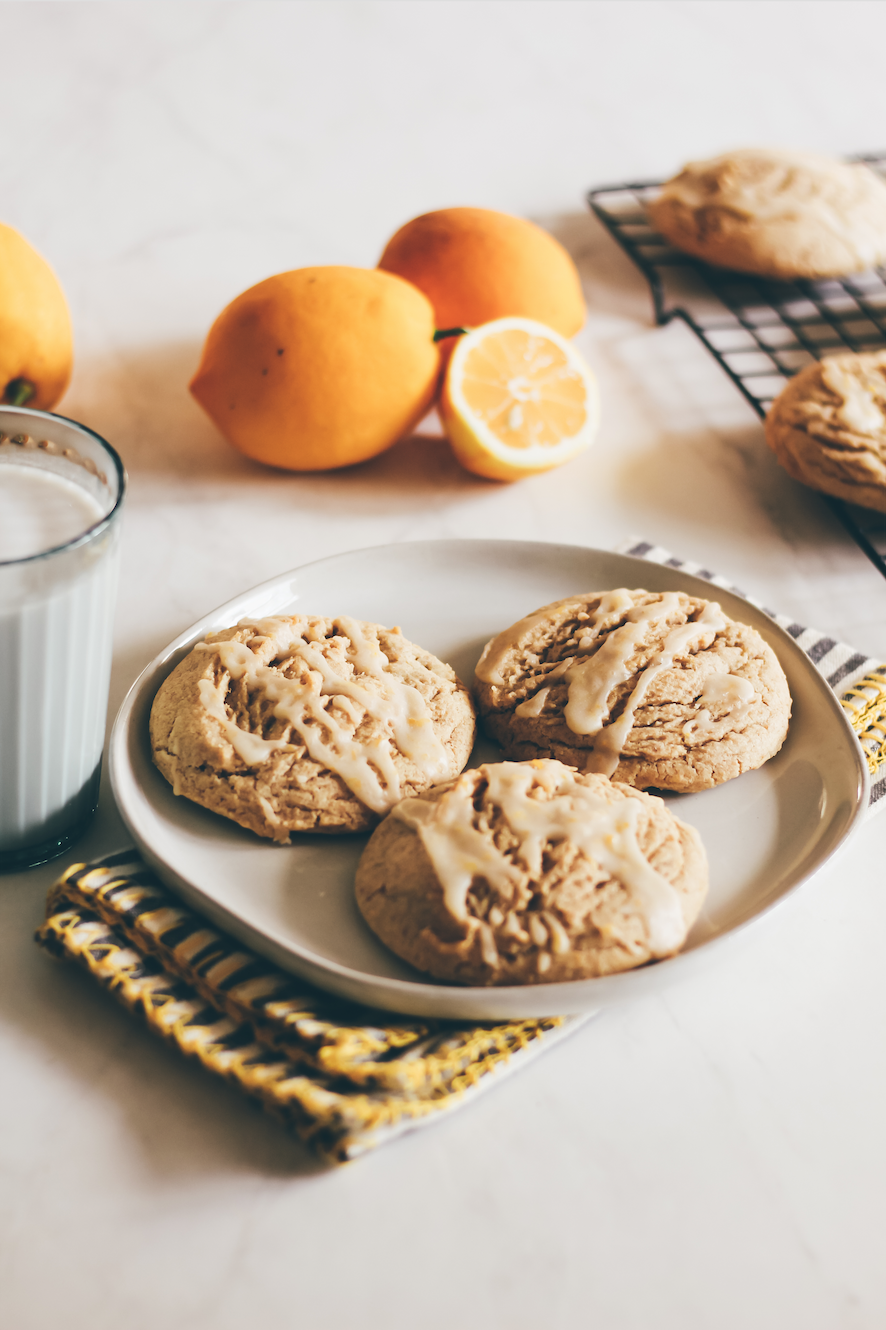
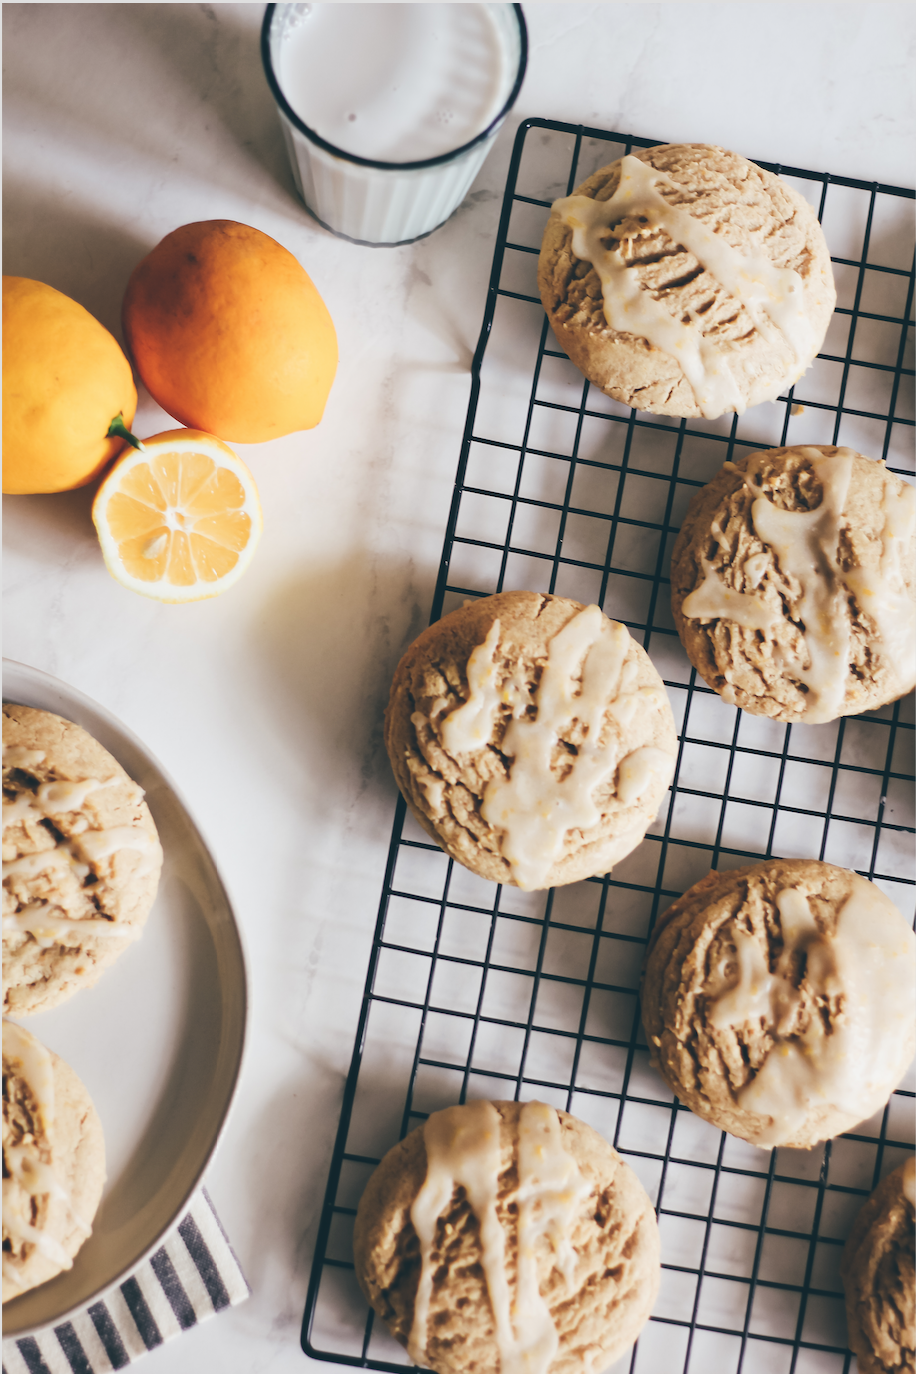
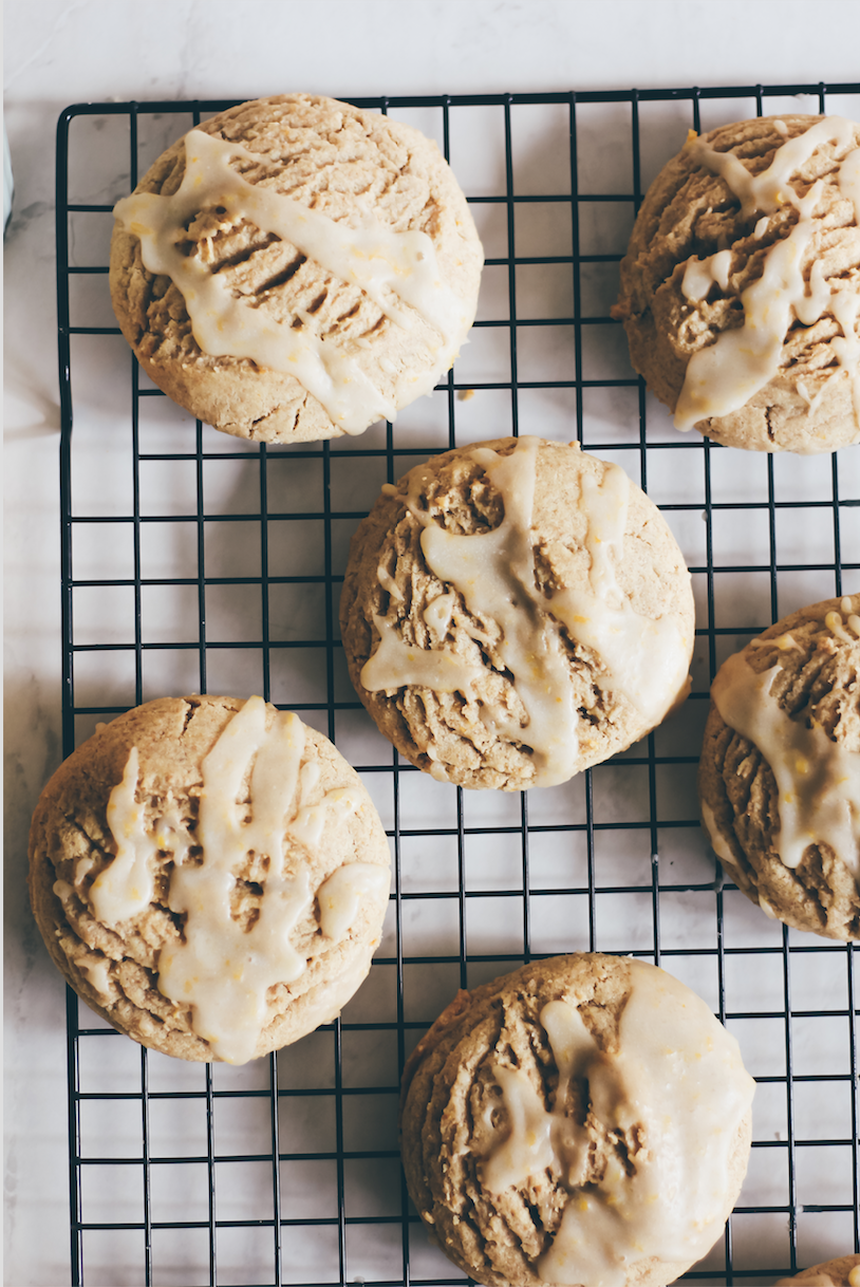
I was never much of a lemon cookie fas as a kid - but who was? With chocolate chip, peanut butter, and the pervasive M&M sprinkled cookies of the 90s, it really was no competition. But as an adult, I've grown a real appreciation for the flavor of fresh meyer lemon! Its a little sweeter and more full-bodied than the flavor of a traditional lemon, but I'd even take a regular old lemon here. Because lemon is GOOD. these are like the cookies you WISH you'd been eating in the 90s! These cookies are:

fluffy
chewy
soft
perfectly sweetened
drizzled in fresh lemon glaze
and SUPER lemon-y!

You're going to love them as much as I do. Especially when you realize that they are like the sugar cookies younger, cooler, hipper cousin. They whip up in minutes and require NO REFRIGERATION. Yup, you read that right! Most sugar cookie recipes call for at least 1-3 hours in the fridge both batter making to ensure a proper shape and texture as the cookies cook; otherwise, they'd melt all over the pan into a sheet-pan sized cookies that's not actually appetizing at all. So here's the thing - these babies, they go from prep bowl straight to sheet pan straight to oven - it literally couldn't get any easier than that. So let's put on over our day sweatpants and get to baking - you'll have fresh, warm cookies in an hour!
Picture
Picture
Picture
Picture
Picture
INGREDIENTS:
COOKIES
1
 and 3/4 cups flour
1/2 teaspoon baking soda
1/2 teaspoon salt
1 tablespoon lemon zest (about 1 medium lemon)
1/2 cup unsalted ghee (or butter, room temp)
1 cup granulated sugar
1 egg
1 teaspoon vanilla
2 tablespoons lemon juice

GLAZE
2 cups powdered sugar
2 tablespoons lemon zest
1/3 cup lemon juice

​DIRECTIONS:
Preheat oven to 350 degrees. Prepare a baking sheet with a non-stick spray or parchment paper, and set aside.

In a medium bowl whisk the flour, baking soda, salt. In a separate large mixing bowl beat the butter for a few seconds, add the sugar and mix until light and fluffy. Add in the egg, vanilla, lemon zest and lemon juice. Beat or whisk until fully combined.

Add in the dry ingredients, and  continue mixing until a fluffy batter forms.

Drop cookie dough by the spoonful, or using a 1-2 inch cookie scoop, onto the prepared cookie sheet. We used a two inch scoop for big, bakery-sized cookies! Bake until light golden on edges, approximately 12- 14 minutes. Remove from oven, let cool on the cookie sheet about 5 minutes and then remove to continue cooling on a wire rack.

While cooling, prepare the glaze by whisking the powdered sugar, lemon juice, and lemon zest together until well combined. Drizzle over the top of the cookies. Allow to sit and dry, glaze will harden after about 10-20 minutes.

Leftovers can be stored in airtight container at room temperature for 3-4 days. Enjoy!
PRINT RECIPE
Picture
0 Comments

Coconut Sugar Sweetened Chocolate Chip Cookie Bars

10/7/2026

0 Comments


Coconut Sugar Sweetened
Chocolate Chip Cookie Bars

If you know me, you know I love cookies. Like, more than most foods. You could sell me on a cookies nearly any time of the day or night, especially if they're homemade and most especially if they contain chocolate. I prefer homemade versions because they're always a little softer, gooey-er, and filled with love - which I swear tastes like extra vanilla extract! ☺️

This batch of bars whips up easily, and can be made into cookies themselves if you prefer. This week though, I wanted to go full bar status so that I could:
a) eat 1 large bar instead of 4 regular cookies
b) cook all the batter in one batch rather than baking trays and trays of cookies
c) both answers are true (I'm lazy and okay with it)

What I'm saying is - RUN, don't walk, to your kitchen and preheat the oven! These bars are so worth it. They're a real sweet treat that deserves to be enjoyed and they only use 1 mixing bowl from start to finish. Rich, chocolatey, perfectly fluffy batter - let's go! 
Picture
The batter whips up easily, and the best part? Once it's prepped, you can SAVE IT! Yup, you can package into plastic or glass and keep it in the fridge for up to two weeks or save it in the fridge indefinitely. Pull it out whenever you want a single serve cookie or just a scoop of raw cookie dough - I won't tell if you don't! But I also won't be there to take you to the emergency room if you use real eggs and get e.coli so you know, be careful.

The coconut sugar in this batter replaces the normal addition of white and brown sugar perfectly - it adds a rich, sweet, slightly caramel flavor to the batter that comes out in the final bar, and uses about half the amount of sugar that a normal recipe might. Scroll down for the recipe, and let me know if you try them! 
INGREDIENTS:
1 cup ghee (or butter, or coconut oil)
1 cup coconut sugar
2 teaspoons vanilla
2 eggs (sub vegan version, if you like. Flax eggs work well here!)
3 cups all purpose flour
1 teaspoon baking soda
1/2 teaspoon baking powder
1 teaspoon salt
1 1/2 cups chocolate chips (I used soy-free chocolate chunks from Enjoy Life)

DIRECTIONS:
Preheat your oven to 375 degrees. Line or grease a 9x9 inch baking pan and set aside.

In a medium sized mixing bowl, beat together the ghee, coconut sugar, and vanilla until creamy. Crack in the eggs, and beat again until the mixture becomes fluffy. Pour in the flour, baking soda, baking powder and salt and beat until well combined. 

Pour in the chocolate chips (or chunks!) and fold them into the dough. 

Scoop the combined dough into your lined baking dish, and press it down so that the batter fills the corners completely. Bake for 20-25 minutes, until top becomes golden and an inserted toothpick pulls mostly clean.

Remove, cool, and serve! Makes 9-12 bars, depending on the size. 
​
NOTES:
To make individual cookies instead, scoop 1-2 in. balls of dough onto a baking sheet and bake for about 10 minutes each.

Leftovers can be saved in an airtight container for a week.

​White / Brown sugar (or a combo of the two) is an easy sub if you don't have any coconut sugar! The more brown sugar you substitute rather than white sugar, the richer the bars will be. 
Did I include probably more pictures of these bars than you need for reference in this post? YES. Are they worth the bake time? YES. Have I head three bars in one hour today? YES. So get on my level - throw a batch of these babies in the oven and you could be three bars deep in an hour, just like me. Or you could share them! Up to you, babes. Either way, you're gonna want to make this batch! Leftovers last in a sealed container on the counter or fridge for up to 5 days, but of course I recommend eating at least one gooey bar fresh out of the oven. Enjoy!
0 Comments

Healthier Jam Thumbprint Cookies

1/23/2019

0 Comments


Healthier Jam Thumbprint Cookies

This month has been INSANE. We've all seen the memes - January felt like it lasted 2018287324 days and let me be the first to say THANK GOD it's over. I feel like it was one things after another  - things going wrong at work, won't weather, days just not being long enough to get everything - or seemingly anything - done. Luckily, amongst the chaos, I had a little bit of a plan: #BeYourBestBabe2019! I loved creating this challenge with Nathalie, my partner on the Real Good Podcast, and I loved participating in it even more! The challenge was broken down into 4 weeks, each week with a different focus, and each filled with simple and fun daily challenges designed to help the crazy month be as productive as possible. It was fun, and even though the month flew by, I feel like I can actually look back and realize I had a pretty successful month! 
One thing I did several times this month, no checklist reminders needed? Made batches of homemade cookies! It's one of my favorite ways to decompress and satisfy a sweet tooth. And this past  month? I made some REALLY great batches of cookies. And after posting about them on my IG, I got tons of requests for recipes! I'm still working on my super duper chocolate chunkers but I've damn near perfected these Healthier Jam Thumbprint Cookies and it was time to share. They're buttery, soft, and full of flavor, and then topped with your favorite jam! Even better? I made them nearly entirely sugar-free! You can always add more sweetness if you like, but I'm all about adding less sugar so I can eat more cookies - ya know what I mean?! Recipe below, babes!
INGREDIENTS:
2 1/4 cups AP flour
2 teaspoon cornstarch
1/2 teaspoon salt
1 cup butter (vegan or regular, unsalted), softened to room temperature
1/3 cup sugar
1/3 cup Lakanto Monkfruit Sweetener (or you can always just use stevia or brown sugar here, instead! You've got options. 😊)
1 large egg yolk (or 2 tablespoons mashed banana, to keep 'em vegan)
3/4 teaspoon vanilla extract
1/3 cup jam or preserves of your choice (I like raspberry but could only find seedless for this batch)

DIRECTIONS:
Preheat the oven to 375 degrees F. Line a baking sheet with parchment and set aside. 

In a medium mixing bowl, combine the flour, cornstarch and salt. 

In a larger mixing bowl, beat together the butter and sugar until creamy. Add in the egg yolk or banana and vanilla, and beat until well combined. Begin to pour the dry ingredients into the larger, wet ingredient mixing bowl about a cup at a time, mixing consistently until a uniform dough forms. Chill dough for 20-30 minutes.

Scoop 1 inch balls of dough two-inches apart onto your cookie sheet and gently press your thumb into the center to make a small indent for the jam to sit comfortably inside of. Once your cookies have all been pressed, scoop your 1/3 cup of jam into a small bowl and microwave for about 20 seconds to soften. Mix the jam after warming and gently scoop hefty teaspoon-sized amounts into the thumbprint in each cookie, filling to the brim.

Place the baking sheet into the oven and bake for 10-11 minutes, or until bottoms and edges are beginning to turn golden brown in color. Remove the cookies from the oven and place them onto a cooking rack. Once completely cooled, enjoy immediately or wrap and save for up to three days!
Print Recipe
This recipe has quickly become a favorite in our house - which is funny, because jam-filled cookies were literally my least favorite for YEARS! I don't know if I'd just had too many fig newtons forced on me as a kid or if the jam my cookies were being topped with just wasn't as up to par, but I never liked them until now! These ones are soft, buttery, and topped with the perfect amount of sweet jam on top. I am super guilty of eating a half-batch in a day. Thank goodness they're HEALTHIER! 

If you're interested in following along with the #BeYourBestBabe2019 challenge, head here and print out the challenge calendars. You can do them week by week or all at once - just enjoy the extra productivity and see if it makes you feel like you're being YOUR best babe this month! 
0 Comments

Organic Funfetti Cookies for my 28th Birthday!

8/29/2018

1 Comment


Organic Funfetti Cookies for my 28th Birthday!

I have always been the kind of person who LOVED birthdays. I would celebrate as long as possible - the whole month if you'd let me! If you listened to the latest episode of my podcast, you know that I'm a total PITTA and that fire in my belly keeps me craving attention, so it makes sense that I would love a day centered around celebrating ME! I've had a pretty great last few birthdays, but this year totally snuck up on me. I have been so insanely busy between the blog, podcast, and new promotion at the yoga studio (studio assistant what whatttt) that I literally didn't realize until just a few days ago when my husband reminded me that we needed to figure out how we were going to celebrate. YIKES! (I must be getting old guys - I'm already forgetting my OWN birthday! 🙈)
It's the Thursday before my Saturday birthday and I still don't know how I want to celebrate (taking suggestions!) but I DID know what I wanted to eat on my birthday. I love sweets but I'm all about that low-sugar life, so I created the birthday cookie cookie of my dreams - an Organic Funfetti Sugar Cookie that hold its shape when it bakes, so you can cookie cut them into whatever cute shapes you like! They're light, sweet, and the PERFECT cookie to splurge on for your birthday - because you can eat as many as you want without having to worry about your sugar intake! Also it's your damn birthday and SOMEONE better make you cake, so let these be your at home treat. I had 6 yesterday. No regrets - bring on 28! ​
Turning 28 isn't a huge milestone, but 27 was a pretty great year for me. I had a lot of great experiences, made new forever friends, found some workouts that have kept me sane + feeling confident about my health and my body, and did some serious traveling. I made so many great memories and proved to myself how much growth I could experience in a year. 26 was hard, 27 was great, and I expect 28 to be filled with even more opportunities and positive memories! These cookies  totally fit for who I am now - obsessed with eating as many cookies as possible as healthfully as possible! A few years ago I would've made a huge, triple layer cake or fudge-filled brownies but these days I'm all about indulging in a guilt-free way - and these cookies rival any cookie with 3x the sugar, guaranteed. I didn't write any long words of wisdom about this birthday, but a few years ago I did come up with 25 Things I'd Learned at 25 and they still stand pretty true. Maybe I'll make another list at 30. For now - let's bake, babes!
INGREDIENTS
2 1/4 cup organic all purpose flour
1/2 teaspoon baking soda
1/2 teaspoon salt
1 cup non-dairy butter
1 cup monk fruit sweetener (I used this brand, but you can always use sugar or your fave sub instead. If you choose to use stevia, I would recommend only subbing half the amount for taste.)
1 egg (or vegan egg substitute - a chia egg works great here!)
1 teaspoon vanilla
1/2 cup sprinkles

DIRECTIONS
Preheat your oven to 350 degrees.

In a medium sized mixing bowl combine the flour, baking soda, and salt. Set aside.

In a separate, larger mixing bowl beat the butter and sugar (or sweetener) together until fluffy. Add in the egg and the vanilla and beat until the mixture becomes fluffy again. Pour in the dry ingredient mixture, continuously mixing until a dough forms. 

Pour in the sprinkles and use your hands to mix them evenly into the dough. Refrigerate the dough, covered, for 20-30 minutes. While the dough chills, lay out some parchment paper and grab a rolling pin. When your dough is ready, roll it out to about 1/4 inch thickness and use a cookie cutter to cut out your favorite shapes.

Place cut cookies onto a lined baking sheet. Bake for 10-12 minutes. Let cool before enjoying. Leftovers save well in a sealed container for up to a week - if they last that long! 
Print Recipe
1 Comment

Lemon Sugar Cookie Cake

8/8/2026

3 Comments


Lemon Sugar Cookie Cake

My favorite way to celebrate any holiday is with FOOD, and this 4th of July I wanted to crack into some of that summer nostalgia from when I was a kid with one of my favorite summertime treats! I finally called Mom to get the recipe she always used to make for us when we were kids; She would always make a giant cookie layer base, slather it in frosting and cover it in fresh fruit. Usually a summertime snack for it's portability and use of that fresh, seasonal fruit I’ve been craving this Lemon Sugar Cookie Cake ever since I made it a few weeks ago! I simplified and slightly health-ified her original recipe and got something I think is even better. Sorry Mom!

I shared the simplified recipe on IG when I made it, but wanted to share an easier-to-read, printable version for all my regular readers here, too. It really is the perfect, easy, crowd pleasing summer 
dessert! Would love to hear your thoughts if you try it - and my Mama would, too! Scroll on down for the recipe and some notes before you bake, too. Enjoy, babes!
INGREDIENTS:
COOKIE BASE RECIPE
2 1/4 cups AP flour
1/2 teaspoon baking soda
1/2 teaspoon baking powder
1/2 teaspoon salt

3/4 cup (non-dairy) butter
1/2 cup sugar
1/2 cup monk fruit sweetener*
1 egg (vegan if you prefer)
1 teaspoon vanilla
2 tablespoons lemon juice
Zest of 1 lemon
Strawberries, blueberries + raspberries for topping


CREAM CHEESE FROSTING
8 oz. plain, non-dairy cream cheese
2-3 tablespoons lemon juice
Zest of half a lemon

1 teaspoon of vanilla extract
Maple syrup and/or monkfruit sweetener to taste


DIRECTIONS:
Preheat your oven to 375 degrees and line a round pan (or baking sheet) with parchment paper.

In a large sized bowl combine the flour, baking soda, baking powder, and salt together. In a smaller, separate bowl combine the sugars, egg, vanilla, lemon juice + lemon zest. 

Add the wet ingredients to the dry, mixing completely. Once the dough has formed, roll it evenly into a round shape on the pan, about 1/4-1/2 inch thick.

Bake for 10 minutes or until edges begin to brown, then let cool completely. While the cookie layer cools, mix the frosting and chop up the fruit. Once cool, frost the cookie like a pizza and top with fruit. Enjoy babes!

NOTES:
​You can use real butter, eggs and milk here if you prefer. I adapted this recipe from my Mom's original which did in fact use the original versions with great success. 

Leftovers last up to 2 days on the counter and up to 4 days in the fridge, but - like most things in life - is best enjoyed fresh.

*You can also sub the monk fruit sweetener for stevia or more real sugar.
Print Recipe
3 Comments

Nearly Sugar-Free Chocolate Chip Cookies

10/25/2016

6 Comments


Nearly Sugar-Free Chocolate Chip Cookies

With my new Homestyle Vegan cookbook hitting shelves November 1st, my first book signing event and the Holidays coming up, I've really been doing my best stay low stress and to avoid sugar. Not only do I have wedding I'm trying to look pretty great for, but sugar is just not my friend. It's the number one food that makes me gain weight and really screws with my face, causing breakouts. I really try not to eat much of it as part of my everyday diet. Besides foods with natural sugar like fresh fruit, of which I indulge plenty, I really don't eat it. Except when I'm menstruating - then all bets are off, friends. Then I will fight you for your french fries. Then I will eat an entire pint of ice cream with no regrets. Then I am unstoppable, and Alex knows it's best to just get out of my way and let me eat through the cramps and lower back pain. But since I can be kind of rage-binge-y at that time of the month, I've started combatting later, meaner, hungrier me with some seriously indulgent-tasting, nearly-sugar-free chocolate chip cookies! 
They are soft, chewy, sweet, and taste like they should be packed with sugar - but NOPE! Just a couple of optional tablespoons in this recipe, and it doesn't even have to be refined. I've made these cookies maybe 30 times at this point and have gotten the recipe down to an exact science. They are the perfect dessert or sweet treat when you need one, and make a decent meal when you need more like 7. They're stuffed with chocolate chips, which I think helps to totally mask the flavor stevia in the recipe. This is actually the FIRST recipe on this site using stevia because I've always been so hesitant to bake with it. But I am experimenting with it and so far, so good. Even Alex says these cookies pass his 'no after-taste' test, which is good, because a lot of sugar-less sweeteners don't! These cookies taste heavenly and indulgent, but are lighter and way more guilt-free than you'd ever imagine. Plus, CHOCOLATE. So go ahead, have four. You know I'm going to! ​
INGREDIENTS
1 tablespoon ground flax
3 tablespoons warm water
1 1/4 cup whole wheat pastry flour (or AP flour)
1 teaspoon baking soda
​1/4 teaspoon salt
1/2 cup softened coconut oil
2 tablespoons brown sugar, maple syrup, or your favorite sweetener (optional)
​3/4 teaspoon liquid vanilla stevia
1/2 teaspoon vanilla extract (double if using unflavored liquid stevia)
3/4 cup non-dairy chocolate chips 

DIRECTIONS
Preheat oven to 350 degrees F.

In a medium mixing bowl combine the flax and water, set aside to gelatinize. 

In a separate, larger mixing bowl whisk together the flour, baking soda and salt. Form a well in the center and set aside. 

In the medium mixing bowl with the flax mixture add the coconut oil, sugar or maple syrup, stevia and vanilla. Whisk to combine completely, then pour the mixture into the well formed by the dry ingredients. Use electric mixers to beat the mixture together until well combined. If not using an electric mixer, mix with a wooden spoon until you can't anymore, then finish it off with your hands. Once combined, pour in the chocolate chips and mix 'em in. 

Use a cookie scoop or spoon to scoop 1-inch balls onto a lined or lightly greased baking sheet. Bake for 10-12 minutes, or until the cookies are golden. Remove from the oven and move the cookies to a cooling rack. Enjoy! 

NOTES
Makes about 18 cookies.

Leftover cookies save well in a sealed container on the counter for up to a week.
Print Recipe
6 Comments

White Chocolate Macadamia Nut Cookie Bars

7/14/2016

1 Comment


White Chocolate Macadamia Nut Cookie Bars

Picture
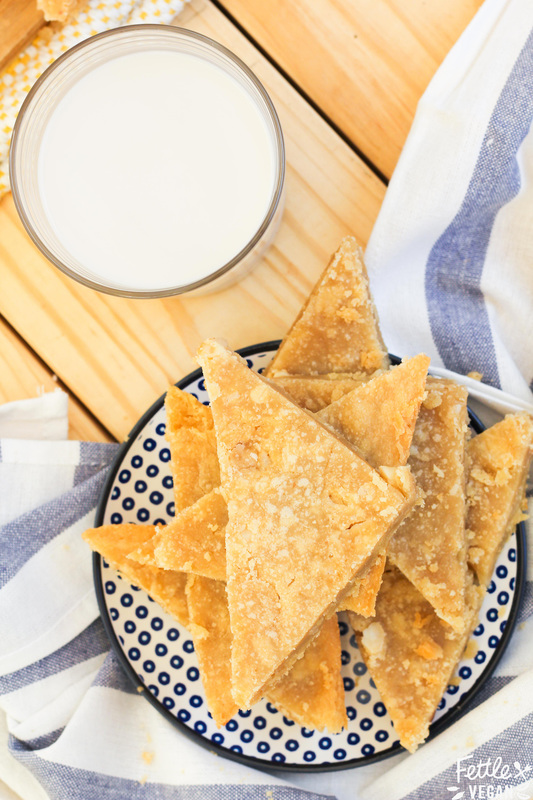
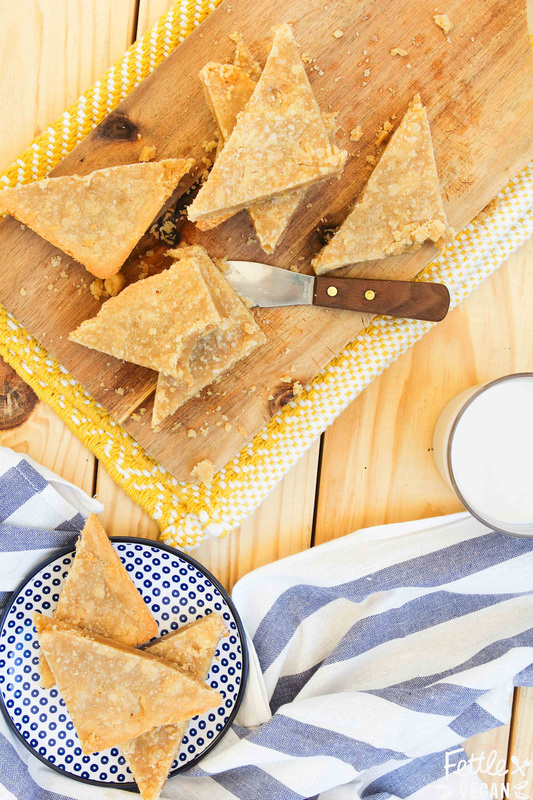
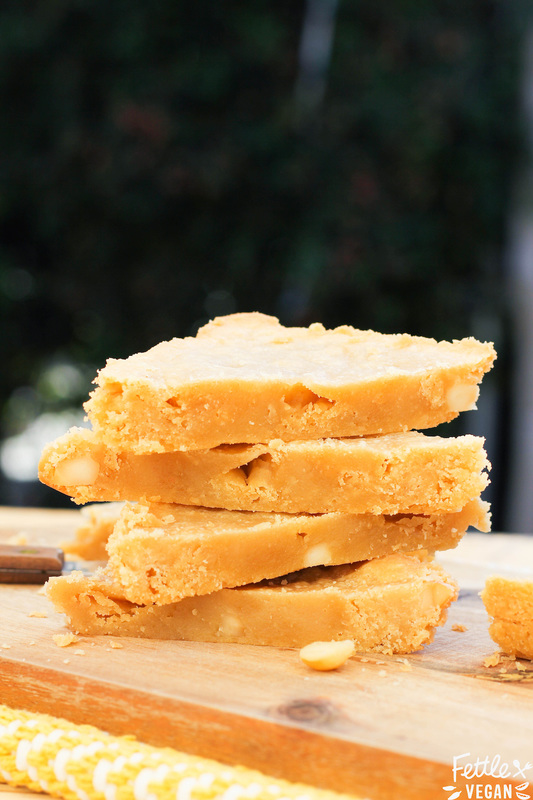
I love cookies of all shapes and sizes - I'm not one to discriminate. That being said, there just aren't enough vegan white chocolate macadamia nut cookies around. At least not ready available for purchase...so I came up with my own recipe so I could have them whenever I got a craving. Instead of using a store-bought vegan white chocolate (which is REALLY hard to find. I have found it online, though) in these, I used chopped cacao butter. Cacao butter is the edible vegetable fat extracted from the cocoa bean and it both smells and tastes like chocolate. It's the perfect substitute and is PACKED with antioxidants to help give you healthy hair and skin - so they're basically a health food...right?! 😝
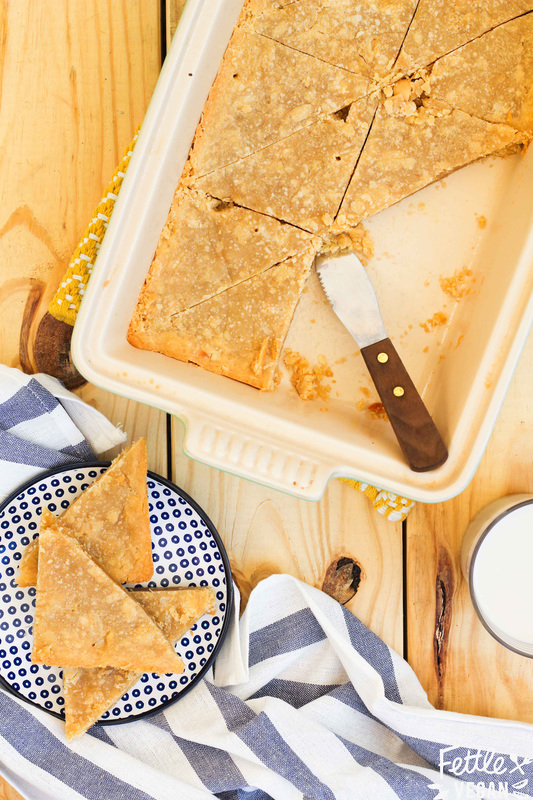
I used maple syrup instead of sugar in this recipe because I prefer the flavor of maple syrup, but substitution info is listed below if you're interested. These cookie bars are thin, a bit crispy on the edges, and packed with yummy, crunchy macadamia nuts. They're SO GOOD and make a taste pretty damn dipped in tall glass of almond milk. So what're you waiting for?! We've got cookies to eat!
Picture
Picture
INGREDIENTS
1 cup vegan butter OR vegetable shortening
2/3 cup maple syrup
1 1/2 teaspoons vanilla
3/4 teaspoon salt

2 cups all purpose flour
1/2 cup vegan white chocolate or cacao butter, roughly chopped
1/2 cup macadamia nuts, roughly chopped

DIRECTIONS
Preheat the oven to 350°.

Using a hand held or stand mixer, cream together the butter, sugar, vanilla and salt until light and fluffy. Add in the flour. When it's fully incorporated, stir in the white chocolate chunks and macadamia nuts. 

Pour the cookie dough into a greased 9 X 13 inch baking dish. Press dough very firmly with plastic wrap or a spatula until the top is silky smooth and free of cracks or bubbles.

Bake for 23-28 minutes until slightly golden + crisp on the edges. An inserted toothpick should come out clean. Cool completely, then cut into triangles (or squares!) with a sharp knife. Scoop out the bars and enjoy!

NOTES
Makes about 16 bars.

You can also sub 1 cup organic sugar for the maple syrup here. The cookie bars will be crispier if you do this. 

For thicker bars you can also try baking in an 8x8 inch pan, but the cooking time may need to be adjusted.

Leftovers last in the fridge for about a week! 
Print Recipe
Picture
1 Comment

Gingersnap Buttercream Cookie Sandwiches
12/3/2026

3 Comments


Gingersnap Buttercream Cookie Sandwiches 

Picture
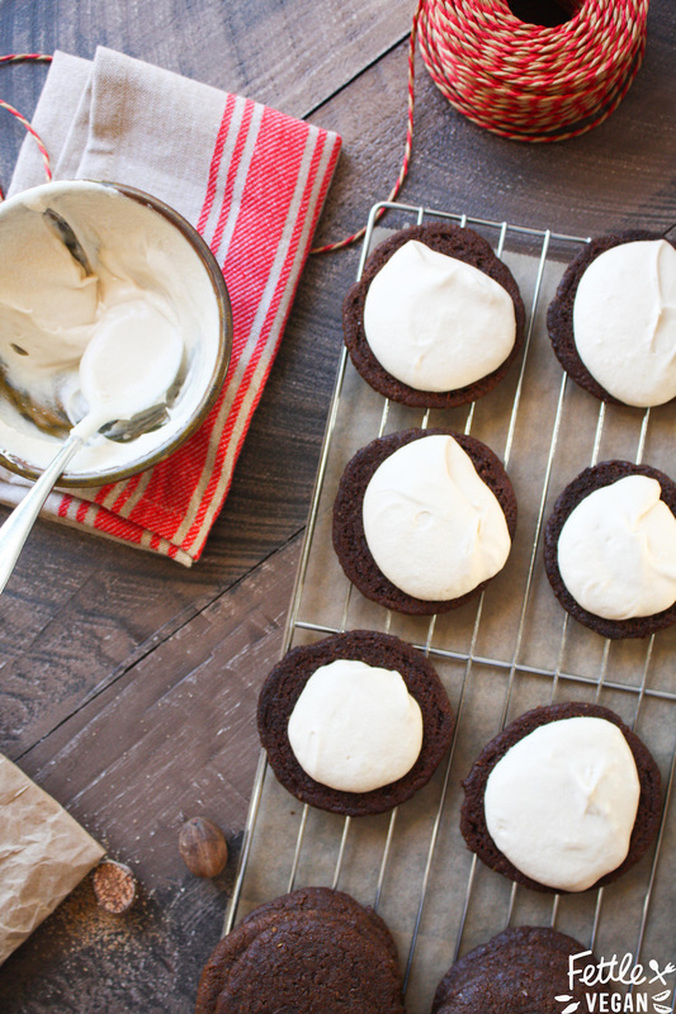
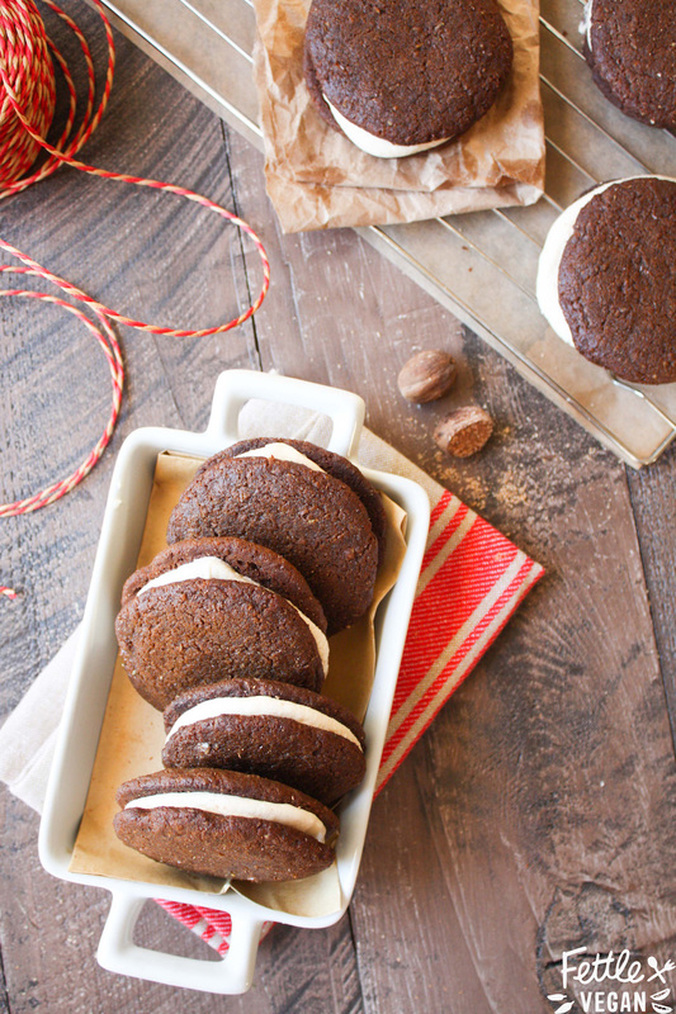
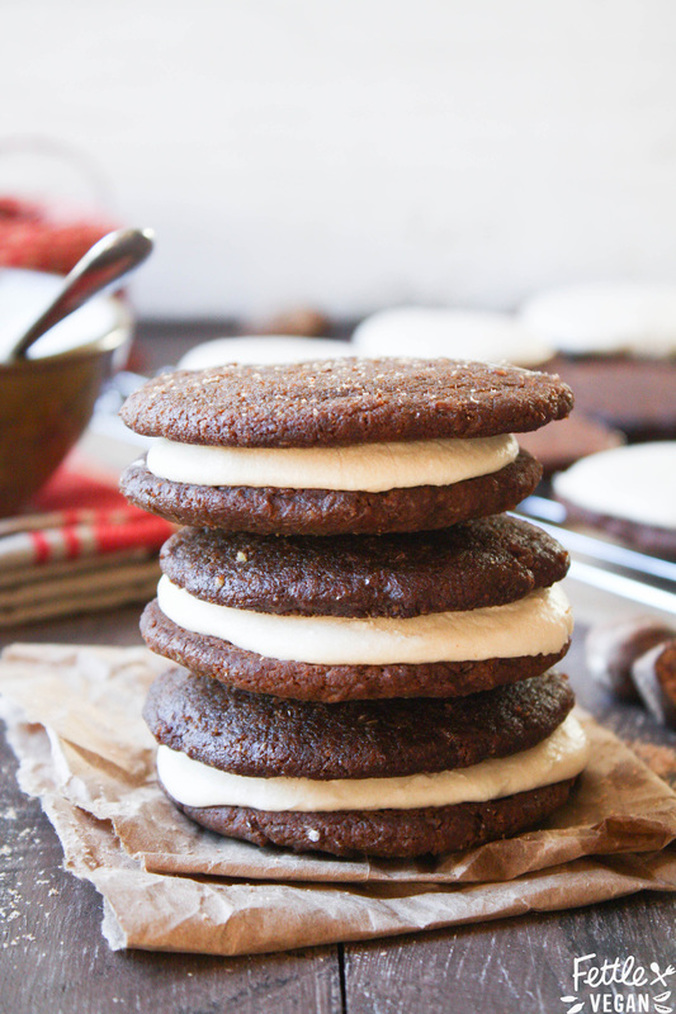
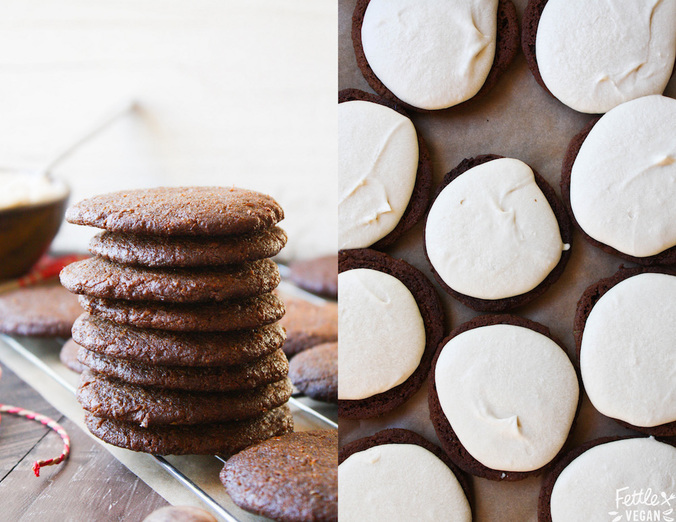
The holidays are in full-swing, which means we're baking like maniacs over here! Between the parties with friends and family, gifts for co-workers, and recipe testing for the cookbook (out Fall 2016!), our oven have been getting plenty of use and my waistline is feeling a little larger than usual. But that's okay, because there are only a few weeks left and by then we'll be so sick of cookies and baked goods we won't want anything to do with them for months. But for now, I'm all about that perfect chewy cookie. And these, my friends, are two perfectly chewy, spiced cookies sandwiching a rich buttercream frosting...and they are DAMN good! Using fresh ginger and nutmeg in these cookies really make the flavors rich and bright, and the molasses help keep 'em chewy - and adds some iron and calcium so you can pretend they're a health food. That's how that works, right? 
My favorite part of these cookies is that I like them. I mean it! For years, I have avoided ginger and molasses cookies. I never like the weird sticky-sweet flavor of them and though they tasted kind of bland or too molasses-y. But these cookies? These are mind-changing, crowd-pleasing, are packed with spicy ginger flavor and just enough sweet molasses to balance out the bite of the ginger. Wanna cut the sugar? Skip the buttercream frosting and just eat the cookies as is, they're pretty darn delicious on their own!
Picture
Picture
INGREDIENTS
Cookies:
1 1/4 cups all purpose flour
1 teaspoon baking soda
1/2 teaspoon baking powder
1/2 teaspoon salt
1/2 teaspoon cinnamon
1/4 teaspoon freshly grated nutmeg 
3/4 cup packed brown sugar
1/2 cup coconut oil, solid (OR sub vegan butter)
3 tablespoons ground flax
3 tablespoons molasses
2 tablespoons fresh ginger, grated
1 teaspoon vanilla

Buttercream filling:
2 cups powdered sugar
1/4 cup vegan butter
1 teaspoon vanilla
1-2 tablespoons unsweetened non-dairy milk

fresh nutmeg, for garnish

DIRECTIONS
Preheat oven to 350 degrees.

In a large mixing bowl combine flour, baking soda, baking powder, salt, cinnamon and nutmeg.

In a separate bowl or stand mixer cream together the brown sugar and coconut oil. Stir in the ground flax, molasses, ginger, and vanilla until completely combined. 

Pour the dry ingredients into the wet about a cup at a time, stirring continuously, until the cookie dough comes together. 

Scoop 1-in balls of cookie dough onto a lined baking sheet and bake for 10-12 minutes, until edges are firm. Move the cookies to a wire rack to cool. 

While the cookies bake and cool, prepare the buttercream frosting by beating together the powdered sugar, butter, and vanilla. Add in milk a bit at a time, until the desired frosting texture is achieved. 

Spread the buttercream onto half of the cooled cookies, and move to the fridge or freezer for 10 minutes to firm the frosting before topping it with another cookie. Once the sandwiches have been assembled, grate fresh nutmeg over the sandwiches and gobble 'em up!

NOTES
Makes 20 cookies, or 10 cookie sandwiches.

After the cookies cooled, we placed some of the frosting on top and then place them in the freezer for 10 minutes to set the frosting before placing the second cookie on top. Otherwise, the frosting tends to smoosh out the sides a bit. If you won;t be serving them immediately, I recommend keeping them in the fridge until just before serving.
Print Recipe
Picture
3 Comments

Pumpkin Chocolate Chip Cookies

10/26/2015

11 Comments


Pumpkin Chocolate Chip Cookies

I'm gonna get really real with you for a second: these are fucking delicious cookies, but they're packed with butter and sugar. Again, SERIOUSLY SCRUMPTIOUS, but not seriously healthy. Just maybe don't eat 6 per sitting? I'm not even apologizing, just a warning for the haters. I usually eat a very healthy diet and rarely sugar splurge, but I'm on my period and I wanted chocolate and sugar and these cookies are heavenly and dreamy and amazing and you will love them. Everyone will! These are 'impress your mother-in-law' cookies. These are celebrating your birthday cookies. They're follow with a glass of champagne cookies. They're decadent and rich and insanely delicious. If you're on a diet, these are not for you. If you wanna have a fall-flavored mouthgasm, then these are definitely for you. Your choice. But let's be honest, with an intro like that, don't you wanna bake up a batch? We'll do it together, share the guilt. Let's eat! 

INGREDIENTS
2 1/2 cups all purpose flour 
1 tablespoon pumpkin spice
1 teaspoon baking soda
1 teaspoon sea salt
1 cup coconut oil or vegan butter, melted
1 cup organic sugar
1/2 cup pumpkin purée 
3 tablespoons ground flax
1 teaspoon vanilla
3/4 cup chocolate chips
​
DIRECTIONS
Preheat the oven to 350 degrees.

In a medium-sized bowl, mix together flour, pumpkin spice, baking soda and sea salt. Set aside.

In a larger mixing bowl whisk melted coconut oil or butter, sugar, pumpkin purée, ground flax and vanilla. Pour wet ingredients into dry ingredients and stir until completely combined, or process in a food processor with the dough blade.
​
Fold in the chocolate chips until they're evenly distributed in the dough, then use a spoon or cookie dough scoop to place 1-inch balls of dough onto a greased or parchment lined cookie sheet. Bake for 8-10 minutes, or until cookies become golden. Let cool on a wire rack, then enjoy! Cookies last in the fridge about a week and in the freezer indefinitely. Makes about 36 2-inch cookies. 

NOTES
You can safely sub in 1/2 of the AP flour for whole wheat flour, if you prefer, but you will get a denser cookie.

Frozen cookies can be defrosted by being placed onto a plate and left on the counter for about 2 hours or microwaving for a few seconds at a time. 

You could definitely sub in applesauce or a healthier replacement for some of the oil if you wanted, but I would recommend only subbing in about half the amount to maintain the cookies texture.
print recipe
11 Comments

Pumpkin Oatmeal Cookies

10/11/2025

7 Comments


Pumpkin Oatmeal Cookies

Picture
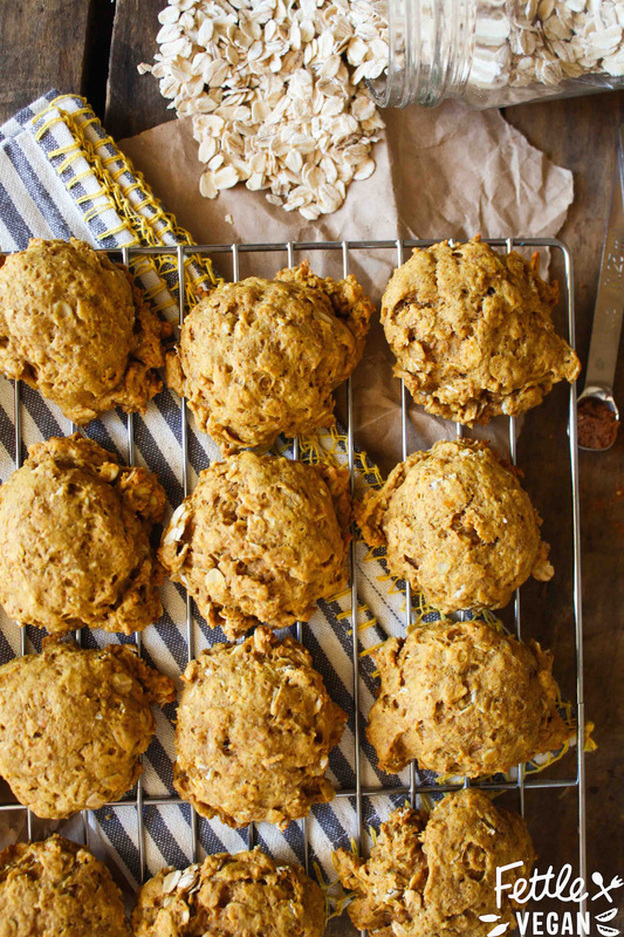
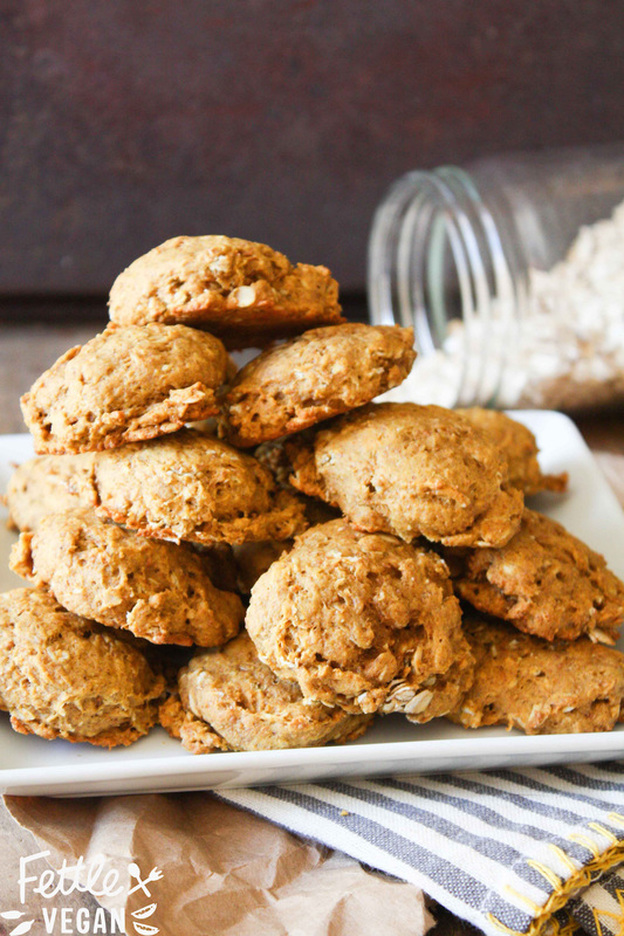
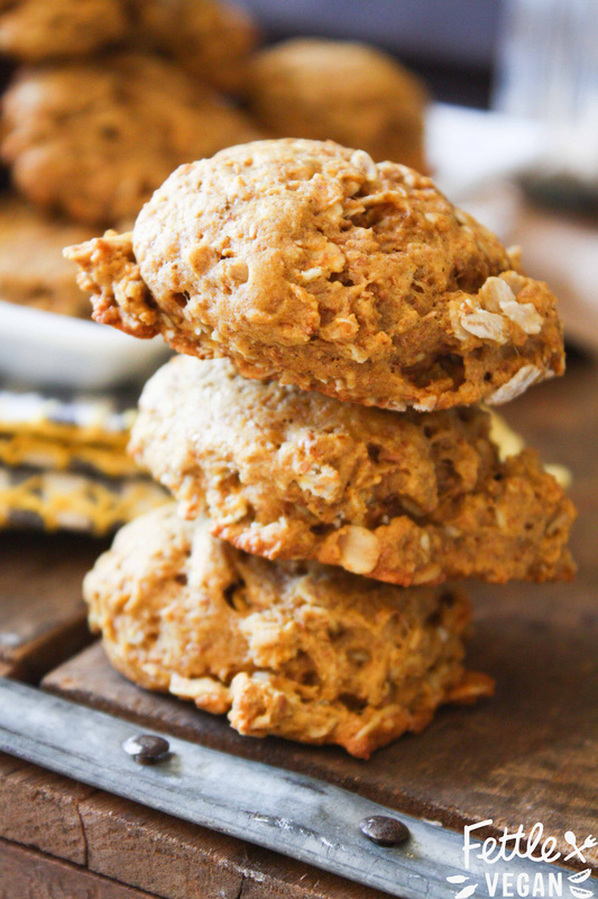
PUMPKIN SEASON HAS ARRIVED! I'm sure you've noticed, since everywhere you look there are pumpkin recipes, pumpkin-flavored foods, tiny pumpkins + gourds for sale, and of course, PSL's. I like pumpkin just as much as the next gal, but I prefer mine to be not SO sweet. Too much sweet pumpkin flavored crap before November and I'm burnt out. That's why it's become Mid-October and we're just now getting around to pumpkin-themed foods over here! These cookies are perfectly fluffy and moist, and have an almost muffin-like texture. They're soft, chewy, and packed with oats and pumpkin spice. Plus, we cut the sugar way down so you can eat like six instead of one. (That's how that works, right?) They're easy to whip up and perfect for serving at parties or just binge-eating while you watch Hocus Pocus. They're also about to become your new favorite oatmeal cookie. Let's bake! 
Picture
INGREDIENTS
1 tablespoon ground flax 
3 tablespoons warm water
3/4 cup all-purpose flour
3/4 cup whole wheat flour
2 teaspoons baking soda
1/2 teaspoon baking powder
1/2 teaspoon salt
1 teaspoon pumpkin pie spice
1/2 teaspoon ground cinnamon
1 cup pumpkin purée
1/3 cup melted coconut oil
1/4 cup sugar
1/4 cup brown sugar
3 tablespoons water
1 1/2 teaspoons vanilla
1 1/2 cups oats

DIRECTIONS
Preheat oven to 350 degrees.
In a small bowl combine ground flax and warm water and stir to combine. Set aside to gelatinize.
In a large bowl, mix together flours, baking soda, baking powder, salt and spices.
In a separate, smaller bowl, whisk together pumpkin purée, melted coconut oil, sugar, brown sugar, water and vanilla. Add gelatinized flax mixture and stir to combine. 
Pour the wet ingredients into the bowl of dry ingredients, using a wooden spoon to mix the two into a thick batter. Pour in the oats and mix together until dough forms. Use a cookie dough scoop or spoon to place 1 inch balls of dough onto a greased or parchment paper-lined cookie sheet. Bake for 10-12 minutes, until bottoms are golden and cookies are cooked through. Let cool, and enjoy! Makes about 24 cookies.

NOTES
*Instead of 3/4 cup of AP and WW flours, you could try using 1 1/2 cups of either one. I haven't tried this recipe with GF flour.

*Your flax egg will come together faster with warmer water. 

*We used a 1 in. cookie dough scoop to measure ours out and got about 24 cookies. For a smaller batch of larger cookies simply use more dough per cookie.

*Leftover cookies can be left on the counter in an airtight container about 3 days, in the fridge for about a week, and in the freezer indefinitely. 
print recipe
Picture
7 Comments
<<Previous

    tags

    All
    Acai
    Alcohol
    Almond Cream
    Almonds
    Apple
    Aquafaba
    Artichoke
    Arugula
    Avocado
    Bacon
    Baked
    Balls
    Balsamic
    Banana
    Bars
    Basil
    Bbq
    Beans
    Beets
    Berries
    Biscuits
    Blondies
    Blood Orange
    Blueberries
    Bok Choy
    Bowls
    Bread
    Breakfast
    Broccoli
    Broccoli Slaw
    Brownies
    Bruschetta
    Brussels Sprouts
    Buffalo
    Burger
    Burrito
    Buttercream
    Butternut Squash
    Cabbage
    Cacao
    Cajun
    Cajun Spice
    Cake
    Candy
    Caprese
    Cardamom
    Carob
    Carrot
    Cashew Creme
    Cashews
    Cauliflower
    CBD
    Celeriac
    Celery
    Cereal
    Champagne
    Charcoal
    Cheese
    Cheesecake
    Cheesesteak
    Cheeze
    Cherimoya
    Cherries
    Chia Pudding
    Chia Seeds
    Chicken
    Chickpeas
    Chili
    Chips
    Chocolate
    Cider
    Cilantro
    Cinnamon
    Clafoutis
    Coconut
    Coconut Milk
    Coconut Water
    Coffee Cake
    Cookie Bars
    Cookie Butter
    Cookie Cake
    Cookies
    Cooking Tips
    Crackers
    Cranberries
    Cream Cheese
    Crumble
    Cucumber
    Cupcakes
    Dates
    Dill
    Dinner
    Dip
    Donuts
    Dough
    Dressing
    Drinks
    Easter Eggs
    Falafel
    Faux Cheese
    Faux Meat
    Figs
    Flatbread
    Flax
    Fluff
    Fondant
    French Toast
    Fried
    Fries
    Frosting
    Fruit
    Fudge
    Galette
    Garam Masala
    Garlic
    Ginger
    Gingersnaps
    Glaze
    Gluten Free
    Goji Berries
    Golden Berries
    Golden Milk
    Grain Free
    Gratin
    Gravy
    Green Tea
    Grinder
    Guacamole
    Halloween
    Hazlenuts
    Hearts Of Palm
    Hemp Milk
    Hemp Seeds
    Hemp-seeds
    Holidays
    Homemade
    Honey
    Hormone-balancing
    Hot Sauce
    Hummus
    Ice-cream
    Jackfruit
    Jalapenos
    Jam
    Jicama
    Juice
    Kale
    Kettle Corn
    Kimchi
    Kung Pao
    Lasagna
    Latte
    Lavender
    Leeks
    Leftovers
    Lemon
    Lettuce Wraps
    Lime
    Low Sugar
    Macadamia Nuts
    Mango
    Maple
    Maple Syrup
    Marshmallow
    Masa Harina
    Matcha
    Mayo
    Meals
    Mediterranean
    Milkshake
    Mint
    Miso
    Molasses
    Monk Fruit Sweetener
    Muffins
    Mushrooms
    Nachos
    Noodles
    Not Vegan
    Nut Butter
    Nutmeg
    Nutritional Yeast
    Oatmeal
    Oats
    Olives
    Onions
    Orange
    Pancakes
    Panini
    Parsley
    Pasta
    Peaches
    Peanut Butter
    Pears
    Peas
    Pecan
    Pepitas
    Peppermint
    Peppers
    Persimmon
    Pesto
    Phyllo
    Pickled
    Pie
    Pilaf
    Pineapple
    Pine Nuts
    Pita
    Pizza
    Polenta
    Pomegranate
    Popcorn
    Potatoes
    Protein
    Pudding
    Pumpkin
    Queso
    Quinoa
    Radish
    Rasins
    Raspberries
    Raw
    Red Bean
    Rhubarb
    Rice
    Ricotta
    Rightrice
    Roasted
    Rolls
    Romanesco
    Rosemary
    Sage
    Salad
    Sandwich
    Sangria
    Sauce
    Savory
    Scones
    Seitan
    Sesame
    Shallot
    Shoshito Peppers
    Side Dish
    Slaw
    Sliders
    Smoky
    Smoothies
    S'mores
    Snacks
    Soba
    Soup
    Spicy
    Spinach
    Spread
    Squares
    Squash
    Sriracha
    Stevia
    Stone-fruit
    Strawberry
    Streusel
    Strudel
    Stuffed Peppers
    Stuffing
    Sugar Cookies
    Sugar Free
    Sunbutter
    Sweet Potato
    Sweets
    Tacos
    Tahini
    Tart
    Tea
    Tempeh
    Thumbprint
    Thyme
    Tigernuts
    Tofu
    Tomato
    Tomatoes
    Tortillas
    Turmeric
    Vanilla
    Veganized
    Vegetarian
    Vegg- The Vegan Egg Yolk
    Vinaigrette
    Vinegar
    Waffles
    Walnuts
    Wheat Berries
    Whiskey
    White Chocolate
    Wrap
    Yeast
    Yogurt
    Zucchini

    RSS Feed

G O O D  S A I N T

© 2019, Good Saint, All Rights Reserved.

    S T A Y  F R E S H  +  S U B S C R I B E

Subscribe
  • CLASSES
  • BLOG
    • HEALTH
    • LIFESTYLE
    • TRAVEL
  • PODCAST
  • SERVICES
  • RECIPES
    • BREAKFAST
    • APPS + SNACKS
    • MAIN DISHES
    • SALADS
    • SOUPS
    • BREADS + SCONES
    • SWEETS + TREATS
    • DIPS + SPREADS
    • DRINK UP
  • RESOURCES
    • BRAND PARTNERS
    • SHOP