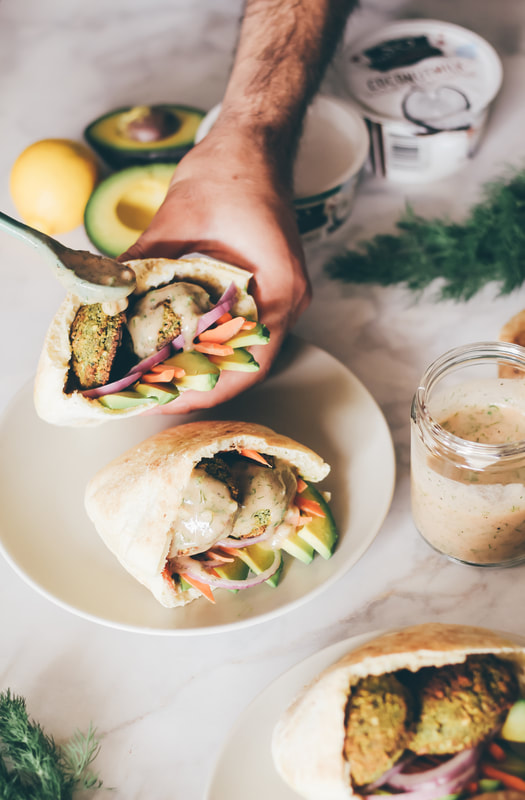
Falafel Pitas with Smoky Lemon Yogurt Sauce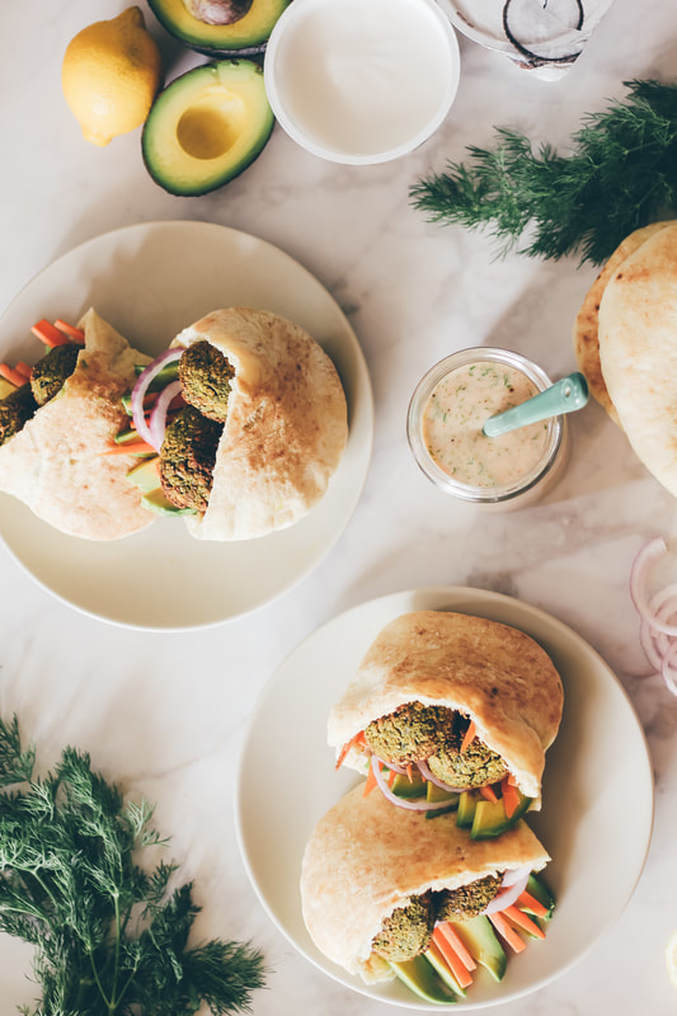 This post is sponsored by So Delicious and all opinions are my own. One of the hardest parts for most people about living a plant-based lifestyle is ditching the dairy - especially for someone like me who has always been lactose intolerant! Luckily for us, So Delicious continues to churn out impressive, better-than-the-real-thing, dairy-free alternatives to our favorite foods, making it easier and easier to say no to milk, cheese, and even yogurt. So Delicious has been in the dairy-free game for over 30 years and their products are at the top of the market for taste and accessibility. They offer all kinds of allergen-free options and different types of dairy alternatives, but one of the products I reach for over and over again is their thick, creamy coconut milk yogurt!
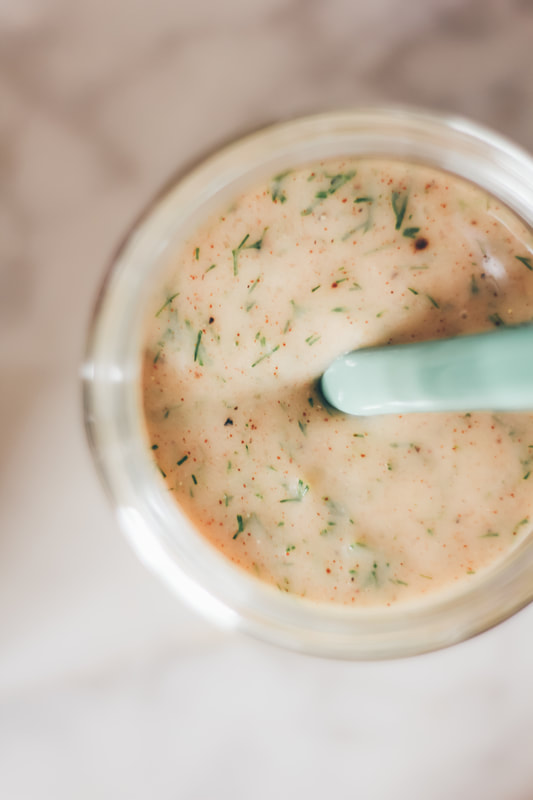
Made with organic coconuts, active cultures and non-GMO ingredients, each flavor offers just the right amount of sweetness - their unsweetened flavor contains LESS than 1 g of sugar - and a truly unsweetened yogurt can be SO hard to find! Because these yogurts are made similarly to traditional yogurts, they don’t sacrifice taste and texture - but you can feel a lot better about eating them! 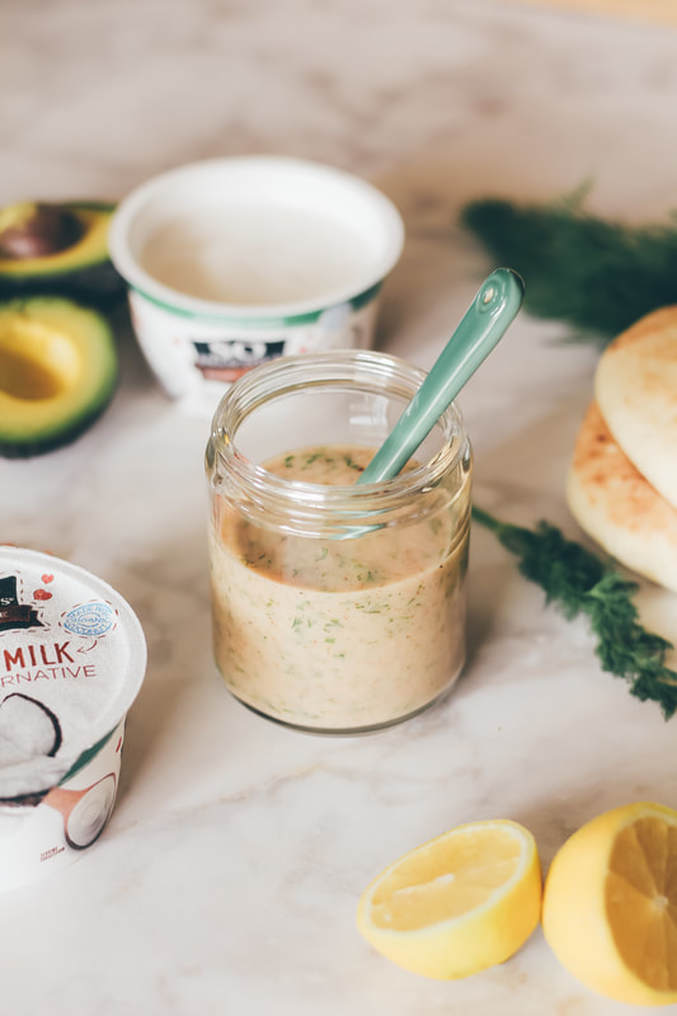 I like eating the yogurts on their own (obvs - YUM!), but also love them in smoothies, parfaits, and even use the unsweetened flavor a base for savory sauces. I think yogurt tends to get a bad rap for being too much of a breakfast food, and I think that’s silly. Yogurt is great any time of the day! You’ve just gotta get creative. Which is exactly why we’re sharing one of my favorite easy yogurt sauce recipes today - so you can start loving and using yogurt and reaping the probiotic (and delicious) benefits, too. We love toasting and stuffing warm pita full of healthy ingredients for an easy lunch around here, and we almost always have avocados and hummus on hand. We bought some falafel, added our favorite homemade yogurt sauce and our on-the-go pitas went from lunchbox worthy to Instagram worthy real quick. We shot the recipe + are sharing it so you can enjoy some seriously tangy, savory, smoky yogurt sauce stuffed with fresh herbs that’ll leave you craving more and finding new ways to eat more of it. As a dressing for roasted vegetables, anyone? Scroll down for our recipe! 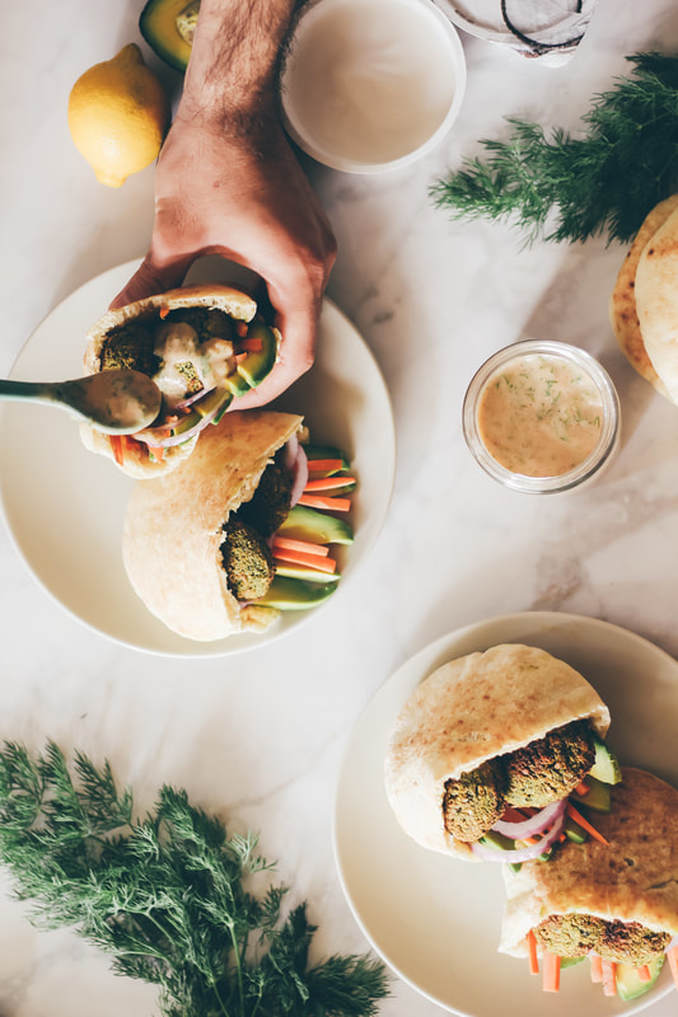
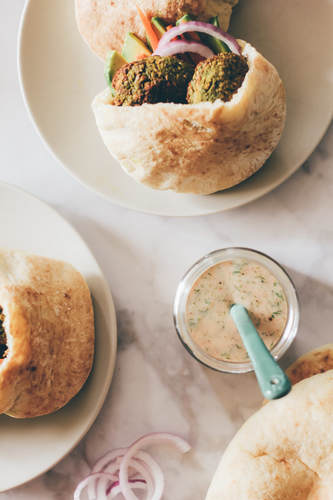
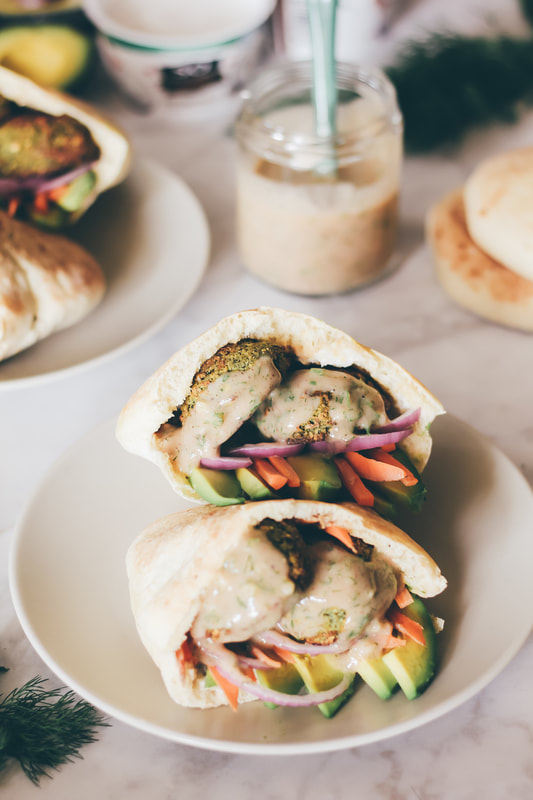
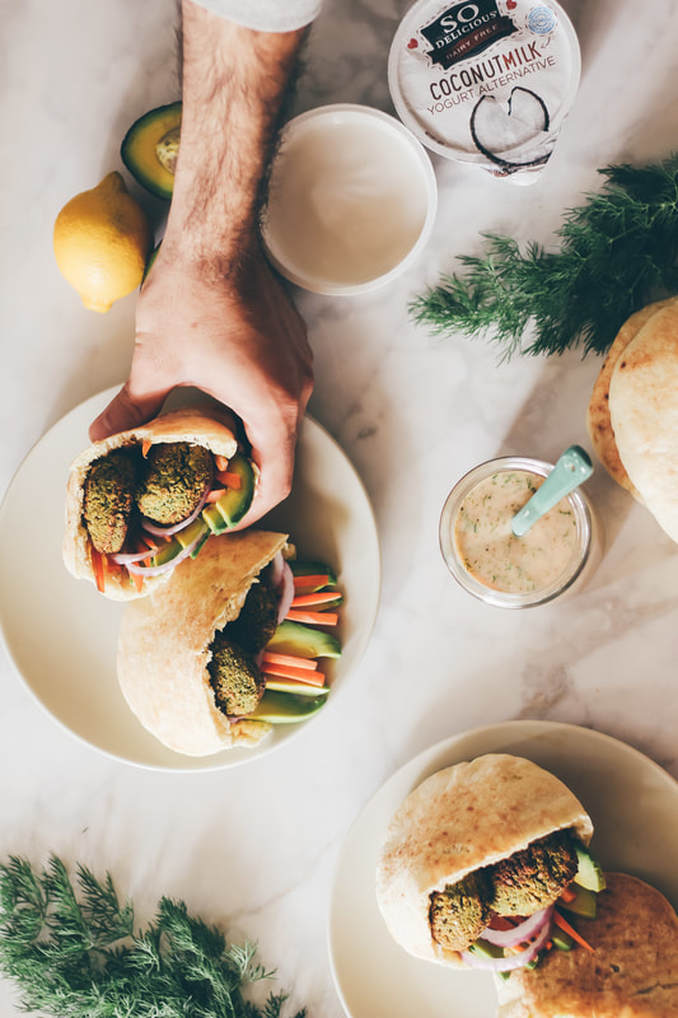 FALAFEL PITAS WITH SMOKY LEMON YOGURT SAUCE INGREDIENTS 1 (5.3 oz) container So Delicious Unsweetened Dairy Free Yogurt Alternative 1 tablespoon lemon juice 1 tablespoon chopped fresh dill 1 clove fresh garlic, minced 1/2 teaspoon smoked paprika 1/4-1/2 teaspoon (to taste preference) each salt + pepper DIRECTIONS In a small dish combine all the ingredients and stir until combined. Serve over falafel, roasted veggies, as a dip with pita or warm bread, or as a dip for french fries! Leftovers save well in the fridge for up to a week too. We simply stuffed our favorite pitas with pre-made falafel and some chopped veggies, then drizzled the sauce all over. Yum! Serves 2-4. 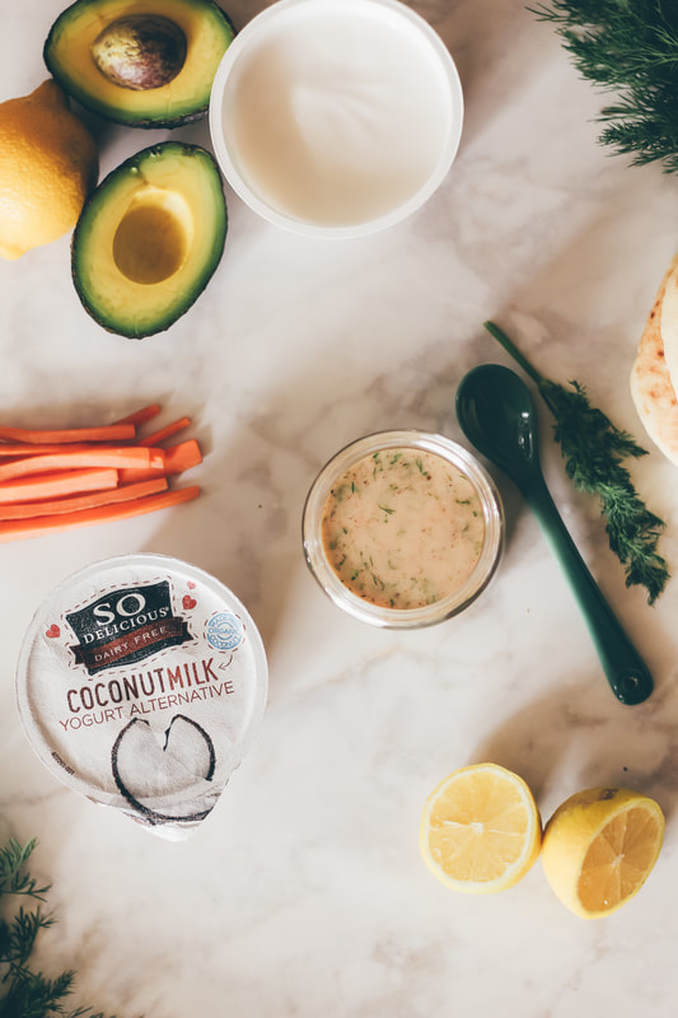 Find So Delicious Dairy Free Yogurt Alternatives at stores nationwide - head to their website to find a store locator and sign up to receive exclusive product coupons! And, if you love their new Almondmilk with Cashew as much as I do, you need to check out this creamy morning matcha recipe, too. Enjoy, friends! 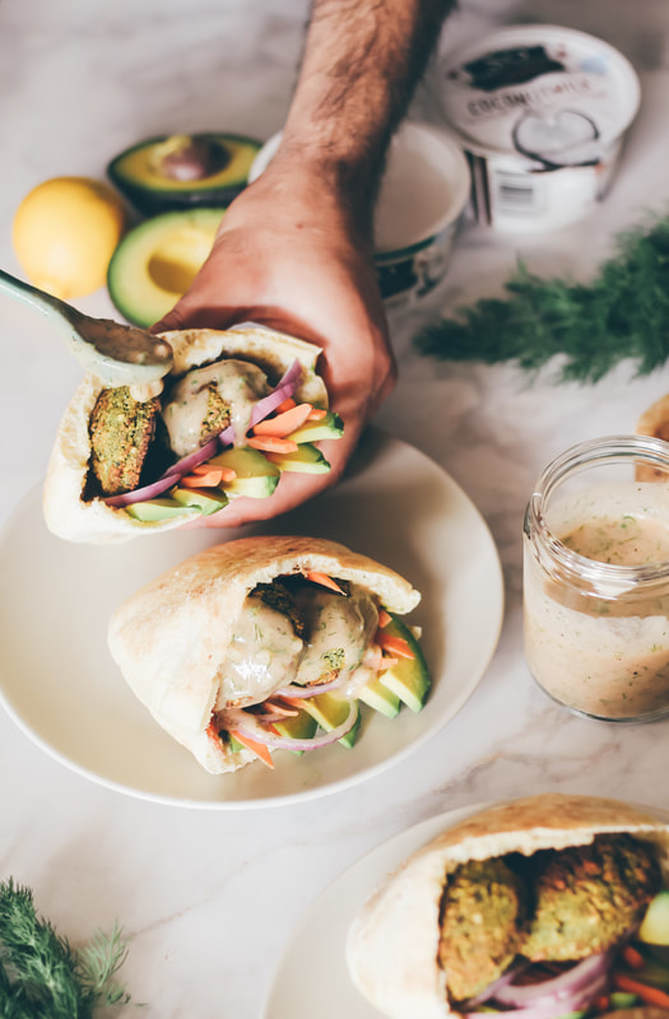
0 Comments
Creamy Baked Kale + Artichoke DipWe’re big fans of Sir Kensington’s all natural, non-GMO mustards and ketchups in our household - their spicy ketchup is my FAVORITE on french fries and breakfast potatoes! Last month at Expo West we were lucky enough to get a taste of a brand new product they’ve been experimenting with, and it sort of blew our minds. The secret product had everyone at the show raving and had us going back for samples each day we attended. The secret product? A totally vegan, aquafaba based mayonnaise called Fabanaise! It is literally the BEST vegan - dare I say ANY? - mayo I have ever had. It is light, it is creamy…it is perfect. It comes in two flavors - original and it’s spicier sister, chipotle. And unlike most gloppy eggless mayos, this one has a great, tangy flavor that compliments everything from potato salad to a loaded veggie sandwich. My favorite way to enjoy it is spread thinly over a slice of plain sourdough bead, topped in thinly sliced cucumbers and ground black pepper. It’s almost TOO good, and is the perfect light snack! Anyway, I’m obsessed with it. They generously hooked us up with a few jars after the show and we’ve been slathering it on everything we can since. In case you’ve been living under a proverbial vegan rock for the last year, aquafaba is a viscous, egg-like binder made of the liquid from cooked beans such as chickpeas, navy or black beans. We’ve used it as an egg replacer in our recipes for Cranberry Orange Clafoutis and Easy Chickpeasy Breakfast Burritos with great success. It is super light and foamy when whipped and takes on whatever flavors it is mixed with, making it the perfect egg-free substitution in this mayo. Fabanaise will be coming out in stores soon and we cannot wait for you guys to get your hands on it! To celebrate, and because this is our new miracle product in the kitchen, we wanted to share this delicious dish we whipped up using the original flavor - it’s too good NOT to share! Our Baked Kale + Artichoke Dip is creamy, cheezy, and totally decadent. The mayo in the recipe gives the dip the perfect amount of smooth, rich texture but it still light enough to enjoy with thick, crusty bread. It whips up in about an hour and is a total crowd pleaser. Perfect for parties or a movie night-in, you’re going to be blown away by this dip. So, let’s get cooking! Creamy Baked Kale + Artichoke Dip INGREDIENTS 1 1/2 cups (about 1 - 15 oz. can) cooked white beans 1 cup Sir Kensington's Fabanaise Vegan Mayo 1/4 cup nutritional yeast 1/4 cup roasted red peppers 2 tablespoons lemon juice 1 teaspoon fresh basil, chopped 1 teaspoon salt 1 teaspoon cayenne pepper 1 tablespoon oil or vegan butter 4 cloves garlic, minced 1 medium yellow onion, finely chopped 1 heaping cup artichoke hearts, roughly chopped 3 packed cups de-stemmed kale, leaves roughly chopped 1/2 cup panko breadcrumbs (use GF if you prefer) DIRECTIONS Preheat oven to 375º. In a food processor, combine the white beans, Fabanaise, nutritional yeast, roasted red peppers, lemon juice, fresh basil, salt and cayenne pepper until smooth. Scoop the mixture out into a bowl and set aside. In a medium cast iron pan, melt the oil or butter over medium heat. Sauté garlic and onions together 3-5 minutes, until softened. Pour in the chopped artichokes and stir to combine. Pour in the kale about a cup at a time, stirring to wilt. When the kale has wilted, shut off the heat and pour in the blended white bean mixture. Stir to combine completely. Pour the panko bread crumbs over the top of the mixture, then cover the pan with aluminum foil. Bake for 15 minutes. Remove the foil and bake for another 10-15 minutes, until the mixture is bubbly and hot. Let cool 5 minutes, then serve with bread, chips or sliced vegetables! You can find Sir Kensington’s products, including their ALL NEW vegan mayo, at a natural retailer near you or at your nearest Whole Foods. And you can use this link for a $1 discount! For more info and recipe ideas, head to SirKensingtons.com or find them on Facebook, Twitter and Instagram at @SirKensingtons. *Product provided by Sir Kensingtons. Thoughts, opinions, recipe and photos are my own.*
Party-Sized Jackfruit Nachos!
Whether you're into football or not, you probably know that the Super Bowl is this weekend. I've never been much of a football fan myself, but I'm always down for a party centered around eating! We're going to have some friends over the day before for a little get together and these nachos will absolutely be making an appearance. They're deceptively simple to make, big enough to share with a crowd, and so good your guests might not even believe you made them yourself! We start by smothering toasted tortilla chips with our spicy seasoned jackfruit, then pour on our homemade queso cheese and all the toppings you can imagine - plus we added guac!
This is a dish you won't want to share - it is THAT good! Which is also why we supersized it, so maybe it'd make it juuuuust a little easier to share? No matter what team you're rooting for, you'll be glad you made these nachos to munch on...and so will your guests!
INGREDIENTS
1 large bag of tortilla chips 1- 15 ounce can black beans, drained 2- 20 ounce cans of jackfruit (in brine), prepared and cooked to our Jack Asada recipe instructions 1-2 cups homemade queso cheese (or sub whatever dairy-free cheese you prefer), warmed 1/2 cup red onion, chopped small 1/2 cup black olives, sliced 1/4 cup fresh cilantro, chopped the BEST guacamole, for serving limes, for garnish DIRECTIONS Preheat the oven to 375 degrees. Line a baking sheet with parchment paper (or aluminum foil). Spread the tortilla chips evenly over the baking sheet and scatter the drained black beans over the top. Layer the seasoned, cooked jackfruit evenly over the top, then place the baking sheet in the oven for 10 minutes heat the chips, beans and jackfruit together. When finished, pull the baking sheet from the oven and immediately top with the queso cheese, chopped red onion, black olives, cilantro and guacamole. Serve immediately! NOTES Save time by preparing the jackfruit and queso a day ahead, then just reheat as necessary! If you use a different cheese (daiya, for example) we would recommend adding the cheese layer BEFORE baking so it melts while in the oven. Add whatever other toppings you like! Some suggestions? Cabbage, salsa, hot sauce, green onions, jalapeños, tomatoes! 
The BEST Guacamole
If you're into football you're probably getting ready for the big game next weekend! The Super Bowl, at least for my family, was always more about the food than the football. The focus was always on creating delicious, snack-able dishes to enjoy with our guests, but always included a TON of fried food. Ick.
Now that we're adults and can watch the game at our own place, we're more interested in making delicious dips and snacks that don't make us feel crummy or guilty about eating wayyyy too much. Because I inevitably will eat way too much. Luckily, we're gearing up some super delicious, healthier-for-you, gameday recipes to share with you all week...starting with our recipe for the BEST guacamole! This guacamole is our absolute favorite. We''ve been making this version for a few years, and it's pretty similar to Chipotle's style, if you're familiar. There are a million different ways to make this green gold, but we like ours full of fresh lime juice, red onion and cilantro. We serve it up at every taco night, take it to parties, and munch it on gameday, too! It's going to become your NEW favorite guacamole. Let's get dippin'!
INGREDIENTS
4 medium, ripe avocados 3 tablespoons red onion, finely chopped 1-2 tablespoons fresh cilantro, chopped 1-2 tablespoons freshly squeezed lime juice 3/4 teaspoon salt 1 small jalapéno pepper, seeded and finely diced OR 1/4 - 1/2 teaspoon cayenne pepper (optional, for spiciness) DIRECTIONS Slice the avocados in half lengthwise, tossing the seed and scooping the green innards into a large mixing bowl. Mash the avocado with a fork or potato masher until it reaches your desired consistency; my recommendation is to keep it a little chunky. Pour in the red onion, cilantro, lime juice, salt and peppers, if using. Stir to combine. Serve immediately with chips or as an accompaniment to tacos or fajitas! Serves about 4. NOTES DON'T go squeezing (and ruining for everyone else) all the avocados at the store! If it has a little give and the stem doesn't just fall off, you're good. If it is overly softened or the stem falls off easily, revealing a dark or black area underneath, skip it. The best way I've found to save leftover guac without it turning too brown is to cover it with plastic wrap, but push the plastic wrap against the guac in the bowl, so no air can stay trapped between the two. Alternately, you can try one of the million tricks found on the internet. Again though, the plastic wrap trick works pretty well. So does scraping off the brown layer and eating the perfectly good guac underneath.
Easy Miso Gravy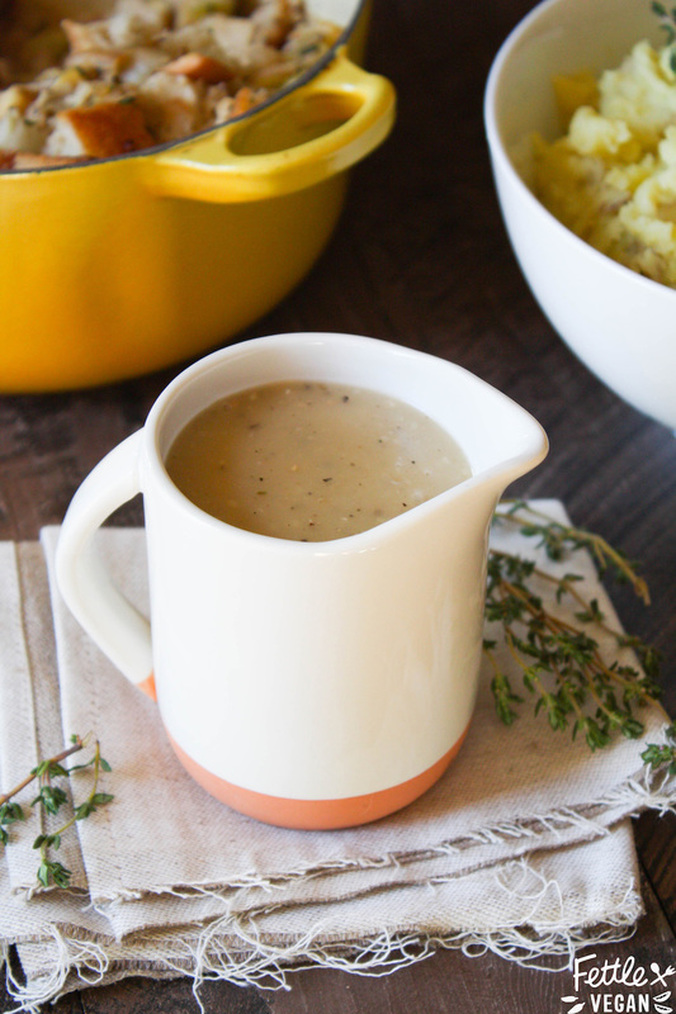
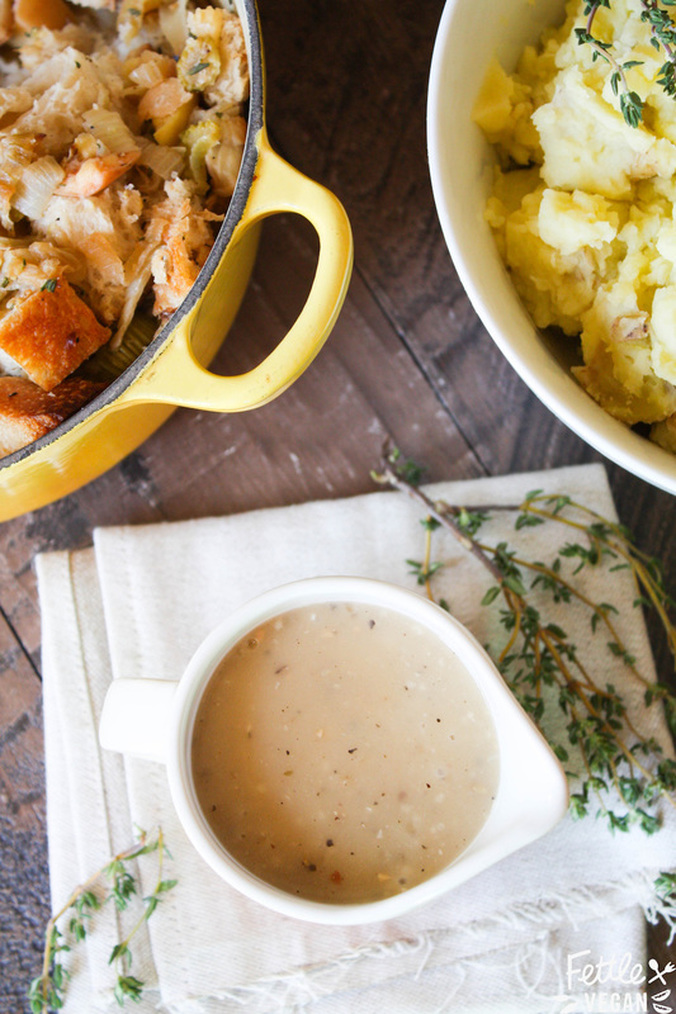
You know what's better than gravy that's ready in just over 5 minutes? ALMOST NOTHING. Gravy is like my lifeblood - I could eat it slathered on just about any vegetable and I think it makes everything taste better. A good gravy, that is. I'm not much for store-bought packets, so whenever I want gravy I follow pretty much this exact recipe and whip up a batch to dump on everything. And since I've made it so many times, I've gotten pretty darn good at it. So good at it, I figured it was about time I shared it with you guys. And just in time for Thanksgiving! Kitchen time on Tofurkey Day is valuable, so who wants to waste it slaving over an hour long gravy recipe? NOT YOU! And sure as heck not me. So grab a pan, whip up a batch of this easy, flavorful gravy, and go smother some mashed potatoes in it. Or share it with our friends at the dinner table, if that's your jive turkey. Let's eat!
Looking for more Thanksgiving sides? Check out our Celeriac Mashed Potatoes, Lemon Miso Cranberry Sauce, and Homemade Tofurky! 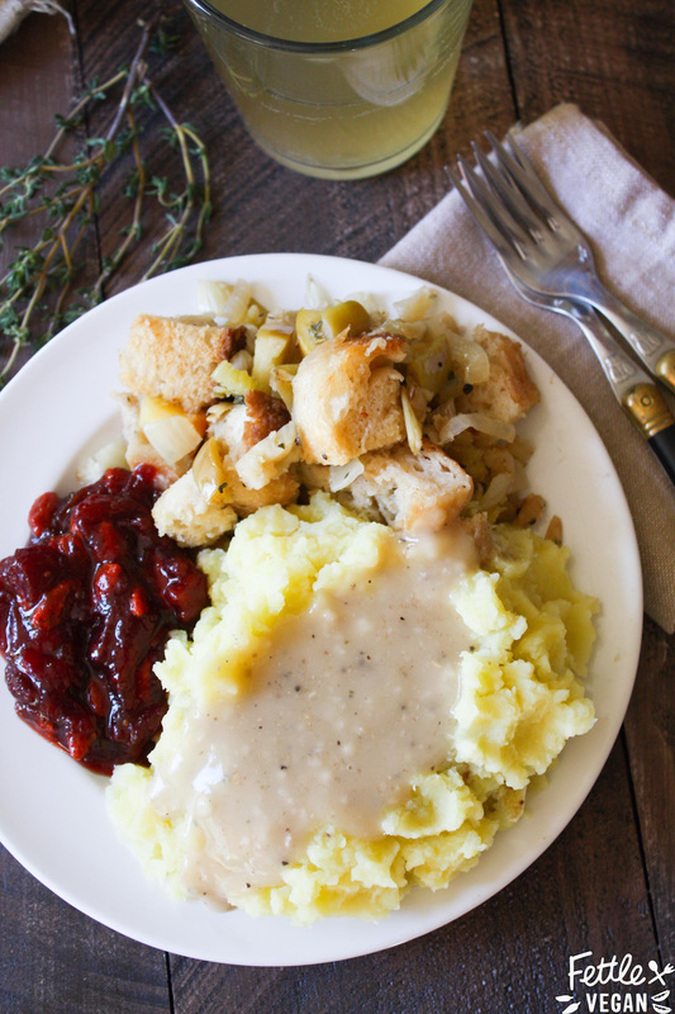
INGREDIENTS
2 tablespoons vegan butter 1/4 cup flour (AP or WW) 2 cups vegetable broth 1 teaspoon miso paste 1/4 teaspoon onion powder 1/4 teaspoon ground pepper DIRECTIONS In a small cast iron pan (or sauce pan, but we like the flavor and the way the butter browns a bit more in cast iron) melt the butter over medium heat. Once melted, stir in the flour. The mixture will be chunky. Stir and let brown for 1-2 minutes, then pour in vegetable broth, miso paste, onion powder and pepper. Whisk vigorously until completely combined. Continue to cook over medium heat, stirring occasionally for 3-4 minutes, until the mixture is bubbling and thickening. Turn the heat to low and simmer a few more minutes, until your desired gravy thickness is achieved. Serve immediately! NOTES Makes about 2 cups. If you don't have flour/ want to keep it GF, you can substitute cornstarch. Start with an equal amount and use more to thicken as needed. Leftovers can be refrigerated up to a week in an airtight container.
Parsley Pesto
Here in Southern California, the growing season starts earlier than most places. Thanks to our high temps and sunny days, our garden started growing back in March and hasn't stopped since. In other words, our parsley plant is bigger than most peoples large dog. We have SO MUCH parsely- we're overrun! And there's only so much garnishing you can do with parsley before you're sick of it. A better way to use up mass amounts of fresh, fragrant parsley? This simple Parsley Pesto recipe! It whips up quickly and taste great spread on everything! I'm loving pairing it with sweet cherry tomatoes on crackers and crusty bread and mixing it into pasta dishes like this Caprese Pasta Salad. I was hesitant when I started messing around with this stuff- what if I didn't like it as much as my traditional Hemp Seed Basil Pesto? What if it just didn't taste right? Well, SURPRISE! It tastes AMAZING! Adding the green onions and extra garlic give it a ton of flavor and take away from the bitterness of having too much parsley, and the nuts keep it smooth and mellow. It's green gold! And it saves well in the fridge for up to a week, so you can enjoy fresh, flavorful pesto all week long. Lets eat!
INGREDIENTS:
3 packed cups fresh parsley, stems removed 1 cup almonds or cashews 1/2 cup olive oil 1/2 cup green onion, chopped 3 tablespoons lemon juice 4 cloves garlic 1/2 teaspoon salt 1/2 teaspoon pepper DIRECTIONS: In a high speed blender (we used our Vitamix) or a food processor, combine all ingredients. Blend until smooth, or until your desired texture- you can leave it chunkier if you like! [If you don't have a great blender to work with, try soaking your nuts in warm water for at least an hour before blending them, it'll help break them down much more easily.] Spread it on everything from bread and crackers to pizza dough and rice cakes. Saves well in an airtight container for about a week, or until pesto begins to brown. Enjoy!
Wild Mushroom Bruschetta
I love bruschetta. Before experimenting with this recipe, I'd only had tomato-based versions, but I always loved them. Bruschetta is a great appetizer, party dish, or snack all by itself. And served on a warm, crunchy-crusted baguette? Ooh, man. Plus, its so easy to make! A little chop-chop-drizzle and you're good to go.
Well, I'm here to share with you the BETTER THAN TOMATO version, something I hardly believed possible. It takes a little longer to prepare than the original, but I promise- it's worth it. Mushrooms, onion, and garlic flavors are highlighted by a little white wine and black truffle sea salt. This is the kind of recipe I would make to impress Alex's mom (hi, jen!) and I think it would work. Scoop onto some crusty bread or crackers or serve over pasta for a seriously satisfying savory snack. Yep, that just happened. Enough chit chat, let's eat!
Instructions:
4 cloves of garlic diced, 1 halved and set aside 1/4 cup olive oil 10 ounces mixed wild mushrooms (or your favorite grocery store type. We used oyster & crimini.) 2 tablespoons vegan butter 1 medium onion, finely chopped 1/3 cup white wine 1/8 teaspoon each salt & pepper 1/8-1/4 teaspoon black truffle sea salt (optional-but worth it!) 1 crusty baguette, sliced (use a gluten-free baguette or skip this ingredient to keep it GF) parsley, for sprinkling Directions: Toast the baguette slices on a baking sheet under the broiler, then rub each side with the sliced garlic halves and drizzle with a bit of olive oil. Keep warm in a low heat oven. Wipe any dirt off the mushrooms, and slice them if necessary. If they're small, go ahead and leave 'em whole. Heat half of the butter (1 tbs) in a skillet, then add the mushrooms and cook over medium heat, stirring frequently for 3-4 minutes or until soft. Remove from heat and place pan in the warm oven alongside the sliced baguette to keep warm. Heat the second tablespoon of butter in a separate skillet, adding the onion and garlic, and cook over medium heat for 3-4 minutes, or until soft. Add the wine and stir well, letting the mixture bubble for 2-3 minutes, until reduced & thickened. Add the mushrooms to the onion & wine mixture and stir until heated. The sauce should be thick enough to glaze the mushrooms. Shut off the heat, and pull the bread out of the oven. Pile the brushetta on top of the baguette slices, sprinkle with chopped parsley and a drizzle of olive oil. Serve immediately, and enjoy! *Leftover brushetta can be refrigerated in a sealed container and reheated as needed.
Hemp Seed Basil Pesto
Before we get started today, I wanted to announce the WINNER of our Rawsome Vegan Baking cookbook giveaway! And the lucky winner of their very own copy is...Veggie Loops! (Assuming thats your real name...hehe.) I've emailed you and look forward to sending your your copy of Emily's raw-mazing book! Thanks to everyone that entered, and to Emily for letting us be a part of her book tour. We love ya, Em!
Having a jar of pesto in the fridge is pretty much the same as having a pile of expensive jewelry in the closet- its mealtime gold. Throw it on a pizza, in pasta, or as a sandwich spread and you're halfway to solving the weeknight dinner conundrum! Plus, it whips up in a flash and lasts a few weeks in the fridge, so you can make several meals out just one batch. Alex loves this recipe and uses it every time he makes pasta, adding some chopped tomatoes and vegan mozzarella to make his own capresé salad. I'm a sucker for just putting it on bread with veggies and having a panini for lunch, but either way- its a crowd pleaser. Plus remember that annoying, "Where do you get your protein from?" question we discussed last time? Well, hemp seeds are a complete protein, meaning they contain all of the essential amino acids and are a great source of protein, magnesium, iron & fiber for vegans . They're one of the greatest superfoods you can find! And they're easy to sneak into healthy recipes. The hemp seeds add a slightly nutty flavor that contrasts the slight bitterness of the basil in the recipe, and makes for a super healthy sandwich slather.
This recipe is also super easy to manipulate to your own liking; hate hemp seeds? Try replacing them with flax seeds or your soaked nut of choice. Out of lemon juice? Try lime juice or apple cider vinegar. Only have black truffle sea salt on hand? Throw it in! The experimentation is all up to you. That being said, the original is pretty goddamned good. So, lets eat!
Ingredients:
3 cups fresh basil 1/2 cup hemp seeds (shell-free) 3 tablespoons lemon juice 3 garlic cloves 1/2 tablespoon black pepper 1/2 teaspoon salt 1/2 cup olive or grapeseed oil Directions: Rinse basil and separate leaves from stems. Toss the stems in the compost and the leaves in a food processor or high speed blender. Add the hemp seeds, lemon juice, garlic, salt & pepper. Blend until smooth. Add oil and blend again until evenly incorporated. Store in a sealed container in the fridge for up to 2 weeks. Makes about 2 cups. Enjoy!
Picante Black Bean Hummus
You know what is the most frustrating thing about being a vegan? When people ask "Well, where do you get your protein?" Like we vegans can only get it from meat. Ick. Protein can be found in all kinds of foods (not just meat- but since you're here you already knew that), and recent studies have shown that we really don't need nearly as much protein as most of us get, anyway. But that's a lame answer.
Next time, just shove this recipe in their face and watch 'em drool. The black beans in this hummus provide you with 2.6 grams of protein for every tablespoon of them you consume. And I don't know about you, but for me that's like maybe two dips. Nom nom. Plus, this hummus is damn good. As you may (or may not) know, 'PICANTE' is Spanish for 'SPICY', and this dip has a little kick. The cilantro is fresh with hints of citrus, balanced out by the smoky flavor of the paprika and highlighted by the fresh lime juice. It comes together quickly and is sure to be a crowd pleaser. Need a bigger batch? This recipe is easily doubled or quadrupled. So, lets eat!
Ingredients:
1- 15 ounce can OR about 2 cups cooked black beans, drained 1 tablespoon olive oil 1 tablespoon tahini 1/4 cup fresh cilantro 1 clove garlic 2 tablespoons freshly squeezed lime juice 1/2 teaspoon salt 1/2 teaspoon cumin 1/2 teaspoon cayenne 1/4 teaspoon smoked paprika Directions: After draining beans, combine then in a high-speed blender or food processor with all other ingredients. Blend on high about 30 seconds, until all the ingredients are combined. Serve with a dash of smoked paprika and a sprinkle of green onions, or all on its own with chips, veggies, or on pita bread. Saves well, covered, up to a week in the fridge. Enjoy!
Crispy Cauliflower Nuggets
Exciting news! (I mean, beside the fact that you're about to make your own deliciously crunchy cauliflower nuggets.) I got the job I've been so hoping to hear back from at the non-profit, and I'm so excited about it! So excited, in fact, that I demanded we celebrate by making nuggets and fries for dinner. Alex happily obliged. Now the nuggets might be gone but the excitement is STILL HERE! I feel like this move is to a position that is much more closely aligned with the work I'd like to spend the rest of my life doing, and again, I'm PUMPED! So, go me. Enough of that though...how 'bout those nuggets?
Crispy, perfectly golden, fried cauliflower nuggets will change the future of nuggets as we know it. Alex claimed they were better than any chicken nugget he had ever had (duh!), and loved the slight crunch and the fact that he didn't feel like crap after eating them. I love all things fried (in moderation, of course), and was happy to have something to slather in ketchup- my guilty pleasure. Now I know frying is bad and we shouldn't do it, but if we're gonna splurge here, at least you're frying up a vegetable, right? And 2014 has been named the Year of the Cauliflower- so let's do this thing!
INGREDIENTS
2 cups cauliflower florets (about 1/2 head of cauliflower) 1/4 cup high heat oil, for frying (coconut, grapeseed, and avocado oils are all great high-heat options) Flax Wash: 1/4 cup ground flax 1/4 cup almond meal 3/4 cup water Flour Mix: 1 1/2 cups bread crumbs (gluten-free or regular) 1/4 cup almond meal 1 teaspoon organic sugar 2 tablespoons nutritional yeast 1/2 teaspoon garlic salt 1/2 teaspoon sea salt 1/4 teaspoon cracked black pepper 1/4 teaspoon cayenne pepper DIRECTIONS In a small bowl, make flax wash by mixing ground flax, almond meal, and water. Set aside. Next, mix together in a medium-sized mixing bowl the bread crumbs, almond meal, sugar, nutritional yeast, garlic salt, salt, pepper, and cayenne. This mixture will become your breading. Heat 1/4 cup oil n a large frying pan over medium heat. Dip cauliflower florets into the flax wash mixture, coating lightly but evenly. Next, dip cauliflower into the flour mixture and coat completely. Drop coated cauliflower nuggets into the heated oil, and cook until golden and crunchy, then flip and repeat until the nugget is evenly fried, about 2-3 minutes on each side. Using tongs or a spatula, move cooked nuggets to a paper towel lined plate to absorb excess oil, let cool several minutes, then enjoy with your favorite dipping sauce! Best if eaten immediately. Uneaten nuggets can be reheated in the oven at 375 degrees for 10 minutes, or until warm. Enjoy! **Not much for fried foods? You can try baking these at 400 degrees for about 20-30 minutes, flipping halfway through. They won't be nearly as crunchy and crispy, but probably much healthier. Do what you gotta do!
|
tags
All
|
 RSS Feed