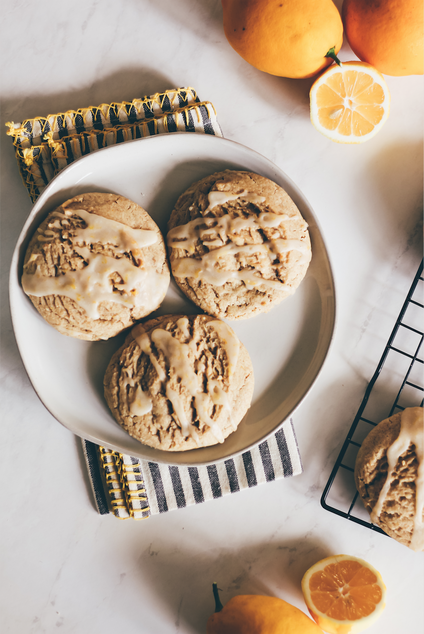
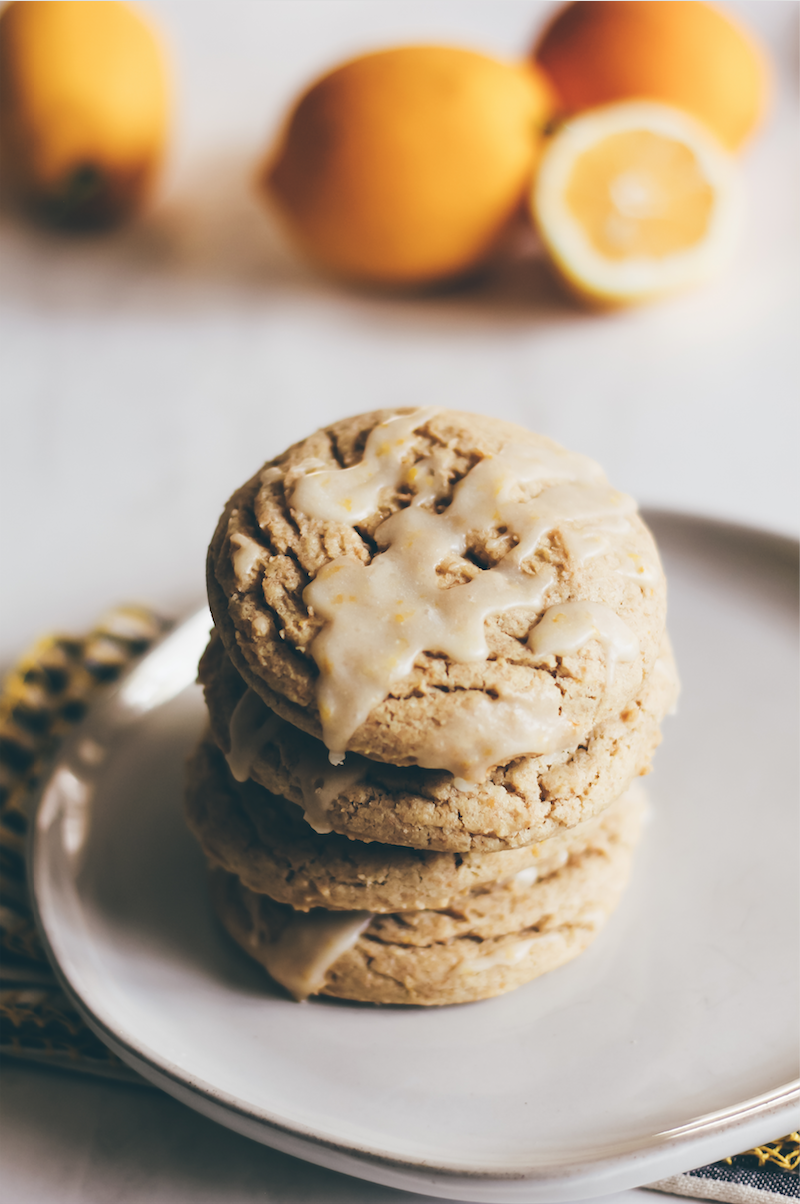
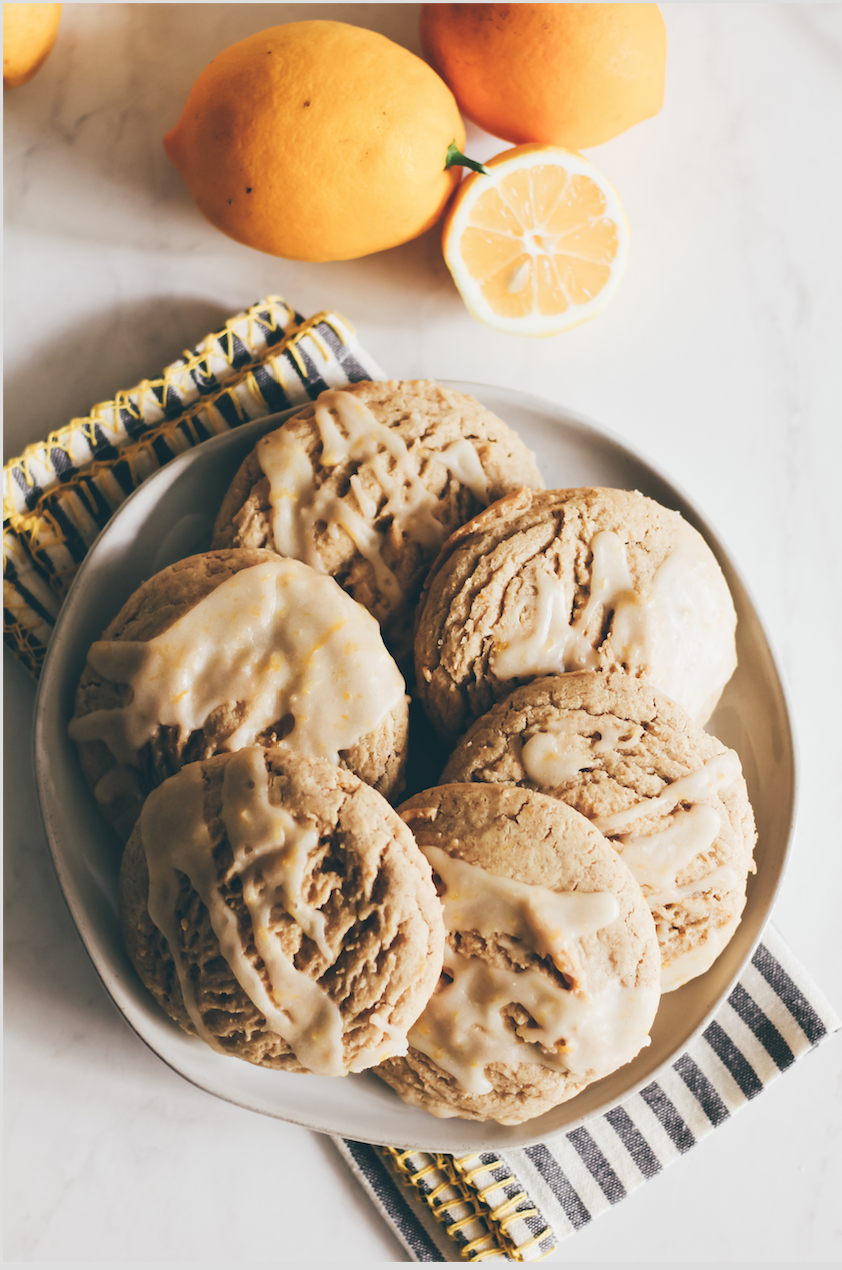
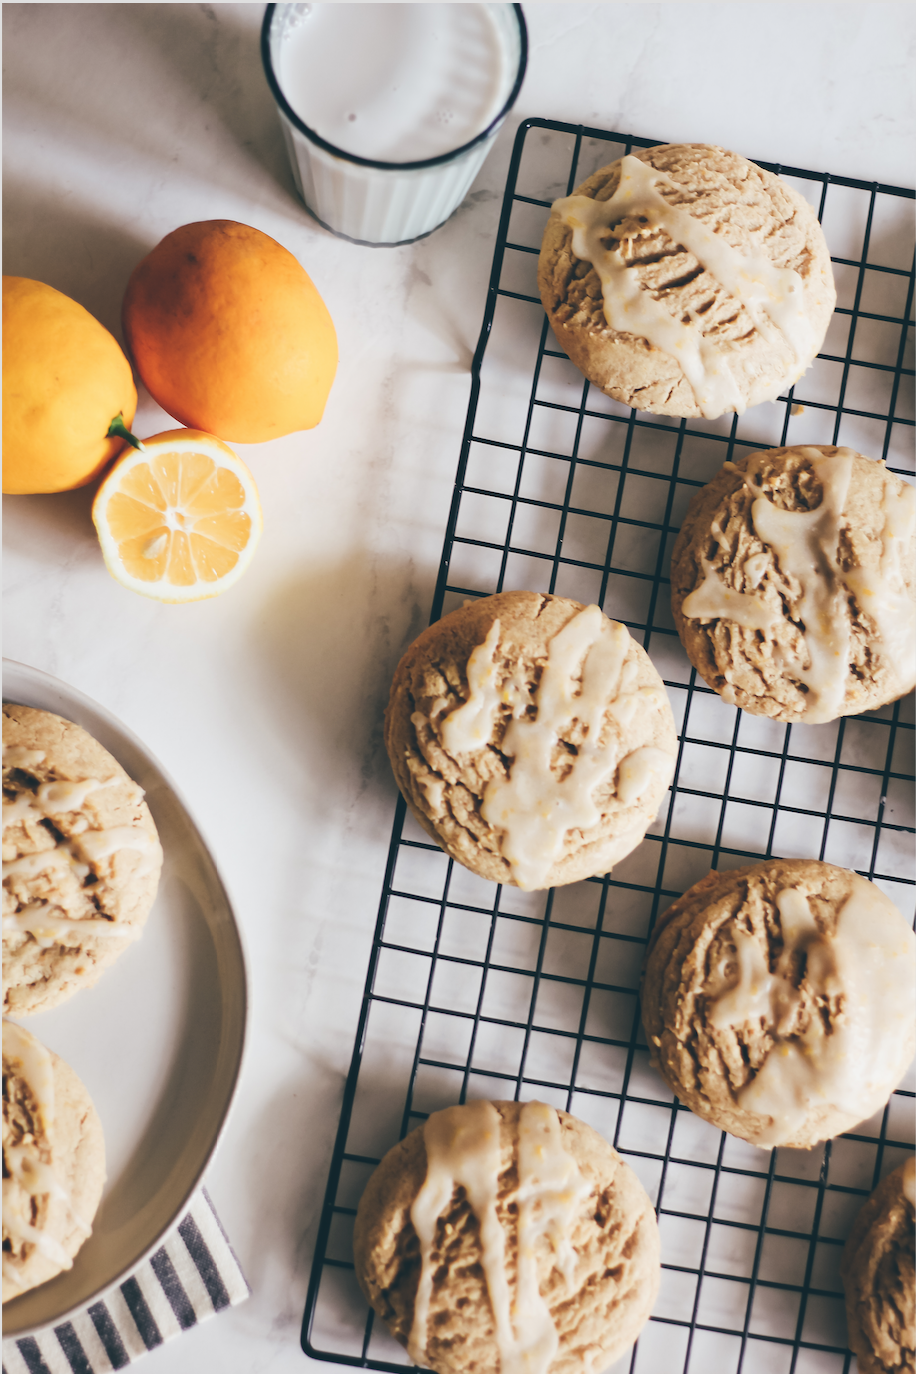
EASIEST LEMON SUGAR COOKIES (NO FRIDGE REQUIRED!)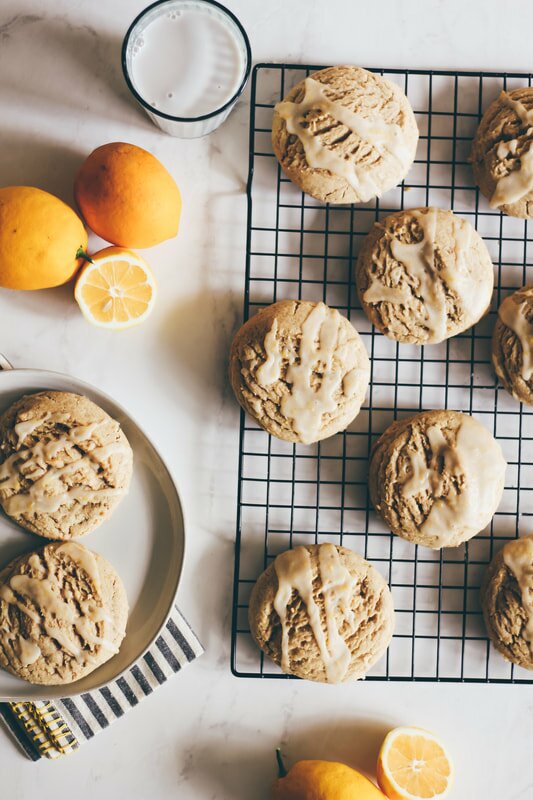
I was never much of a lemon cookie fas as a kid - but who was? With chocolate chip, peanut butter, and the pervasive M&M sprinkled cookies of the 90s, it really was no competition. But as an adult, I've grown a real appreciation for the flavor of fresh meyer lemon! Its a little sweeter and more full-bodied than the flavor of a traditional lemon, but I'd even take a regular old lemon here. Because lemon is GOOD. these are like the cookies you WISH you'd been eating in the 90s! These cookies are:
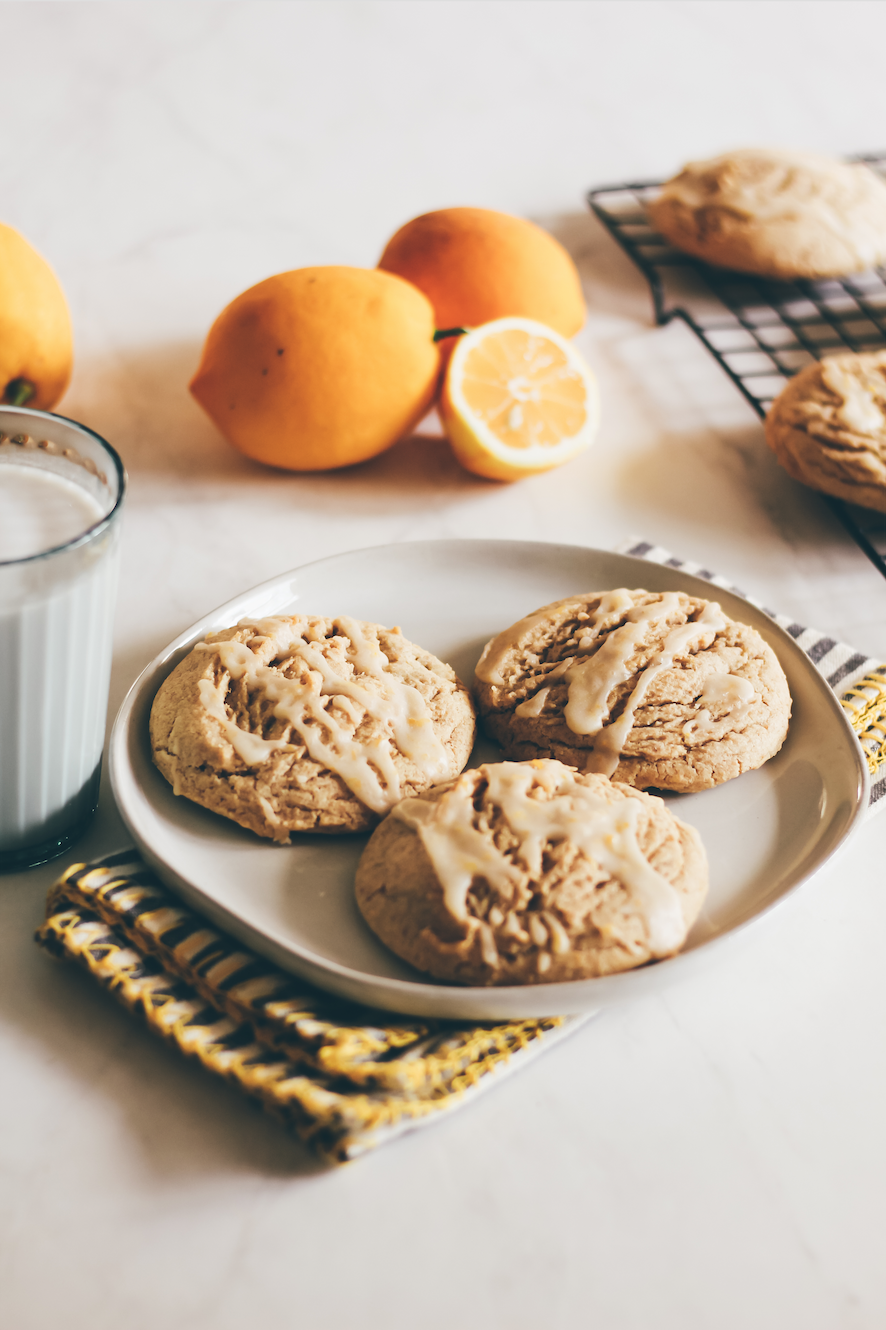
fluffy chewy soft perfectly sweetened drizzled in fresh lemon glaze and SUPER lemon-y! You're going to love them as much as I do. Especially when you realize that they are like the sugar cookies younger, cooler, hipper cousin. They whip up in minutes and require NO REFRIGERATION. Yup, you read that right! Most sugar cookie recipes call for at least 1-3 hours in the fridge both batter making to ensure a proper shape and texture as the cookies cook; otherwise, they'd melt all over the pan into a sheet-pan sized cookies that's not actually appetizing at all. So here's the thing - these babies, they go from prep bowl straight to sheet pan straight to oven - it literally couldn't get any easier than that. So let's put on over our day sweatpants and get to baking - you'll have fresh, warm cookies in an hour!
INGREDIENTS:
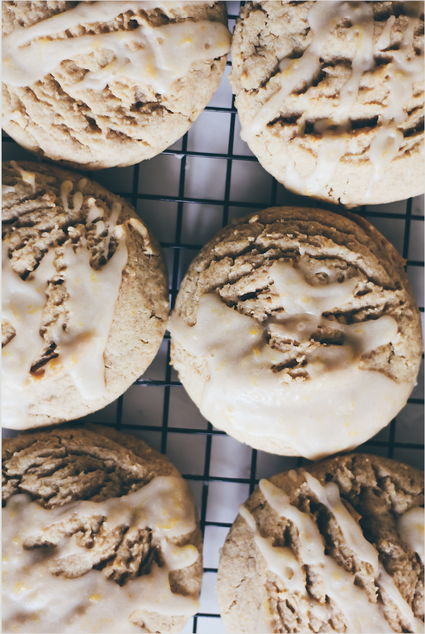
COOKIES 1 and 3/4 cups flour 1/2 teaspoon baking soda 1/2 teaspoon salt 1 tablespoon lemon zest (about 1 medium lemon) 1/2 cup unsalted ghee (or butter, room temp) 1 cup granulated sugar 1 egg 1 teaspoon vanilla 2 tablespoons lemon juice GLAZE 2 cups powdered sugar 2 tablespoons lemon zest 1/3 cup lemon juice DIRECTIONS: Preheat oven to 350 degrees. Prepare a baking sheet with a non-stick spray or parchment paper, and set aside. In a medium bowl whisk the flour, baking soda, salt. In a separate large mixing bowl beat the butter for a few seconds, add the sugar and mix until light and fluffy. Add in the egg, vanilla, lemon zest and lemon juice. Beat or whisk until fully combined. Add in the dry ingredients, and continue mixing until a fluffy batter forms. Drop cookie dough by the spoonful, or using a 1-2 inch cookie scoop, onto the prepared cookie sheet. We used a two inch scoop for big, bakery-sized cookies! Bake until light golden on edges, approximately 12- 14 minutes. Remove from oven, let cool on the cookie sheet about 5 minutes and then remove to continue cooling on a wire rack. While cooling, prepare the glaze by whisking the powdered sugar, lemon juice, and lemon zest together until well combined. Drizzle over the top of the cookies. Allow to sit and dry, glaze will harden after about 10-20 minutes. Leftovers can be stored in airtight container at room temperature for 3-4 days. Enjoy! 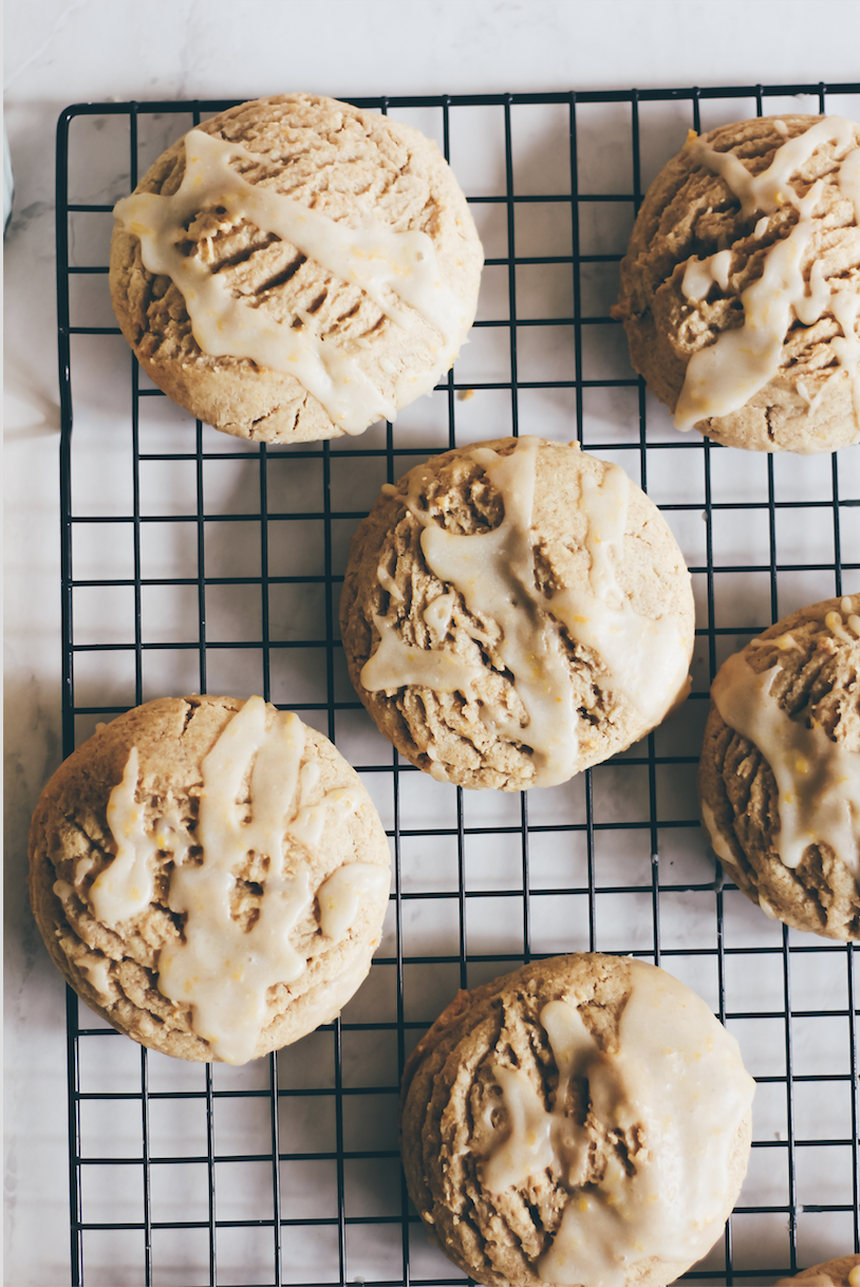
0 Comments
Lemon Sugar Cookie Cake
My favorite way to celebrate any holiday is with FOOD, and this 4th of July I wanted to crack into some of that summer nostalgia from when I was a kid with one of my favorite summertime treats! I finally called Mom to get the recipe she always used to make for us when we were kids; She would always make a giant cookie layer base, slather it in frosting and cover it in fresh fruit. Usually a summertime snack for it's portability and use of that fresh, seasonal fruit I’ve been craving this Lemon Sugar Cookie Cake ever since I made it a few weeks ago! I simplified and slightly health-ified her original recipe and got something I think is even better. Sorry Mom!
I shared the simplified recipe on IG when I made it, but wanted to share an easier-to-read, printable version for all my regular readers here, too. It really is the perfect, easy, crowd pleasing summer dessert! Would love to hear your thoughts if you try it - and my Mama would, too! Scroll on down for the recipe and some notes before you bake, too. Enjoy, babes!
INGREDIENTS:
COOKIE BASE RECIPE 2 1/4 cups AP flour 1/2 teaspoon baking soda 1/2 teaspoon baking powder 1/2 teaspoon salt 3/4 cup (non-dairy) butter 1/2 cup sugar 1/2 cup monk fruit sweetener* 1 egg (vegan if you prefer) 1 teaspoon vanilla 2 tablespoons lemon juice Zest of 1 lemon Strawberries, blueberries + raspberries for topping CREAM CHEESE FROSTING 8 oz. plain, non-dairy cream cheese 2-3 tablespoons lemon juice Zest of half a lemon 1 teaspoon of vanilla extract Maple syrup and/or monkfruit sweetener to taste DIRECTIONS: Preheat your oven to 375 degrees and line a round pan (or baking sheet) with parchment paper. In a large sized bowl combine the flour, baking soda, baking powder, and salt together. In a smaller, separate bowl combine the sugars, egg, vanilla, lemon juice + lemon zest. Add the wet ingredients to the dry, mixing completely. Once the dough has formed, roll it evenly into a round shape on the pan, about 1/4-1/2 inch thick. Bake for 10 minutes or until edges begin to brown, then let cool completely. While the cookie layer cools, mix the frosting and chop up the fruit. Once cool, frost the cookie like a pizza and top with fruit. Enjoy babes! NOTES: You can use real butter, eggs and milk here if you prefer. I adapted this recipe from my Mom's original which did in fact use the original versions with great success. Leftovers last up to 2 days on the counter and up to 4 days in the fridge, but - like most things in life - is best enjoyed fresh. *You can also sub the monk fruit sweetener for stevia or more real sugar. Falafel Pitas with Smoky Lemon Yogurt Sauce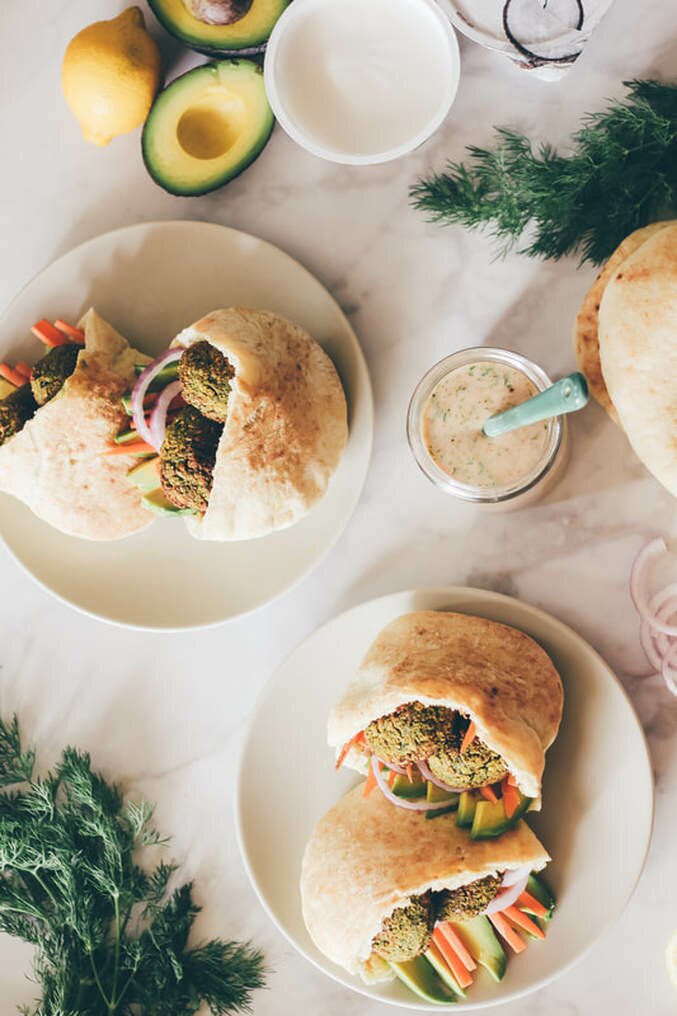
This post is sponsored by So Delicious and all opinions are my own.
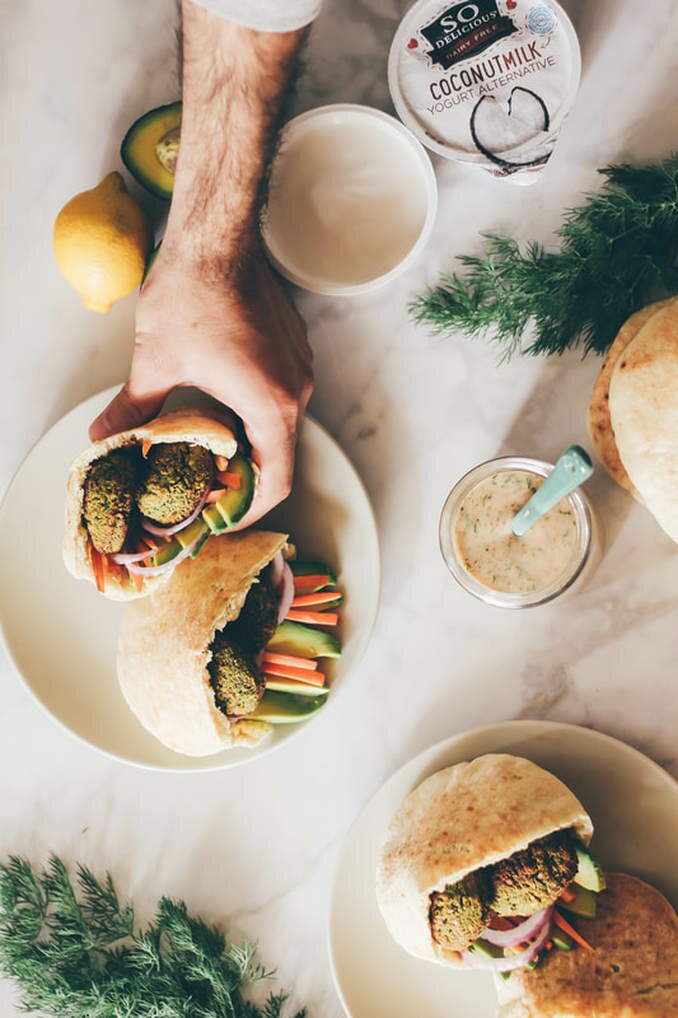
One of the hardest parts for most people about living a plant-based lifestyle is ditching the dairy - especially for someone like me who has always been lactose intolerant! Luckily for us, So Delicious continues to churn out impressive, better-than-the-real-thing, dairy-free alternatives to our favorite foods, making it easier and easier to say no to milk, cheese, and even yogurt. So Delicious has been in the dairy-free game for over 30 years and their products are at the top of the market for taste and accessibility. They offer all kinds of allergen-free options and different types of dairy alternatives, but one of the products I reach for over and over again is their thick, creamy coconut milk yogurt!
Made with organic coconuts, active cultures and non-GMO ingredients, each flavor offers just the right amount of sweetness - their unsweetened flavor contains LESS than 1 g of sugar - and a truly unsweetened yogurt can be SO hard to find! Because these yogurts are made similarly to traditional yogurts, they don’t sacrifice taste and texture - but you can feel a lot better about eating them!
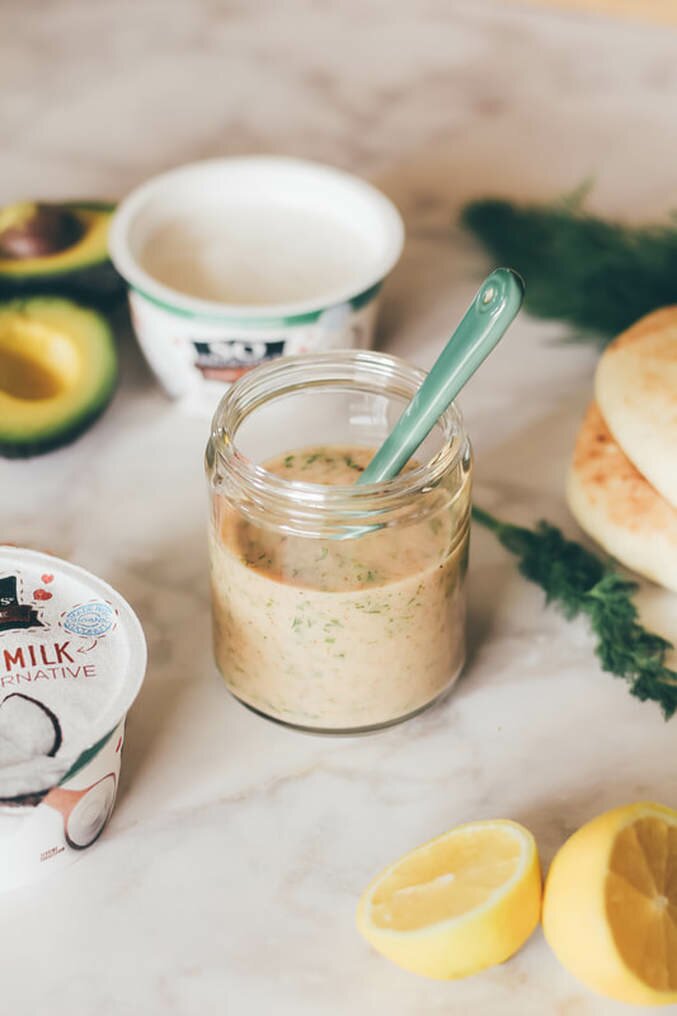
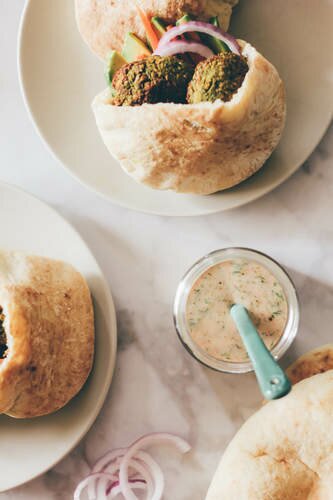
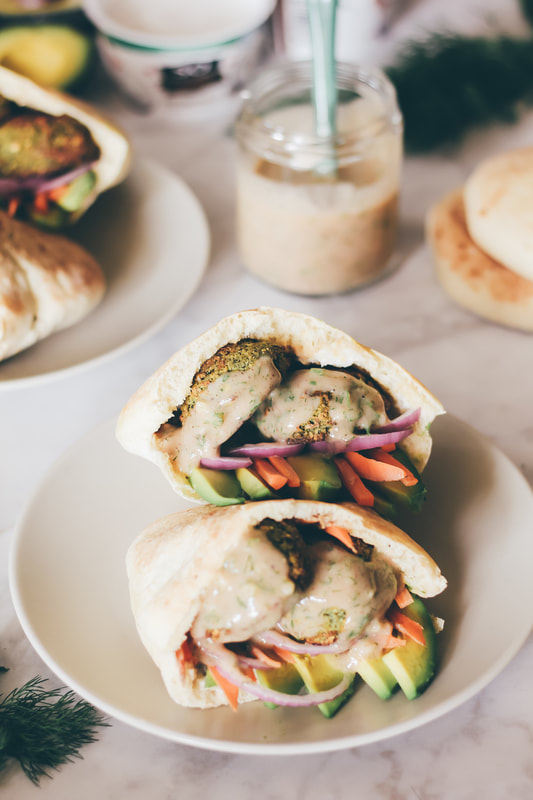
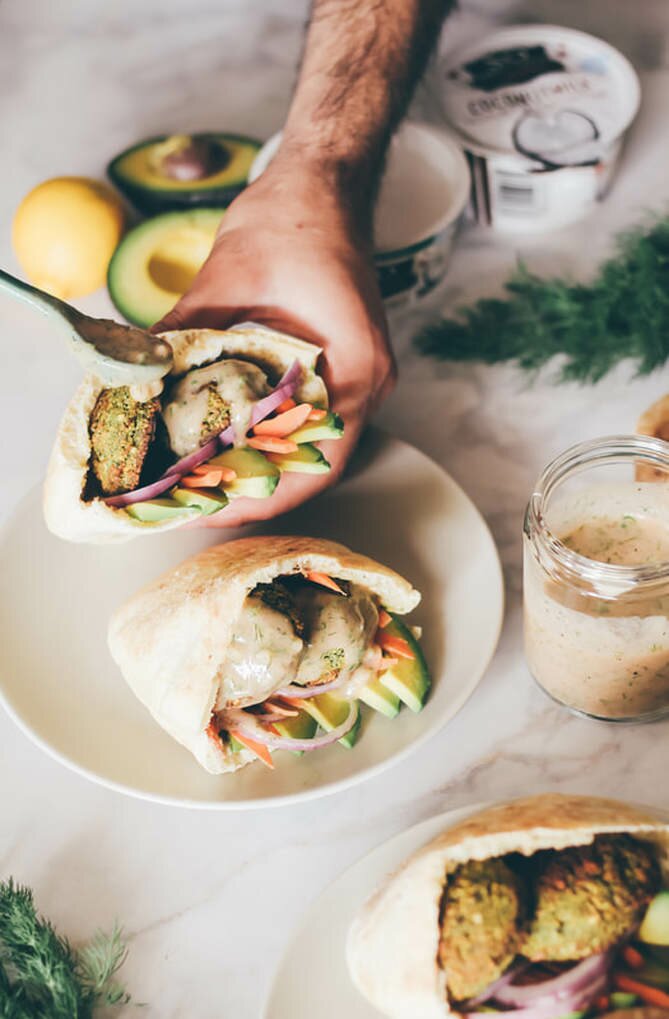
I like eating the yogurts on their own (obvs - YUM!), but also love them in smoothies, parfaits, and even use the unsweetened flavor a base for savory sauces. I think yogurt tends to get a bad rap for being too much of a breakfast food, and I think that’s silly. Yogurt is great any time of the day! You’ve just gotta get creative. Which is exactly why we’re sharing one of my favorite easy yogurt sauce recipes today - so you can start loving and using yogurt and reaping the probiotic (and delicious) benefits, too. We love toasting and stuffing warm pita full of healthy ingredients for an easy lunch around here, and we almost always have avocados and hummus on hand. We bought some falafel, added our favorite homemade yogurt sauce and our on-the-go pitas went from lunchbox worthy to Instagram worthy real quick.
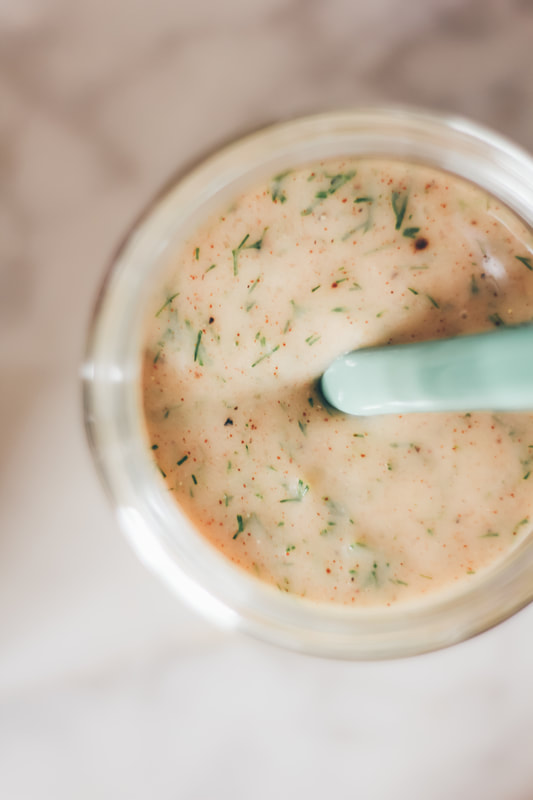
We shot the recipe + are sharing it so you can enjoy some seriously tangy, savory, smoky yogurt sauce stuffed with fresh herbs that’ll leave you craving more and finding new ways to eat more of it. As a dressing for roasted vegetables, anyone? Scroll down for our recipe! 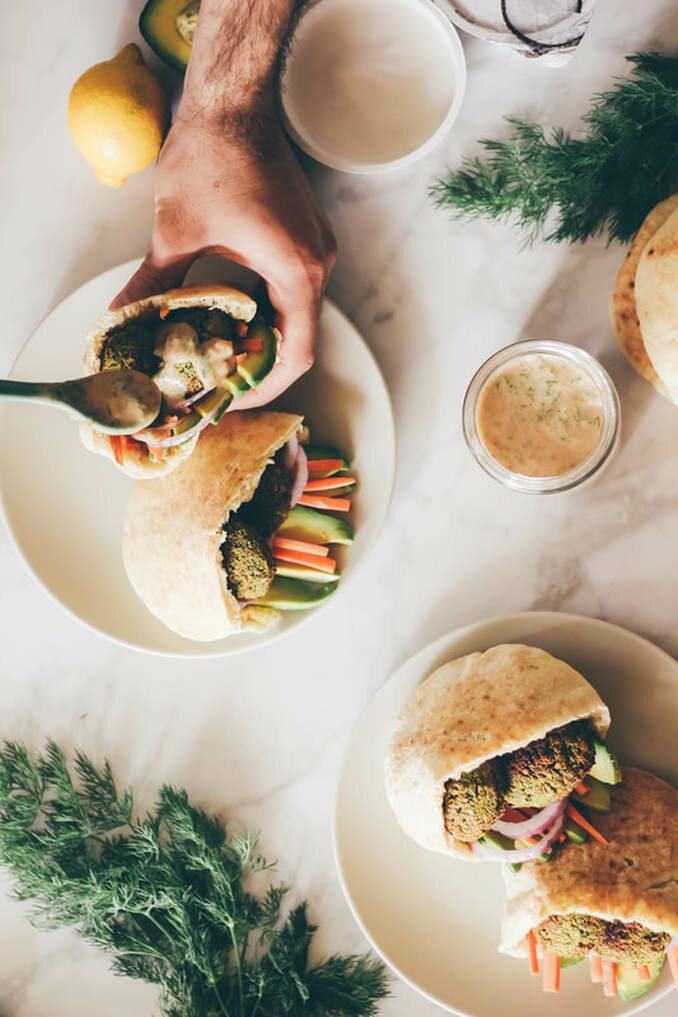
FALAFEL PITAS WITH SMOKY LEMON YOGURT SAUCE
INGREDIENTS 1 (5.3 oz) container So Delicious Unsweetened Dairy Free Yogurt Alternative 1 tablespoon lemon juice 1 tablespoon chopped fresh dill 1 clove fresh garlic, minced 1/2 teaspoon smoked paprika 1/4-1/2 teaspoon (to taste preference) each salt + pepper DIRECTIONS In a small dish combine all the ingredients and stir until combined. Serve over falafel, roasted veggies, as a dip with pita or warm bread, or as a dip for french fries! Leftovers save well in the fridge for up to a week too. We simply stuffed our favorite pitas with pre-made falafel and some chopped veggies, then drizzled the sauce all over. Yum! Serves 2-4. 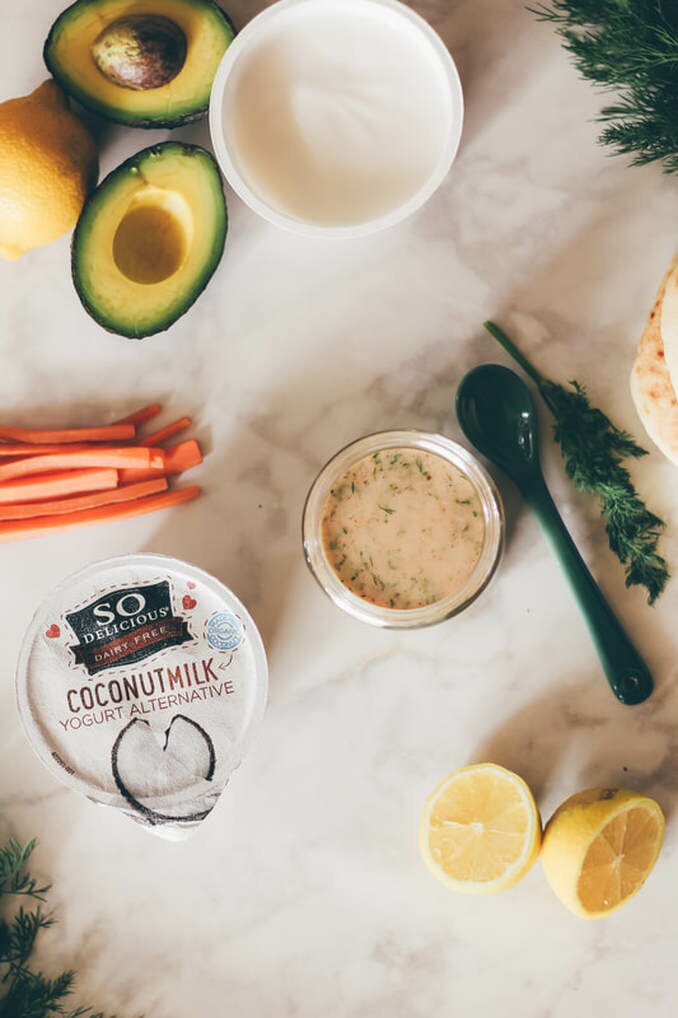
Find So Delicious Dairy Free Yogurt Alternatives at stores nationwide - head to their website to find a store locator and sign up to receive exclusive product coupons! And, if you love their new Almondmilk with Cashew as much as I do, you need to check out this creamy morning matcha recipe, too. Enjoy, friends!
Buffalo Jackfruit Grinders + BEETxBEET Giveaway!
I love the vegan clothing and awareness company BEETxBEET and that they stand up for our animal friends, but I love owner, activist and girl boss Jacky Wasserman even more. We've been friends for a few years now after meeting at a vegan Oktoberfest and interviewing her about her company back where she first started. She works her ass off saving animals and making rad clothing, which has expanded from a few humble t-shirts to hats, notebooks and sometimes even customized cup cozies! She's had some great new, clever shirts come out lately so we decided to team up and create a recipe based on each of her most popular styles - and pair them each with a giveaway of the t-shirt itself! We made some great meals we think you guys are going to love - and then got to eat them ALL. Haha, but only to make sure they tasted perfectly before we shared them. Promise. (Ahh, the life of a food blogger. It's rarely glamorous, but it is full of taste-tests!)
Today we're rocking Jackie's clever, 'It's not you, it's MEAT' shirt. It is available in Men's + Women's styles, and is the softest cotton tee almost EVER. We paired it with a Buffalo Jackfruit Sandwich because it is the perfect sandwich for a protein-head - and it totally MEAT-free! This sandwich is spicy, tangy, crunchy, filling and fresh - you'll be craving another one for weeks afterward! You can get the recipe by scrolling down a bit. To enter the giveaway to WIN your very own 'It's not you, it's MEAT' tee, scroll all the way down to the bottom of the page and fill out the widget. We'll let the widget randomly choose one winner and we'll email that person directly for size information + gender preference. GOOD LUCK!
INGREDIENTS
1 teaspoon coconut oil 2 - 20 oz. cans of jackfruit (use plain or brined, not in syrup) 1/2 cup hot sauce (we used Frank's Red Hot) 3 cups broccoli slaw (store bought OR just shredded broccoli, carrots + red cabbage) 1 tablespoon olive oil 1 tablespoon lemon juice pinch of salt 4 demi baguettes or ciabatta rolls vegan mayo, for spreading DIRECTIONS Heat the coconut oil in a frying pan over medium heat. Toss the jackfruit in a pan with the hot sauce. Cook them together over medium high heat, stirring regularly, for about 12-15 minutes or until the jackfruit begins getting a bit crispy and hot. While the jackfruit cooks, pour the broccoli slaw mixture into a mixing bowl with the olive oil, lemon juice and pinch of salt. Toss to coat everything evenly and set aside. Slice the ciabatta rolls or baguettes and smear about a little vegan mayo onto one side. When the jackfruit is done and cools slightly, scoop it onto the rolls and top with the slaw and other half of the bun. Serve immediately or wrap in paper and take 'em along on a picnic lunch. Either way, enjoy! NOTES Serves 4. Leftover jackfruit stays good in the fridge for up to a week.
a Rafflecopter giveaway
Herbed Lemon Tahini Potato Salad
'Tis the season of potato salad! Seriously, I've made more cole slaw and potato salads this month than I think I ever have...which is fine with me! We've had a lot of BBQ's, backyard parties, and things to celebrate this summer so we've been loving experimenting with different ingredients, and until last week, I had never thought to toss tahini in my the mix. I know - WHAT?! I LOVE pouring tahini on all things potato normally, and literally make a snack out of baked potatoes with tahini, lemon and dill on the regular. So how had I never poured any in my potato salad and served it up? Well, it was love at first taste. The addition of crunchy veggies and a little vegan mayo for creaminess makes it next-level good. I've been eating the leftovers all week! You AND your dinner guests will love it, too, I promise. So what're we waiting for?! Let's eat!
INGREDIENTS
2 lbs. red potatoes, chopped 1/2 red onion, chopped 3 ribs of celery, thinly sliced 4 green onions, thinly sliced 1 cup vegan mayo 1 cup tahini 2-4 tablespoons of lemon juice 3 tablespoons freshly chopped dill 1 teaspoon salt 1/2 teaspoon pepper DIRECTIONS Place the potatoes in a large pot of water over medium heat and bring to a boil. Cook for 10-15 minutes, or until the potatoes are fork tender. Drain and set aside to cool. While the potatoes are cooling, chop up the onions and celery and them set aside. Whisk together the mayo, tahini, lemon juice, dill, salt and pepper in a large mixing bowl. Toss in the potatoes, chopped red + green onions and celery, and toss to combine. Serve + enjoy immediately or keep it in the fridge up to a week! NOTES Serve 6-8. Leftovers may need to be tossed as the lemon juice and tahini will separate slightly overtime. Creamy Avocado Pesto Pasta
When life gives you lemons, you could make lemonade. Or you could get some serious meal-spiraton from us and make this lemony Avocado Pesto Pasta, instead! This creamy dish is packed with flavor but comes together super easily - you can even make the pesto ahead for an easy instant meal builder. It's the perfect dish for welcoming in warm, spring weather and the recipe is easily doubled for family-sized meals or lunch-leftovers. Top it with a sprinkle of hemp seeds for a bit of texture, and of course serve with fresh lemon slices- they add a ton of fresh flavor when squeezed over the top!
Before we get cooking, just wanted to let all my Orange County pals know that my vegan, organic baked goods are now being sold at Green Bliss Cafe in downtown Fullerton! This week they've got Oatmeal Cream Pies and Perfect Peanut Butter Cookies from our NEW Homestyle Vegan Cookbook (available for pre-order!!), as well as matcha-glazed and maple-glazed donuts! And if you need a custom baked goods order, let us know! We're happy to help bake and deliver whatever goodies you may need. Any questions? Shoot me an email at . Now let's get cookin'!
INGREDIENTS
1 1/2 cups fresh basil 1/4 cup hemp seeds (shell-free) 1 1/2 tablespoons lemon juice 2 garlic cloves 1/2 teaspoon black pepper 1/4 teaspoon salt 1/4 cup olive oil 1 medium avocado, halved and seed removed 16 ounces spaghetti noodles (or any pasta you prefer!) lemon slices, for squeezing + garnish hemp seeds, for garnish DIRECTIONS In a food processor or high speed blender combine the basil, hemp seeds, lemon juice, garlic, pepper and salt. Drizzle in the olive oil and scoop the avocado into the mixture and process until creamy. Set aside. Bring a large pot of salted water to a boil. Cook the noodles until al dente, then drain. Pour the avocado pesto sauce into the pasta and toss to coat evenly. Garnish with a squeeze of lemon and a sprinkle of hemp seeds. Serve + enjoy! NOTES Serves 4. Leftovers last in the fridge up to about a week. 
Goji Cranberry Sauce
I'm a little embarrassed telling you this, but I used to LOVE canned cranberry sauce. I haven't eaten it in a few years, since I started making my own, but growing up that was my jam. I looked forward to Thanksgiving just for the ribbed, cylindrical maroon-colored jelly that would PLOP onto a plate and get passed around. It had no chunks, no texture, was just smooth as jello and sweet as could be. It was probably made with corn syrup. I'd probably think it tastes a little gross now. So instead of trying it again and ruining my beautiful memories of smearing it on yeast rolls and eating it alongside my mashed potato and gravy pile, I have decided to remember it as it was: perfect, and delicious. And make a better version! Something much more adult-friendly and gut-friendly. This cranberry sauce is super easy and whip up and is packed with goji berries, a superfood similar in flavor and color to cranberries, but packing a whopping 100% of your daily value of Vitamin's C + B2. Plus they contain all 11 essential amino acids, making them a complete protein. Its the wayyyyy healthier, just as tasty, much more enjoyable version of the crap I used to eat, and I think you're gonna love it too. Did we mention there are just 4 ingredients in this sauce? 5 if you count water! Easy peasy. Let's eat!
Looking for more Thanksgiving side dishes? Check out our Cranberry Apple Walnut Stuffing, Garam Masala Roasted Acorn Squash, Celeriac Mashed Potatoes, and Easy Vegan Gravy!
INGREDIENTS
1 cup water 3/4 cup maple syrup 3 tablespoons lemon juice 12 oz. of fresh cranberries (we bought a bag at Trader Joe's) 3/4 cup goji berries DIRECTIONS Rinse and drain cranberries. In a large saucepan over medium heat, whisk together water, maple syrup and lemon juice. Add cranberries and goji berries, bring to a boil, and cover. Cook, stirring occasionally, for about 10 minutes, until about 3/4 of the cranberries have popped open and the juices are beginning to thicken. Turn heat to low and cook for 5 more minutes, whisking several more times. Remove from heat, let cool, and refrigerate at least two hours to set before serving. Enjoy! NOTES Makes about 3 cups. This sauce can easily be made the night before and refrigerated until ready to be enjoyed. Sauce saves well in an airtight container in the fridge for up to two weeks.
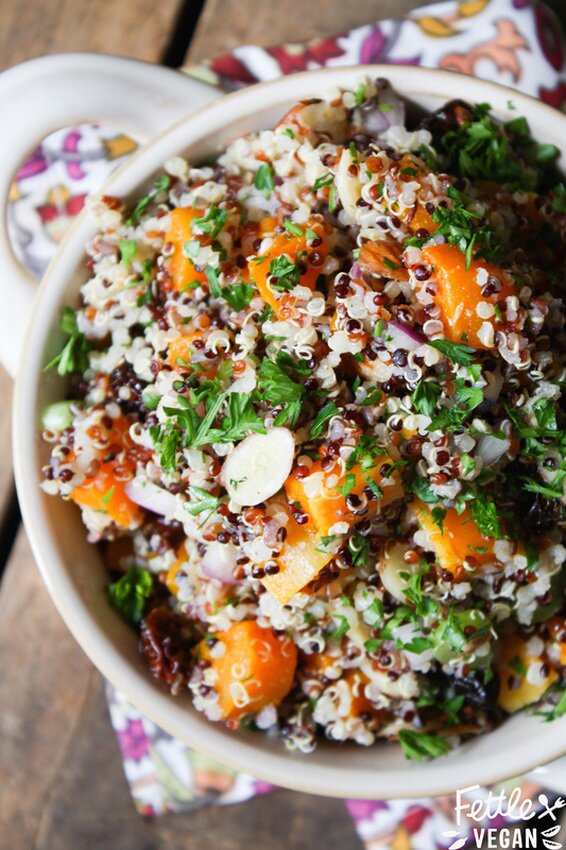
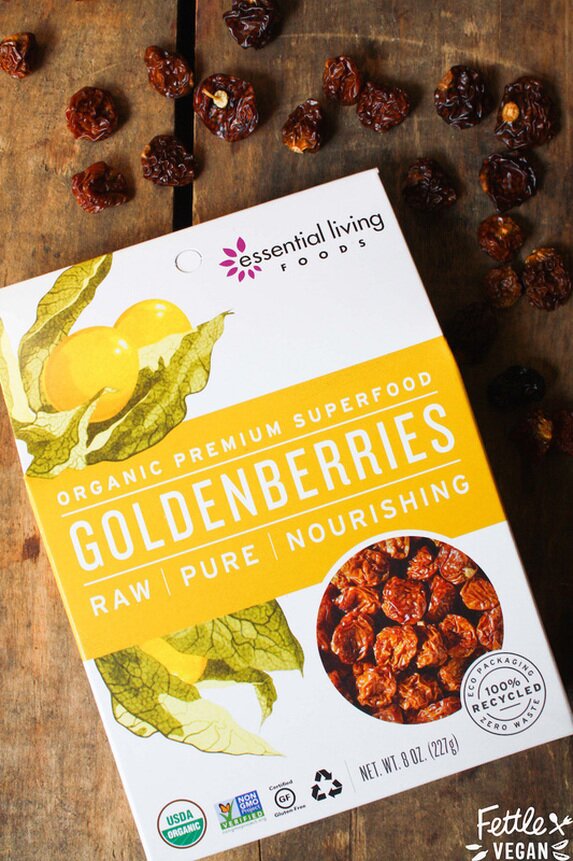
Fall Quinoa Salad with Roasted Butternut Squash and Golden Berries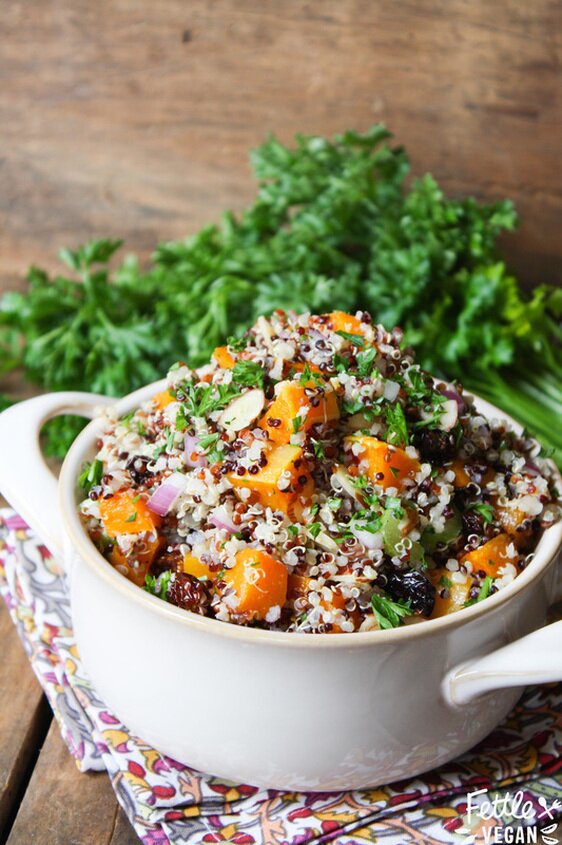
I love fall for the weather, changing colors (okay not so much now that I'm living in California), and delicious, sweet, pumpkin-y baked goods. Which is also the problem...a girl can only eat so many of those baked goods before your belly is like WHOA GIRL and you just need to eat something a little healthier, a little lighter. We're trying to balance our Pumpkin Oatmeal Cookie and Pumpkin Zucchini Bread intake with this savory, flavorful salad. It'll wake your tastebuds up and remind you that healthier dishes can taste pretty damn good, too! It's a great dish for detoxing the crap that has accumulated in your system all month and because quinoa is a complete protein, it'll keep you full longer than you'd expect. This salad has a great mix of sweet (golden berries, roasted butternut squash) and savory (celery, onions, parsley) that makes it a real crowd pleaser. We love using Essential Living Foods Golden Berries in this salad 'cause they keep their foods completely raw, organic, and full of superfood goodness...and they taste amazing! (We're huge fans, and you can check out their complete line of superfoods for yourself here.) It's perfect as a Thanksgiving side dish or a packed-lunch for the week, and we just know you're gonna love it so let's EAT!
INGREDIENTS
3 cups butternut squash, peeled and cut into 1/4 inch cubes 2 cups water 1 cup rainbow (or really any kind) quinoa 1/3 cup celery, sliced thinly 1/3 cup red onions, diced 1/3 cup golden berries, roughly chopped 1/3 cup sliced almonds 3 tablespoons fresh parsley, chopped 2 tablespoons lemon juice 1 tablespoon olive oil 1 tablespoon champagne or apple cider vinegar 1 teaspoon dijon mustard 1 teaspoon maple syrup 1/2 teaspoon salt 1/2 teaspoon ground pepper DIRECTIONS Preheat oven to 400 degrees and line a baking sheet with parchment paper. Peel and cut butternut squash into 1/4 cubes and place on the parchment paper-lined baking sheet. Drizzle with olive oil and a sprinkle of salt + pepper and bake about 30 minutes, flipping halfway through. While squash bakes, place quinoa and water in a medium saucepan. Bring to a boil, reduce to a simmer, then cover with a lid and cook until liquid is absorbed, about 20 minutes. Prepare celery, red onions, golden berries, sliced almonds, and fresh parsley and place it into a large bowl. Set aside. In another small bowl, whisk together lemon juice, olive oil, vinegar, dijon, maple syrup, salt and pepper. When squash and quinoa have finished cooking and cooled, pour the quinoa and roasted butternut squash into the large bowl of veggies and gently toss with a wooden spoon. Drizzle the vinaigrette mixture over the salad and toss again to combine. Serve immediately or save in the fridge up to 3 days in an airtight container. Serves 6-8. Enjoy! NOTES If you don't have/ don't like golden berries or almonds or any other ingredient, sub it out for something you LOVE! This salad is super customizable and you should totally take advantage of that based on your preferences and what you have in the pantry.
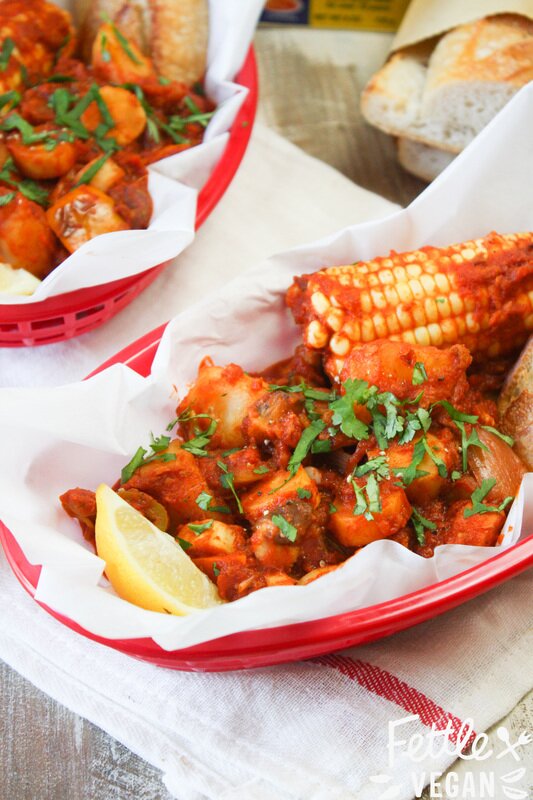
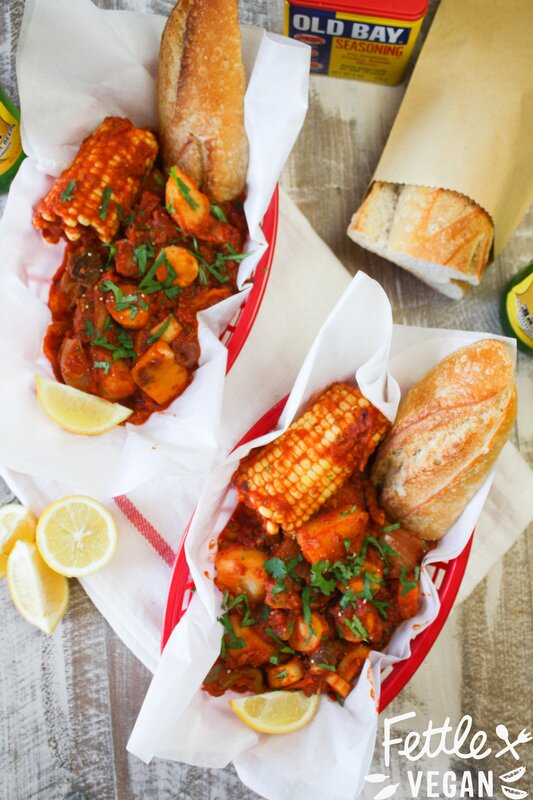
San Pedro Style Fish-less Market Tray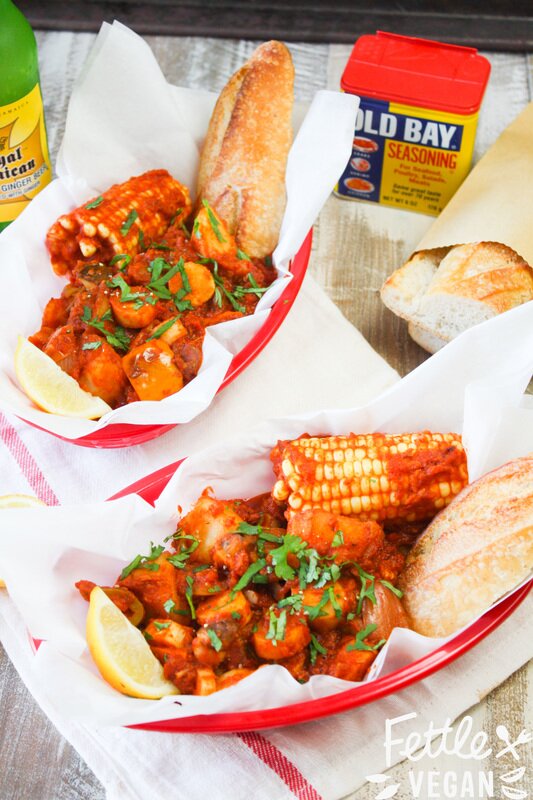
It's Alex. I grew up in Southern California and my grandparents live in the South Bay area. As a kid, we would visit the San Pedro Fisherman's Wharf to eat tons of seafood and to watch the scary-huge cruise ships lumber by as often as we could. The fish market sells all kinds of seafoods by the pound, but the thing everyone really comes for - and a favorite of ours - was the Famous San Pedro Shrimp Tray. The meal is served on a big plastic tray (like from a food court), covered in newspaper, and topped with an overflowing mixture of shrimp, potatoes, onions, peppers, tomatoes, and corn smothered in a spicy, delicious tomato-based sauce that you could sop up with the crusty toasted bread served on the side. The veggies and sauce make the whole thing, and we thought it would be super easy to sub out those little crustaceans with some healthy plant foods. We were right! We replaced the shrimp with seasoned hearts of palm and mushrooms, which both taste similar to and have a texture similar to the original- but you know, vegan. This hearty meals serves 4 or leaves you with leftovers, but you won't mind. We recommend serving it alongside a crusty baguette and with a squeeze of lemon. Let's eat!
INGREDIENTS
Marinade: 1/2 cup white cooking wine 2 tablespoons lemon juice 1 1/2 teaspoons Old Bay seasoning 1/4 teaspoon black truffle sea salt (regular sea salt works here, too) 1 - 14.5 oz can hearts of palm, drained 1 1/2 cups mushrooms (we used shiitake, but oyster or lobster mushrooms would be great, too!) Sauce: 2 - 6 oz. cans tomato paste 6 oz. soyrizo (soy chorizo), optional - but worth it 2 cloves garlic, minced 1 cube vegetable boullion 2 teaspoons chili powder 1 teaspoon cayenne pepper 1 teaspoon smoked paprika 1 teaspoon old bay seasoning 1/2 teaspoon cumin 1/4 teaspoon black truffle sea salt (or regular sea salt) 1/4 teaspoon black pepper 3 cup water Everything Else: 1 tablespoon oil 2 large bell peppers, seeds removed + roughly chopped 2 medium onions, roughly chopped 4 medium red potatoes, cut into 1-2 inch cubes 2 cobs of corn, halved 1 tomato, roughly chopped cilantro, for garnish (optional) DIRECTIONS To make marinade, combine white cooking wine with lemon juice, Old Bay and salt. Drain hearts of palm and slice into 1/2 inch circles. Roughly chop mushrooms and places 'shrooms and hearts of palm slices into the marinade. Let marinate at least 1 hour, or as long as overnight. While marinade comes together, make the sauce by whisking together tomato paste, soyrizo, mixed garlic, vegetable boullion cube, spices and water in a large bowl. Set aside. Heat oil over medium heat in a large cast iron skillet. Cut bell peppers, onions, red potatoes, corn, and tomatoes. Place corn and potatoes into a medium pot and boil until fork tender. Add bell peppers, and onions to pan with heated oil and cook until they begin to soften, about 3-5 minutes. Add in the cooked corn coblets, potatoes, and tomatoes and cook all together, stirring occasionally, for another 5 minutes. Add sauce mixture to the pan and stir tom combine. Simmer for 15 minutes. While veggie + sauce mixture simmers, pour the hearts of palm and mushroom marinating mixture into a medium sized pan and cook over medium heat until leftover marinating liquid reduces and thickens. Remove from heat, add to sauce + veggie mixture and stir to combine. Cook for another minute or two, until mixture is a bit soupy and everything is well combined. Serve with crusty bread and a squeeze of lemon. Leftovers last in a sealed container in the fridge for up to a week, but may need a little water added when reheating because the sauce will thicken as it cools. Serves 4-6.
Parsley Pesto
Here in Southern California, the growing season starts earlier than most places. Thanks to our high temps and sunny days, our garden started growing back in March and hasn't stopped since. In other words, our parsley plant is bigger than most peoples large dog. We have SO MUCH parsely- we're overrun! And there's only so much garnishing you can do with parsley before you're sick of it. A better way to use up mass amounts of fresh, fragrant parsley? This simple Parsley Pesto recipe! It whips up quickly and taste great spread on everything! I'm loving pairing it with sweet cherry tomatoes on crackers and crusty bread and mixing it into pasta dishes like this Caprese Pasta Salad. I was hesitant when I started messing around with this stuff- what if I didn't like it as much as my traditional Hemp Seed Basil Pesto? What if it just didn't taste right? Well, SURPRISE! It tastes AMAZING! Adding the green onions and extra garlic give it a ton of flavor and take away from the bitterness of having too much parsley, and the nuts keep it smooth and mellow. It's green gold! And it saves well in the fridge for up to a week, so you can enjoy fresh, flavorful pesto all week long. Lets eat!
INGREDIENTS:
3 packed cups fresh parsley, stems removed 1 cup almonds or cashews 1/2 cup olive oil 1/2 cup green onion, chopped 3 tablespoons lemon juice 4 cloves garlic 1/2 teaspoon salt 1/2 teaspoon pepper DIRECTIONS: In a high speed blender (we used our Vitamix) or a food processor, combine all ingredients. Blend until smooth, or until your desired texture- you can leave it chunkier if you like! [If you don't have a great blender to work with, try soaking your nuts in warm water for at least an hour before blending them, it'll help break them down much more easily.] Spread it on everything from bread and crackers to pizza dough and rice cakes. Saves well in an airtight container for about a week, or until pesto begins to brown. Enjoy!
<
|
tagsAll  RSS Feed RSS Feed
|