Wild Blueberry Overnight Oats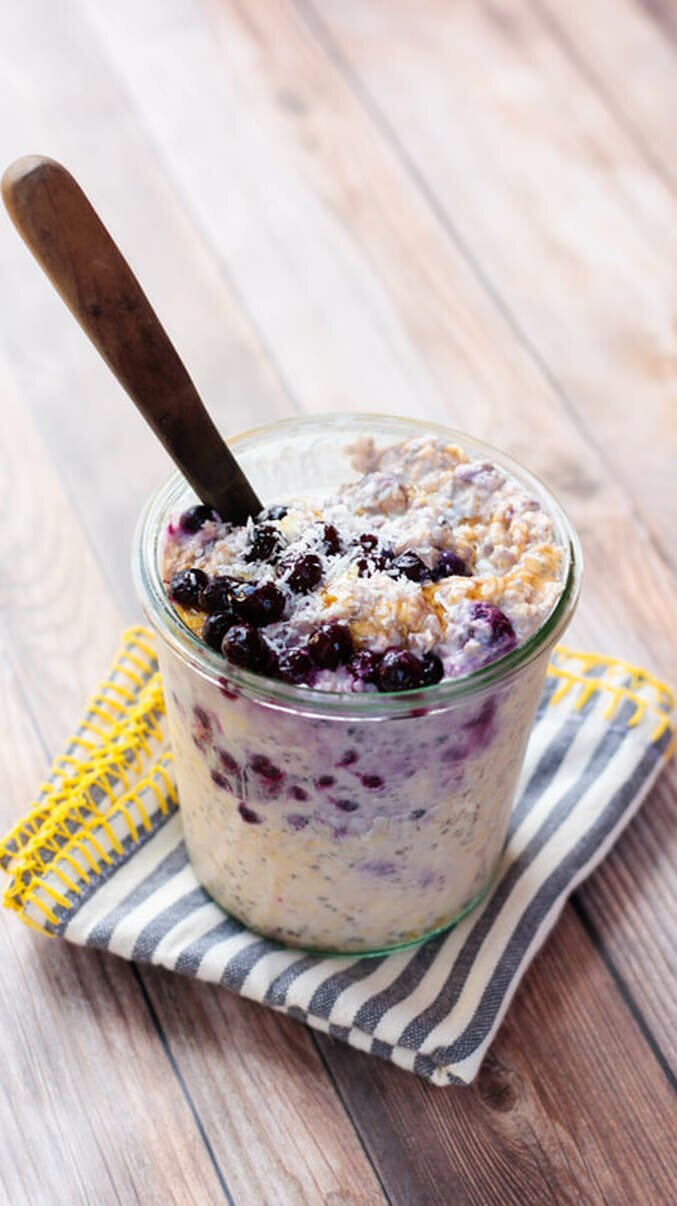
This is a super simple recipe, but sometimes those are the best recipes. I get into food moods all the time, and lately I've been super busy and hooked on easy, on-the-go breakfasts and lunches that pack some real nutrition and can keep me filled up when I have to teach back to back classes with no snack time in between. Being a Maine girl at heart my berries of choice were of the small, tart, and wild variety - but you can sub in whatever fruit or berries you prefer here, instead. The addition of coconut butter adds healthy, hearty, good-for-you fats that'll help keep you moving and the chia seeds add just a little extra texture (and a whole lotta omegas!) to the mix. All you'll need is a few simple ingredients that you probably already have on hand, a glass jar, and a serious appetite. Let's eat!
Before you make your way down to the recipe, a quick reminder that I'm currently teaching 4x a week at CorePower Yoga in Brea, if you're looking to get your sweat on - and soon will have my own yoga vids for you guys to access on my YouTube whenever you need to flow! Send me your flow requests and I'll try to make them happen. Alright - keep scrolling! 
INGREDIENTS:
1/2 cup almond milk 2 teaspoons chia seeds 1 tablespoon coconut butter (or nut butter of choice) 1 tablespoons maple syrup 1/2 cup (GF) rolled oats 1/2 - 1 cup wild blueberries (fresh or frozen) DIRECTIONS: In a mason jar or small bowl, combine the almond milk, chia seeds, coconut butter, and maple syrup and stir or shake to combine. The coconut butter doesn't need to be completely mixed with the almond milk - and you'll get swirls of coconut butter to enjoy the next day! Add the oats and blueberries and stir or shake a few more times. Make sure all of the oats are saturated in the wet mixture. Cover and place in the fridge overnight or for at least 6 hours to set. When ready, simply pull out the oats, give 'em a stir and enjoy! You can add extra fruit or toppings as desired. Enjoy! NOTES: Leftovers last in the fridge up to 2 days, but are best enjoyed within 24 hours. Serves 1, but recipe is easily doubled. 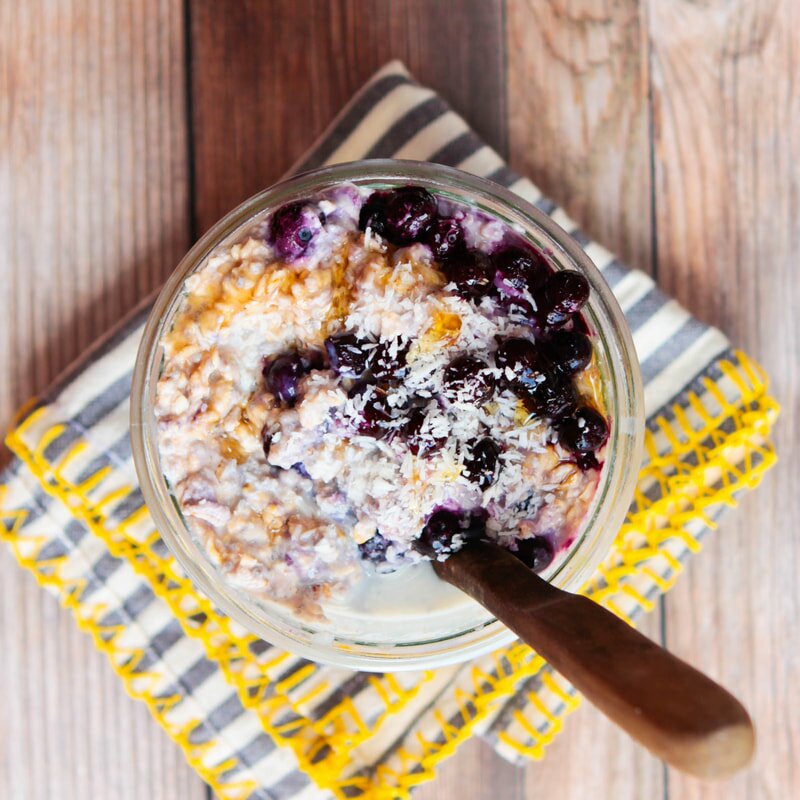
0 Comments
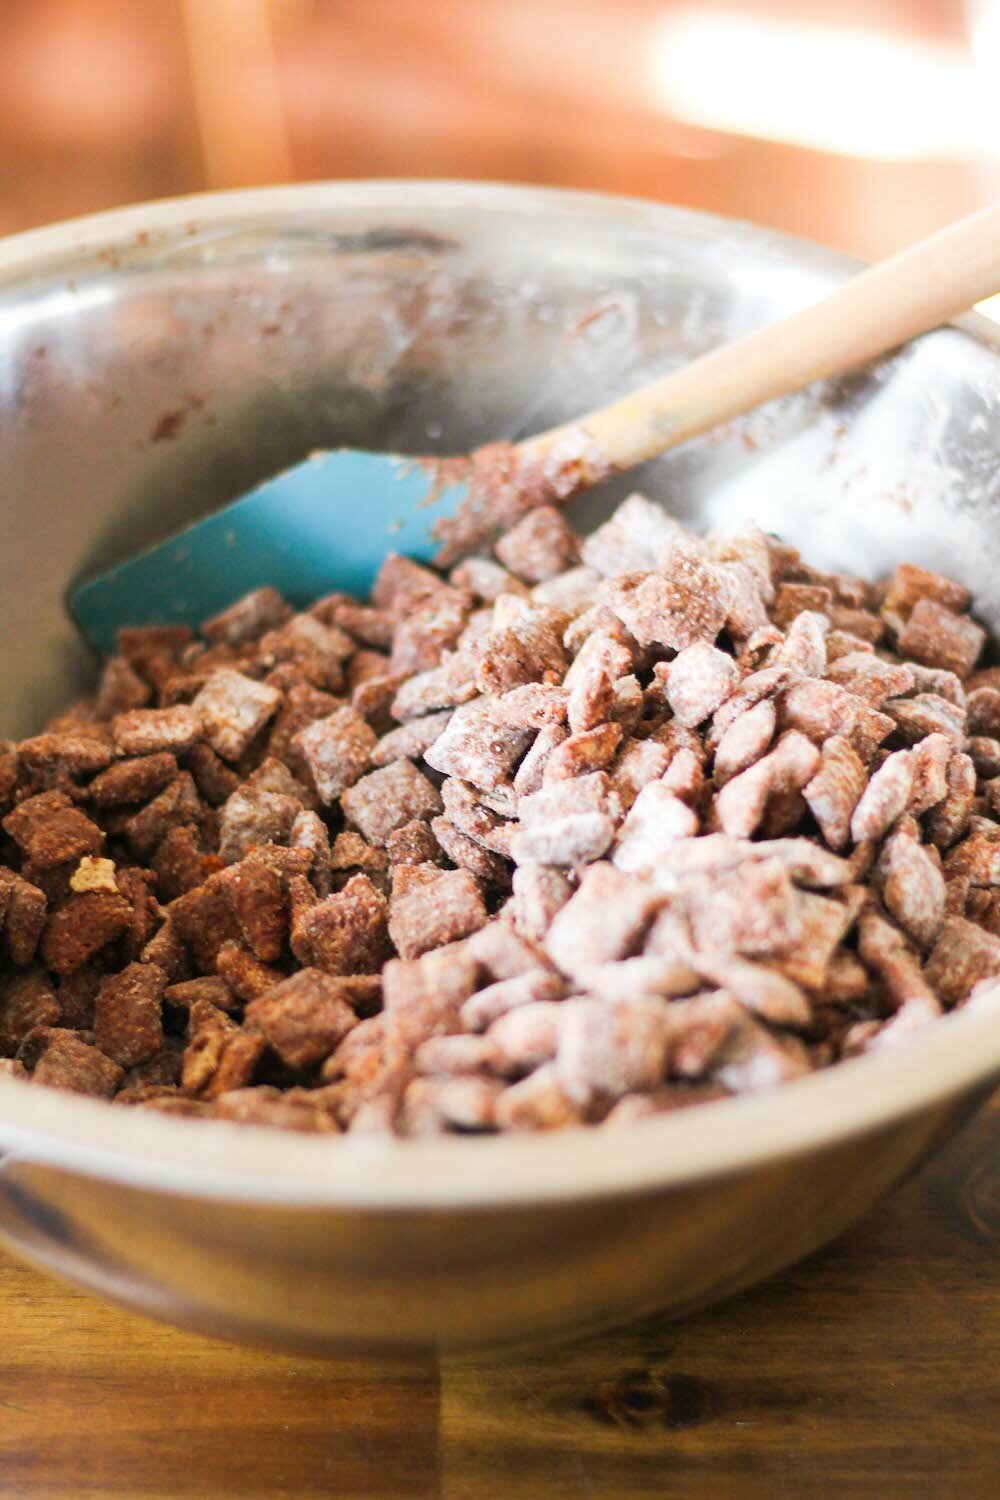
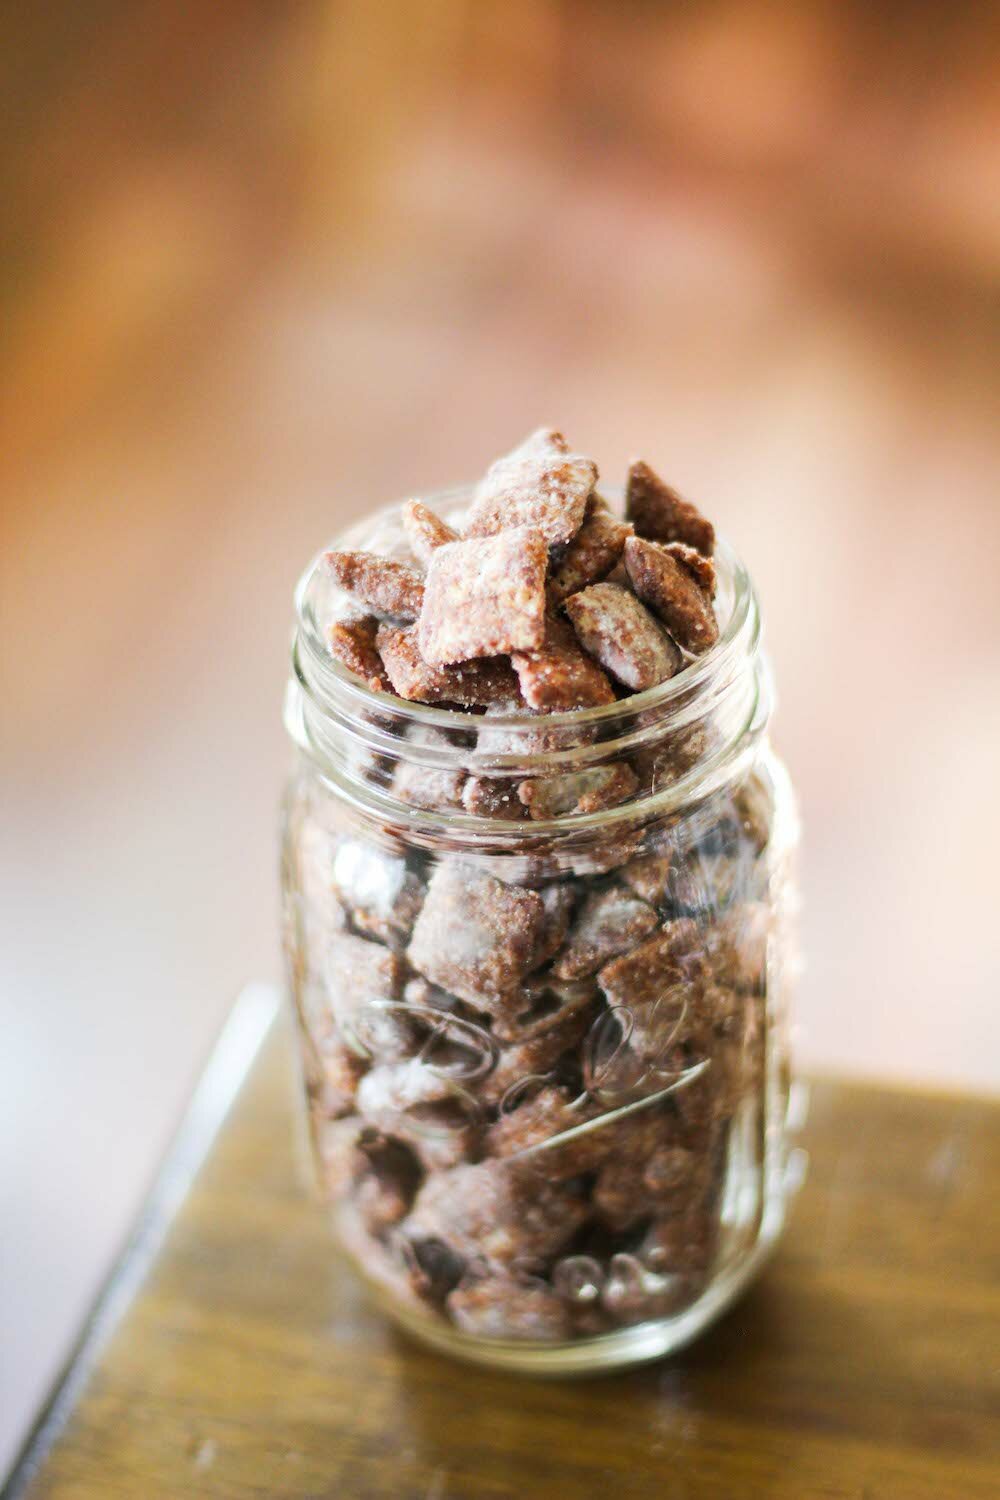
Nearly Sugar-Free Muddy Buddies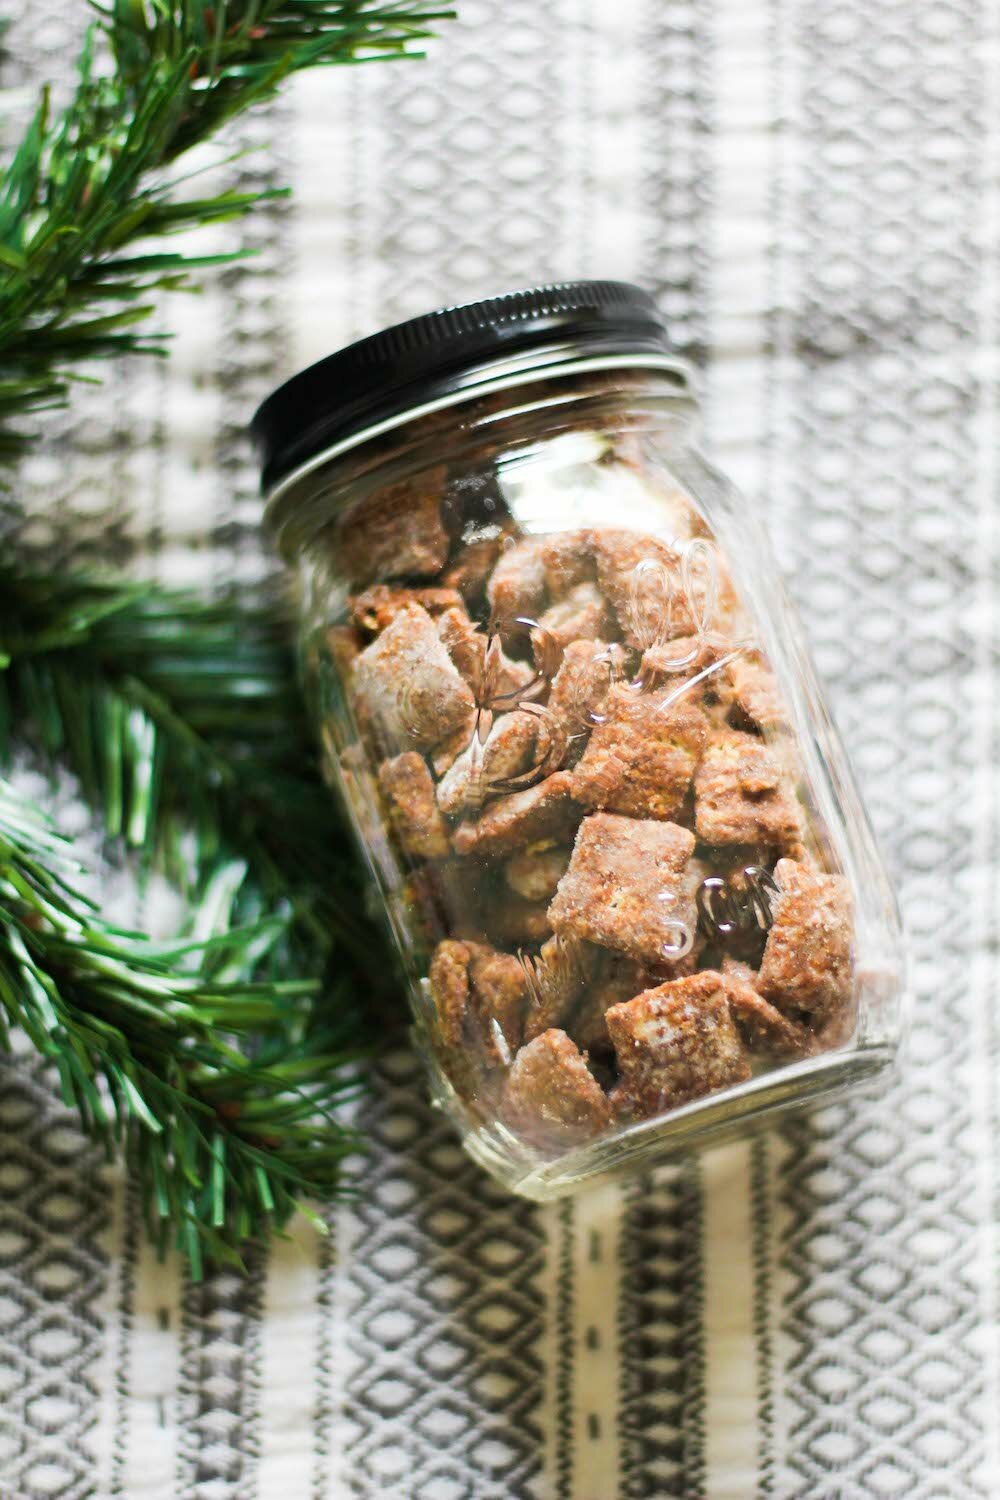
The Holidays are in full swing and I've been feeling ALL the stress! Between present buying, prepping for the New Year - and my Husband's 30th birthday immediately after, writing my 2nd cookbook manuscript and preparing for yoga auditions at my favorite studio just after the New Year - I've been busy! But we all are this time of year. Wrapping up everything in 2017 up nicely before tearing into the giant gift that is 2018!
Because I'm a totally stress eater, I try to help myself out during this crazy time of year by NOT having tons of sweet treats around to pick at. It's only trouble if I do! That said, it just isn't the Holidays if there isn't some type of snackable chocolate something on the counter! This year I decided to reform my normal chocolate Muddy Buddies recipe and make them something I could snack on - guilt and nearly sugar-free - through Christmas. So I subbed out the powdered sugar for a homemade, sugar-free, monkfruit version, instead! Muddy Buddies are a totally Holiday classic in this house and one of my Husband's favorite things to snack on while watching Christmas movies. The only sugar in these babies are the trace amounts in the cereal and dark chocolate chunks we melted down for coating! We used EnjoyLife's Mega Chocolate Chunks for this recipe since they're allergen-free (and I have all the allergies), but you can use whatever chocolate makes your heart happy. Let's make some muddy buddies!
INGREDIENTS
9 cups Rice Chex (they're vegan - but you can use whatever kind or brand you prefer!) 2 cups powdered monkfruit sweetener OR 1 cup regular monkfruit sweetener (we used Lakanto - but you can also use powdered stevia or even regular powdered sugar here if you prefer) 1 cup vegan chocolate chunks (we used this brand) 1/2 cup smooth peanut butter 1/4 cup vegan butter 1 teaspoon vanilla DIRECTIONS In a large bowl, measure and set aside the cereal. If you're using prepared powdered sugar, go on to the next step. If you've got regular monkfruit sweetener and need to make it in into powdered 'sugar', simply place 1 cup of sweetener into a blender or food processor and process for 1-2 minutes, until the sugar has pulverized into a finer, powered sugar. It should double in size using this method. Set aside. Using the double boiler method (or a microwave!), melt together the chocolate chips, peanut butter, vegan butter and vanilla until creamy, stirring consistently. Pour the melted chocolate mixture over the cereal and use a wooden spoon to gently toss and stir until the cereal is evenly coated. Pour the powdered sugar evenly over the mixture and continue to use the wooden spoon to toss and stir the mixture until the chocolate-coated chex are all evenly covered in a fine layer of powdered sugar. Enjoy or save in air-tight container on the counter or in the fridge for up to a week. Enjoy! NOTES If you prefer regular sugar here, go ahead and use it. If you find another sugar substitute you prefer, use that instead. I can't guarantee the quantity exchange will be 1:1, but a little taste test should help guide you if you're unsure. Serves 8-10. 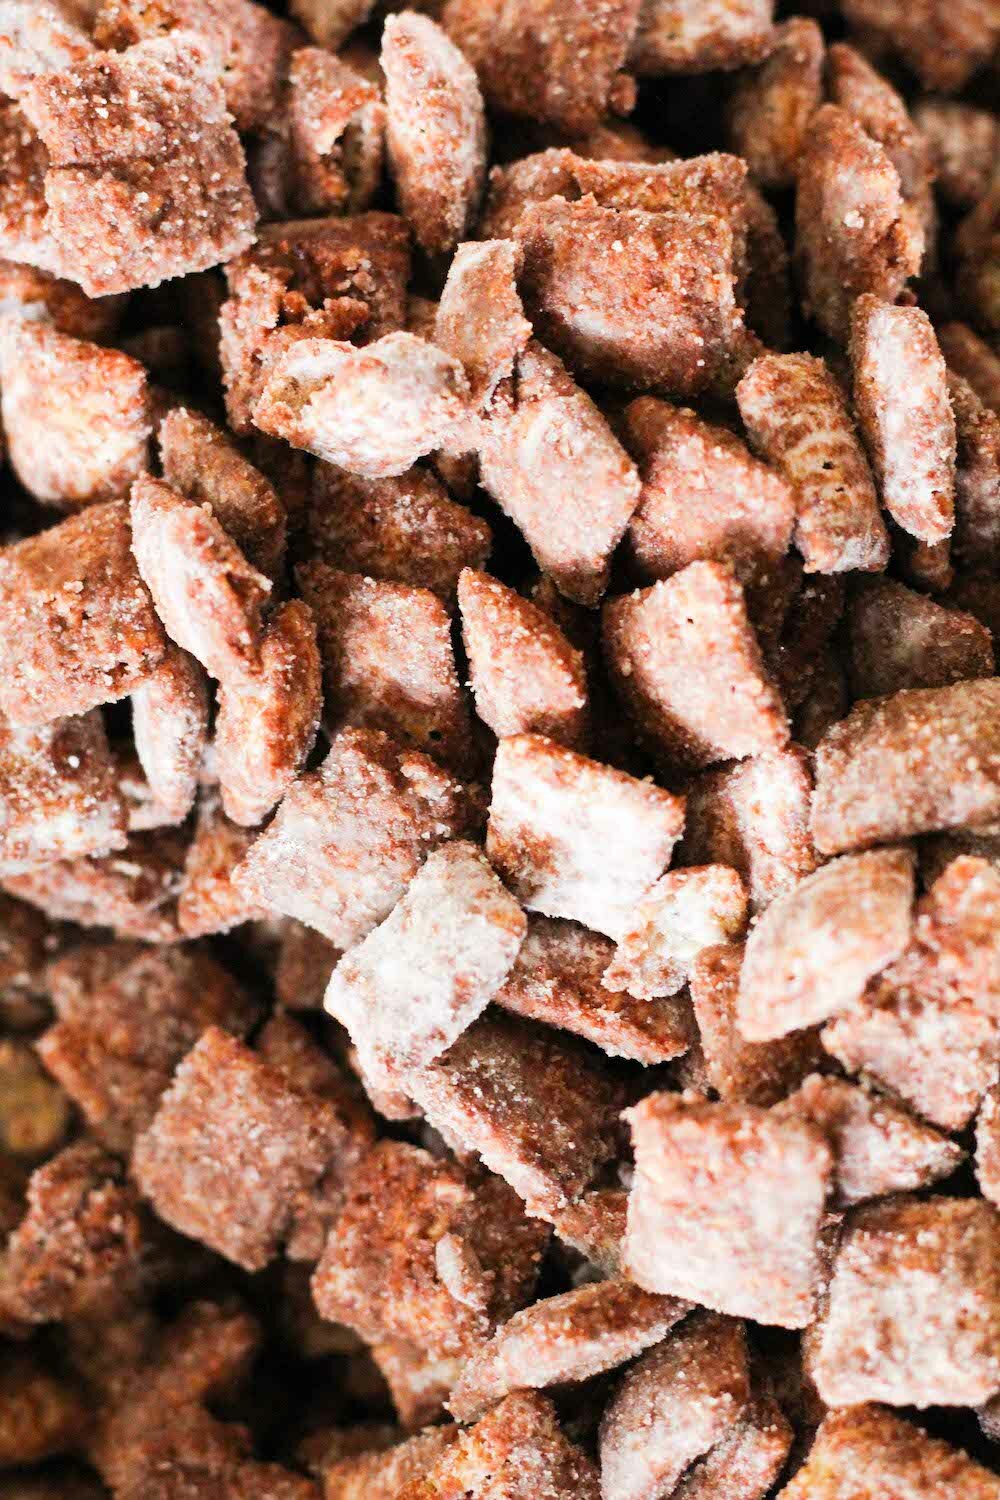
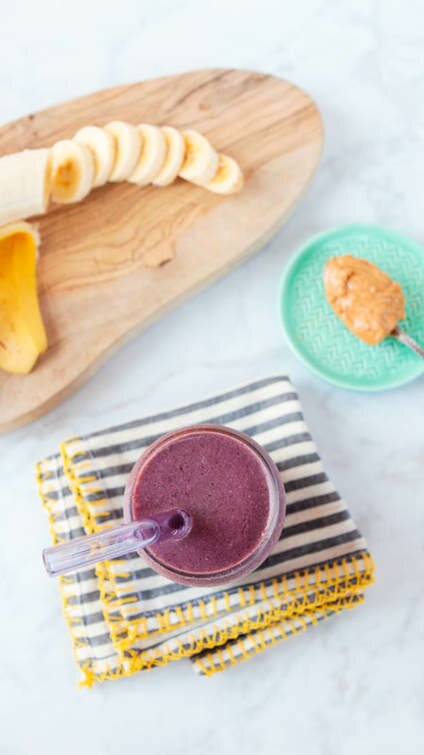
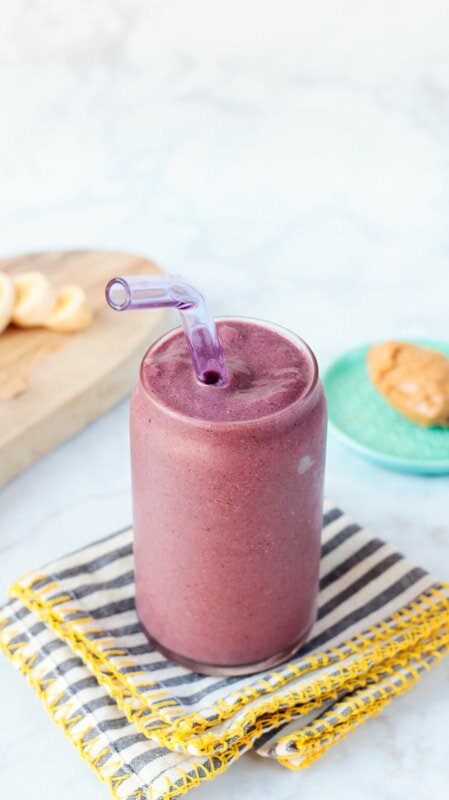
PB+J SMOOTHIE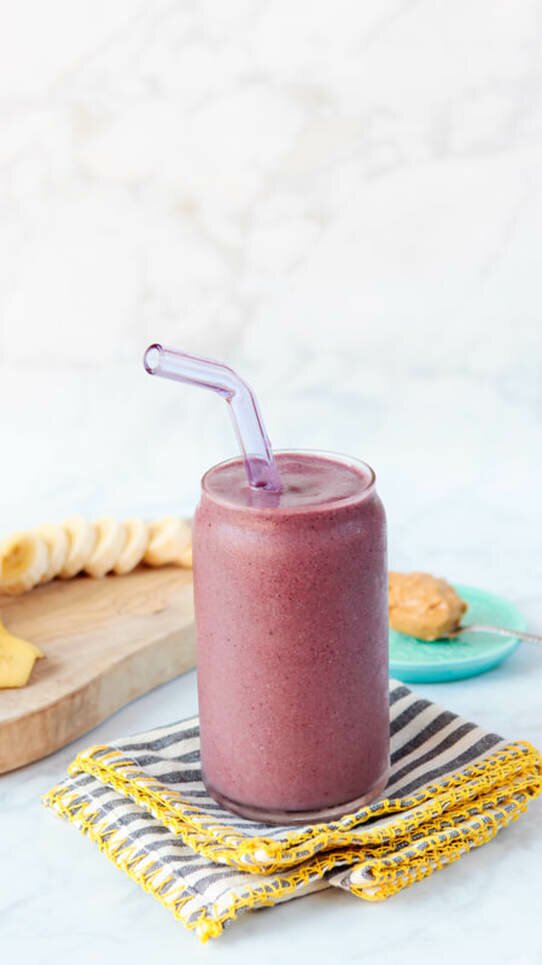
Good morning friends! I'm a serious sucker for smoothies, and a well-known regular at the Whole Foods juice bar. I even recreated one of my favorite smoothies from them - the Green + Glowing - and posted it here because I needed to stop spending $8 a day on a smoothie I could make myself. Well we're back! Kind of. This isn't a smoothie I found at Whole Foods, but I'm sure they've got one like it. I wouldn't know, because until recently I refused to have nut butter in a smoothie. I don't know why! Actually - I hate the chocolate and fruit combination, and I think I just assumed that since chocolate and peanut go so WELL together, that peanut butter and fruit would also be awful. Except deep down in my brain I knew that couldn't be true - because otherwise I wouldn't have eaten a PB+J nearly everyday from ages 4-8!
One morning recently I went to whip up my normal morning smoothie and realized I was out of two of the main ingredients - frozen mango and frozen pineapple. I emptied the bags the day before and had totally forgotten to replace them. Whoops! Luckily, I had seen frozen strawberries and blueberries in the freezer, so I grabbed them instead. I kept the smoothie base the same but after whipping it all together it was just missing something. It was too light and needed some thickness. I almost threw in some coconut in and then thought - welllll, I do have this mostly empty jar of peanut butter...should I try it? I'm so glad I did! It gave the smoothie more thickness, protein, and a ton of great flavor! This might be my new go-to morning fuel. It's packed with protein - seriously, kids will love it. Let's blend, babes!
INGREDIENTS
1 1/2 cups coconut water or unsweetened almond milk 1 frozen banana 1 cup frozen strawberries 1/2 cup frozen blueberries 1-2 cups fresh spinach 1 tablespoon peanut butter 1 tablespoon ground flax 1 tablespoon psyllium husk 1-3 teaspoons MCT coconut oil (optional - just what I add into mine for some healthy fats) DIRECTIONS Toss it all in a high-speed blender (we use a Vitamix) and blend until it is smoooooooth. Then pour it in a large glass and enjoy! NOTES Serves 2. Sub in what you need or what you’ve got to suit your preferences. Fresh fruit works great, but you may need to add some ice to get it nice and creamy. If you use coconut water, the smoothie will be a bit lighter, whereas using almond milk will result in a thicker, creamier smoothie. I like them both, but I actually prefer it with coconut water! 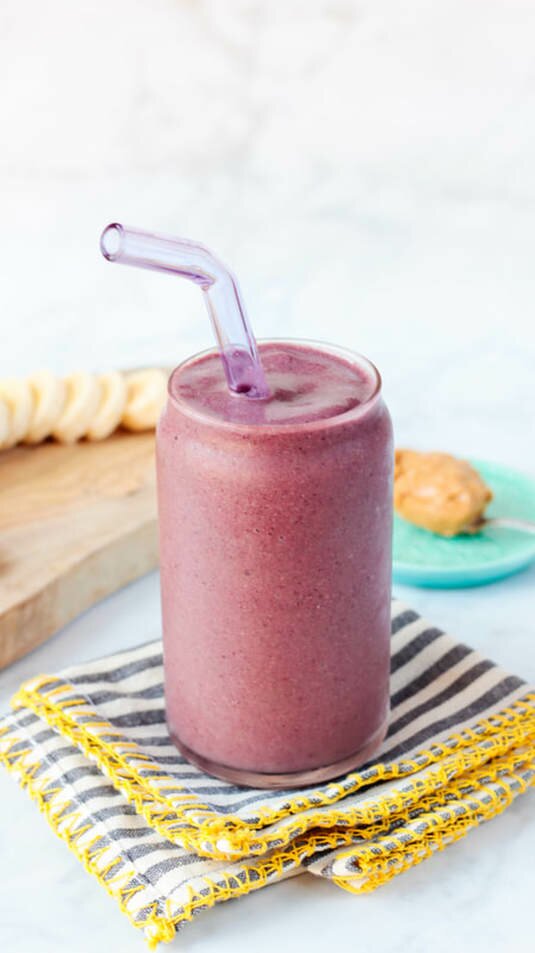
Peanut Butter Chocolate Chunk Banana Bread
Summer is here and our CSA boxes have been packed with tons of fresh fruit! We love getting locally grown goodies sent to our door each week, but sometimes we don't make it through the whole box before things start to get a little...brown. Like our bananas! I like bananas just as much as the next girl, but they're not my favorite, and sometimes they get a little too brown before we have a chance to gobble 'em up. Turning mushy, overripe bananas into banana bread is probably my real favorite way to enjoy my bananas, so I never really mind letting them get to that point. And in this combo- mashed with peanut butter + sweet chocolate chunks? ITS AMAZING. And basically a few sprinkles of coconut bacon short of an Elvis sandwich! We've been noshing this loaf all week, but my favorite way is to stick a piece in the warm oven for a few minutes to let the chocolate get a little melty then slather a little butter on it and mmmm...you get it. It's foolproof- and even works well with gluten-free substitutes. Let's eat!
INGREDIENTS:
2-3 bananas, mashed (about 1 1/2 cups) 1/3 cup oil 1/4 cup sugar 1/4 cup peanut butter 3/4 cup non-dairy milk 1 teaspoon vanilla 1 teaspoon vinegar 2 cups whole wheat flour (we have also used a GF flour blend here, but used about 1 3/4 cup) 1/2 teaspoon baking soda 1/2 teaspoon baking powder 1/2 teaspoon salt 3/4 cup chocolate chunks (or chips!) DIRECTIONS: Preheat oven to 350 degrees. In a large bowl, mash your bananas. Set them aside. In a large mixing bowl or in an electric mixer whisk together the oil, sugar, milk, peanut butter, vanilla, and vinegar. Let sit for 3-5 minutes, while you grab a third bowl and combine the flour, baking soda & powder, and salt. Once the wet ingredients are ready, slowly add in the dry ingredients and stir to combine. Once the two are completely combined and a batter has formed, add the mashed bananas. Stir again. Finally, add in the chocolate chunks and mix once to combine. Pour into a greased, lined or non-stick loaf pan. [We used a non-stick pan with a little parchment paper, for easy removal.] Bake for 45-60 minutes, depending on your oven. Bread is finished when a toothpick comes clean. Remove from the oven and let cool at least 30 minutes before enjoying a piece. Cover and save up to a week, or freeze indefinitely! 
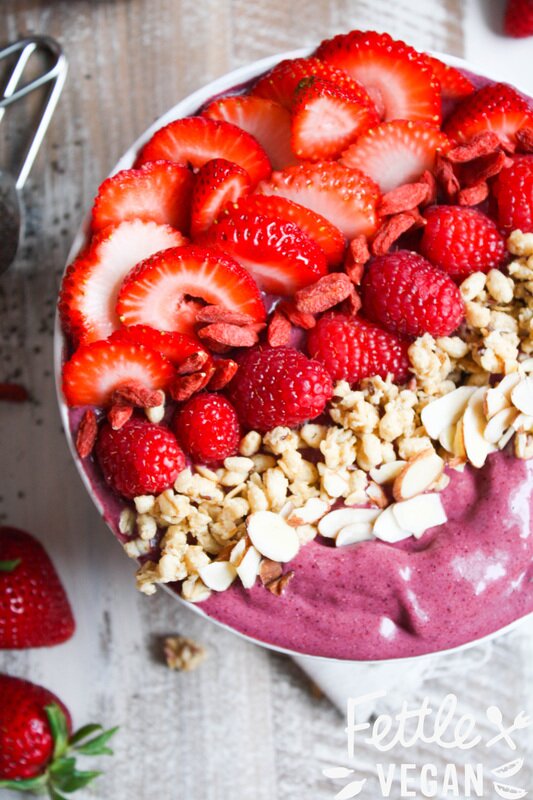
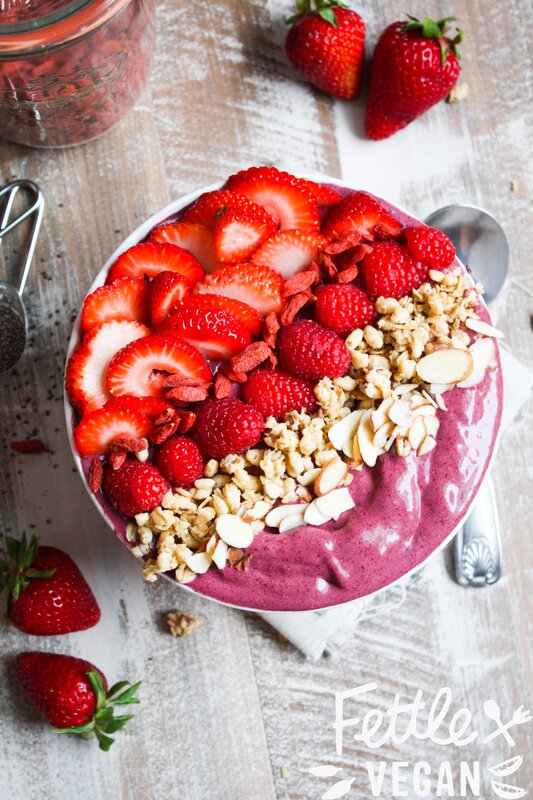
Peanut Butter + Berry Acai Bowl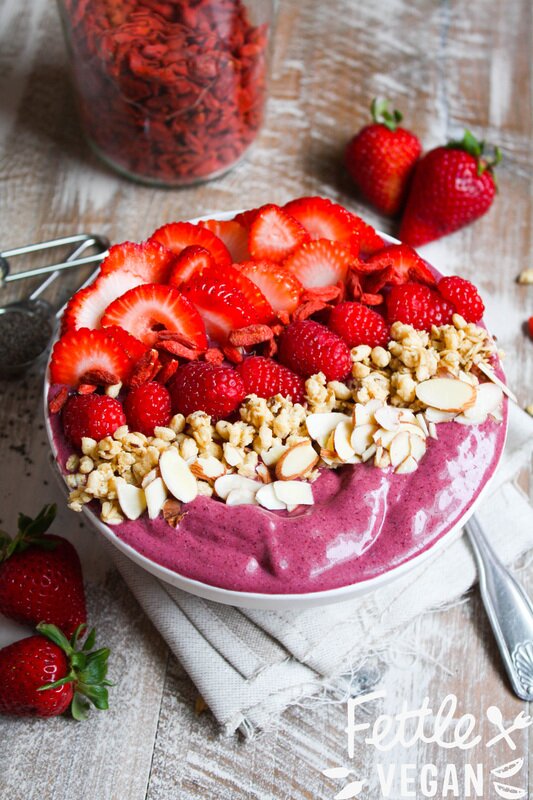
The weather has given us a very early summer growing season here in Southern California, and I've been on a real fruit kick. There's just something magical and so right about eating ripe, juicy fruit when the weather is warm! Whipped into smoothies, pressed into juice, sliced on top of my oatmeal- I'll eat it all, friends. And sometimes though, you realize that something you've been buying all along can be made in your own kitchen more cheaply and easily than running to the juice bar to get it! Combine my love for fresh summer fruit with my sheer laziness about driving across town to the juice bar, and you get this sweet gem. This is a copycat recipe I came up with of Nekter's PB Bowl, a little more balanced and without the added agave. It is way cheaper to make at home (like WAY cheaper), and allows you some portion control if wanted and a freezer to keep it in if you have leftovers. And the best part? It tastes like a peanut butter and jelly sandwich- but you know, in spoon form! I like to top it with lots of extra berries, granola, nuts, and chia seeds, but we'll offer some other fun ideas below. And really, these bowls are super easy to tweak to your preferences, so have fun experimenting with different flavors. I also really like throwing in some pineapple, peach, or mango to sweeten it up a bit. Whichever way you do it, it's bound to be delicious. Let's eat!
INGREDIENTS
1 acai smoothie pack (we use 100g Sambazon packs + can find them in most grocery store freezer sections) 8 ounces coconut water OR dairy-free milk 1 cup fresh or frozen strawberries 1 cup fresh or frozen mixed berries (OR you can sub 1 banana for 1/2 cup of berries here if you like!) 2 tablespoons peanut butter (or any other nut butter) fresh fruit + granola, for topping optional add-in's: (about 1-2 tablespoons each) ground flax chia seeds hemp seeds protein powder goji berries maca lucuma nuts coconut cacao nibs agave DIRECTIONS Blend up all your ingredients in a high speed blender until thick and well combined. Scoop mixture into a bowl and top with fresh fruit, granola, and any other delicious toppings you'd like! Enjoy immediately and freeze leftovers. Makes 1 large smoothie bowl.
Pumpkin Chocolate Freezer Fudge
Yep, more pumpkin. We told you it was coming! But this one is more of a treat yo' self kinda recipe. When I was growing up, we always picked apples and pumpkin at Bailey's, the family-owned orchard down the street. Mrs. Bailey would always make the richest, most amazing chocolate & peanut butter fudge, and it was a tradition to get a square before we left the orchard. I know it was full of sugar, but it was heaven. I can still taste it.
Now as an adult, and one who watches my sugar intake at that, fudge isn't something we make often. But with this crazy hot weather we're still having in Souther California, I was CRAVING some fall. That being said, we all deserve a treat, and being freezer fudge, its easy to eat just a piece of week and preserve the goodness for months to come. Plus, I'm a SUCKER for pumpkin/ chocolate combos, and the velvety, rich pumpkin layer compliments the dark chocolate beautifully. So today, instead of trick-or-treat, we say TREAT YO' SELF! I think even Mrs. Bailey would approve.
INGREDIENTS:
Chocolate Fudge Layer: 1/4 cup vegan butter or coconut oil 4 ounces dairy-free dark chocolate 2 1/2 cups confectioners sugar 1 tablespoon boiling water Pumpkin Fudge Layer: 1/4 cup vegan butter or coconut oil 2 ounces cashew butter (or nut butter of your choice) 2 ounces pumpkin purée 1/2 teaspoon vanilla 2 1/2 cups confectioners sugar 1 tablespoon boiling water DIRECTIONS: Chocolate Fudge Layer: Using the double-boiler method (a bowl placed in in a saucepan of boiling water WITHOUT touching the water), heat the butter and chocolate together until melted, stirring occasionally. Remove the bowl from the pan and stir in half of the confectioners sugar. Add a tablespoon of the boiling water from your pan to the mixture, and stir to remove any lumps. Add in the remaining confectioners sugar and stir like a madwoman (or madman!) until the mixture is smooth. Press into a waxed-paper lined 8x8 baking dish and set aside while you make the pumpkin layer. Pumpkin Fudge Layer: Using the double-boiler method (a bowl placed in in a saucepan of boiling water WITHOUT touching the water), heat the butter, cashew butter, pumpkin purée, and vanilla together until melted, stirring occasionally. Remove the bowl from the pan and stir in half of the confectioners sugar. Add a tablespoon of the boiling water from your pan to the mixture, and stir to remove any lumps. Add in the remaining confectioners sugar and stir like crazy again until the mixture is completely smooth. Pour the mixture over the chocolate layer, then tap the baking dish gently on the counter to smooth and remove any bubbles. Place the baking dish in the freezer to set, for at least 3 hours. When ready, remove the fudge from the baking dish by pulling the waxed paper out. Place block of fudge onto a flat surface, like a sitting board, and use a large fat knife to cut into 1-in. squares. Store uneaten fudge in the freezer indefinitely. Enjoy!
Double Chocolate Peanut Butter Muffins with Coconut Bacon
Life is short, eat chocolate. That's the saying, right? I feel like I could whole-heartedly adopt that mantra from here on out. Anything that gives me an excuse to eat more chocolate is a a good thing. I woke up two mornings ago and just needed these muffins. I was feeling a little foggy and couldn't seem to get going. This past week has held a lot of changes (updates soon!) and carried a ton of stress. I'm finally sleeping again at night but still waking up a little out of it. But, I may have found the cure. Somewhere between these rich, fudgy muffins and the crispy & salty coconut bacon on top, I found pure happiness. Seriously, I got LOST in eating these little guys for almost a half hour. The combo is unbeatable and reminds me (sans bananas) of the Elvis sandwich we had back when Phoney Baloney's was just a sandwich shop here in Southern CA. They may be my new favorite stress-relieving breakfast. Oh, and you know, one more reason to eat chocolate for breakfast.
Oh and one more thing- I'm happy to announce that our Cheezy Polenta Fries recipe is being featured over on Chocolate Covered Katie today. Thanks Katie- we think these muffins may be right up your alley, girl.
Ingredients:
2 1/4 cups gluten-free flour (we used the all purpose GF mix from Fork & Beans- with great results!) 1/3 cup cocoa powder 2 teaspoons baking powder 1 teaspoon baking soda 1 1/2 teaspoons xantham gum 1 teaspoon salt 1 3/4 - 2 cups non-dairy milk 1/2 cup coconut oil, softened 1/4 cup peanut butter (or nut butter of your choice) 1/4 cup organic sugar 1 teaspoon vanilla 1 cup chocolate chips 1/2 cup coconut bacon Directions: Preheat over to 350 degrees. In a large mixing bowl combine flour with cocoa, baking powder, baking soda, xantham gum, & salt. Set aside. In a separate large bowl or mixer, mix together milk, oil & sugar. Once combined, add sugar and vanilla. Mix in dry ingredients one cupful at a time until completely mixed. Dough should be a little closer to cookie dough than cake batter in texture. Pour in chocolate chips and stir it all together. Spoon batter into lined or greased muffin tins and sprinkle each muffin with about a teaspoon of coconut bacon. Bake muffins for 25-30 minutes, until an inserted toothpick comes out clean. If coconut bacon smells like its burning, watch it closely. We didn't have ANY bacon burn, but oven temps and hot spots vary, so be careful. (If your prefer your coconut bacon lightly cooked or are worried about it burning, wait until muffins are about halfway done before sprinkling with coconut bacon.) Once finished, remove from oven and move muffins to a cooling rack. Makes 12 large, full muffins or 24 smaller, half-filled ones (which is the route we took. I have no will power or portion control on my own...) Muffins keep well in the fridge or on a cool counter for up to a week. Can freeze indefinitely, but coconut bacon may get soggy when defrosting. If you plan on freezing 'em, I recommend adding the bacon as needed later. Enjoy!
Homemade Reese's Chocolate Peanut Butter Eggs
Easter is just days away and happens to coincide with another of my favorite, uhm, holidays. Either way, treats were on the menu for snacking and these Reese's egg knockoffs seemed like the perfect way to celebrate. Creamy, sweet peanut butter filling coated with crunchy dark chocolate- yes, please!
Alex and I (okay, mostly Alex) finished the entire initial batch in just three days and barely shared. Whoops! They were too good. I had forgotten just how much I miss treats like Reese's Peanut Butter Cups sometimes. I mean, the originals are filled with awful amounts of conspicuous sounding sugars and animal additives, but even so, THEY WERE SO DAMN GOOD. Re-creating childhood favorites with vegan & gluten-free ingredients is my favorite, and I'm happy to share these with you guys. I hope they make your Easter, or whenever the heck you eat and/or make them for, DELICIOUS.
Ingredients
Peanut Butter Filling: 1 cup peanut butter (smooth or chunky- your preference!) 1/4 cup maple syrup or agave nectar 1 tablespoon coconut oil 1/4 teaspoon salt 1 tablespoon coconut flour Chocolate Coating: 3/4 cup non-dairy chocolate chips 1/4 cup coconut oil Directions: Peanut Butter Filling: Combine all ingredients in a food processor of high speed blender until combined. Mixture should be thick, but smooth (unless you used chunky peanut butter- then expect some chunks!) Using a scoop, spoon, or your hands, roll dough into 1 inch balls and lay on a non-stick cookie sheet. Then, with either a rolling pin or your palm, slightly flatten the dough and use your fingers to shape the top into an oval egg shape. Pop the cookie sheet into the freezer and let the eggs harden while you prepare the chocolate coating, or until they're solid. Chocolate Coating: While the eggs harden, melt chocolate and oil together in a small bowl over a saucepan of water (double boiler method). Remove frozen eggs from the freezer, dip into chocolate, and place back on the cookie sheet. Once eggs are coated, stick them back in the freezer to set completely. If you have leftover chocolate, double-dip the eggs once frozen again, and repeat for a thicker chocolate coating. Eggs are ready for eating as soon as the chocolate hardens! Makes about 15 eggs, which save well in the fridge or freezer in a sealed container indefinitely. These can get a little melty if left out in the heat for too long (or in warm fingers-eat up!), so be sure to store them in a cool place until they're ready to be enjoyed.
Soft, Chewy, Chunky Peanut Butter Cookies
Tomorrow, March 1st, is National Peanut Butter Lovers Day.
And I love peanut butter. Growing up, my family called me Peanut in reference to my love of all things peanut butter. When Reeses Puffs cereal debuted back in the '90s, it was like they had made a breakfast cereal just for me. I was crazy about the stuff. Now I eat far more nut butter, but far less peanut butter than I used to. Cashew butter, macadamia nut butter, even almond butter- delicious alternatives. But simply nothing can replace good ol' peanut butter in a cookie. I kept the cookies gluten-free by using brown rice flour as a base instead of wheat flour. I added potato starch for moistness, since often times my gluten-free experiments turn out far too dry. The result? A perfectly soft, chewy cookie with just a little crunch. Try dunking 'em in some dairy-free milk. Or just gobble 'em up. But be careful, they make your mouth ooey-gooey if you eat too many...like any good peanut butter cookie should! A note: We used organic chunky peanut butter with no added sugar or oils. Just ground up peanuts. Feel free to use whatever you have on hand, but note that the cookies may be considerably sweeter if you use PB w/ added sugars. But they're cookies, so its all good.
Ingredients:
1 chia or flax egg (1 tablespoon ground chia or flax powder + 3 tablespoons water) 1/2 cup mashed banana 1 cup chunky (or creamy, your choice!) peanut butter 3/4 cup raw sugar 1 teaspoon vanilla 3 tablespoons milk 1/2 teaspoon salt 1/2 teaspoon baking soda 1/2 teaspoon baking powder 1 cup brown rice flour 1 teaspoon potato starch (optional, for moistness)
Instructions:
Preheat oven to 350 degrees. First, make your 'egg' by combining 1 tablespoon ground chia seeds (or flax) and 3 tablespoons water. Let it sit for about 10 minutes to gelatinize; in the meantime, prepare the rest of the dough. In a large mixing bowl, combine mashed banana, peanut butter, sugar, and vanilla. Mix well using a fork or whisk. When chia egg is ready, add that and the milk to the bowl. Mix to combine. Finally, throw in the salt, baking powder, baking soda, flour and potato starch. Mix very well using a fork, a strong wooden spoon, or your hands. Just make sure there are no clumps of dry ingredients anywhere in there and that everything is well mixed. Spoon balls of cookie dough onto a non-stick baking sheet. Slightly flatten with the back of a spoon. Bake at 350 degrees for 10-12 minutes, or until edges firm up and slightly brown. Makes 16-20 cookies. **To make traditional fork lines in the cookies, take them out halfway through baking, and press a fork twice, in opposite directions, into the cookie. Place the baking sheet immediately back into the oven to finish cooking.**
Stored in an airtight container, these chewy, soft delicious cookies will last about a week.
But tomorrow is National Peanut Butter Lovers Day so really, don't hold back. Enjoy! Cinnamon-Raisin Walnut Butter
I don't eat a ton of raw nuts. I love them, they're nutritious and delicious- but I'm gonna let in on a little secret: I'm really more of a nut butter kind of girl. There is nothing like a rounded spoonful of fresh, raw nut butter to give you energy and satisfy your appetite. Plus, I love the convenience of being able to tote around a jar of my favorite nut butter to spread on everything in site. Seriously: everything.
Or, like I said, just enjoy it bite-by-bite.
I've been experimenting lately with different nut butter combinations, since plain almond butter can get a little boring...and I just got a new vitamix! Woot woot!
My favorite (besides the deliciocusness you're lookin' at) has been a creamy, whipped coconut cashew butter. (I'll share that recipe soon, promise.) With the Cinnamon-Raisin Walnut butter, I was aiming to quelch a craving. I woke up one morning just drooling over the idea of a giant waffle breakfast, only (surprise!) I don't actually own a waffle iron. So I set out to do what any food blogger with fancy new equiptment and a few hours to kill does: I made something delicious. It was warm, it was sweet, it was like a spreadable cinnabon waffle topping. With a little natural sweetness added courtesy of the raisins, and just a kick of flavor from the cinnamon, I had a delicious waffle-worthy topping...great on toast, too!
We were able to keep the added nutrients attributed to eating a raw diet by not roasting the walnuts first. Its a great trick for adding oomph to the flavor of your nuts, but I like the nut butter sans roasting. Plus, its even easier to throw together and retains some extra nutrients.
Plus, as a chef, I cook all day long. When I come home, I like shortcuts :)
Ingredients:
3 cups whole, raw walnuts 1/2 cup raw, sulphur-free raisins 1/2-1 tablespoon cinnamon 1 teaspoon vanilla (optional) Directions: Throw everything in a food processor or high-speed blender (like a vitamix). Blend about 4-6 minutes, until the nuts, raisins, and cinnamon are all a uniform, creamy consistency. There will be some very small chunks (walnuts, you know). Those are the best part, enjoy 'em! Store in a glass jar in the pantry or refrigerator for a month, or until you've enjoyed it all! I like it as a spread for toast and waffles, a dip for fruit and crackers, and an add in for oatmeal, smoothies, and anything you can replace 'peanut butter' with. Also, makes great holiday gifts for friends and family, especally those with food allergies!
|
tagsAll  RSS Feed RSS Feed
|