GOOD SAINT
  • CLASSES
  • BLOG
    • HEALTH
    • LIFESTYLE
    • TRAVEL
  • PODCAST
  • SERVICES
  • RECIPES
    • BREAKFAST
    • APPS + SNACKS
    • MAIN DISHES
    • SALADS
    • SOUPS
    • BREADS + SCONES
    • SWEETS + TREATS
    • DIPS + SPREADS
    • DRINK UP
  • RESOURCES
    • BRAND PARTNERS
    • SHOP

DIY Holiday Gifts: Cookies in a Jar!

12/22/2013

3 Comments


DIY Holiday Gifts: Cookies in a Jar!

Picture
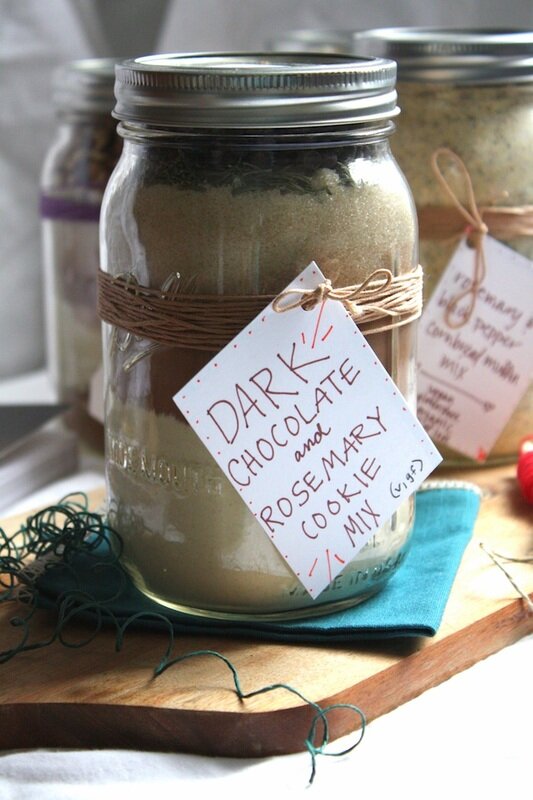
There are just a few days left until Christmas, and I've finally wrapped up all of the gifts. I shopped for a few people, but money is pretty tight this year, so we put most of our efforts into making hand-filled jars of cookie and baking mixes for our friends and family. Its the perfect gift for a foodie, that practical person who only wants things they'll use, and anyone who likes delicious treats. Plus, you probably have most of the ingredients on hand already, anyway.
Picture
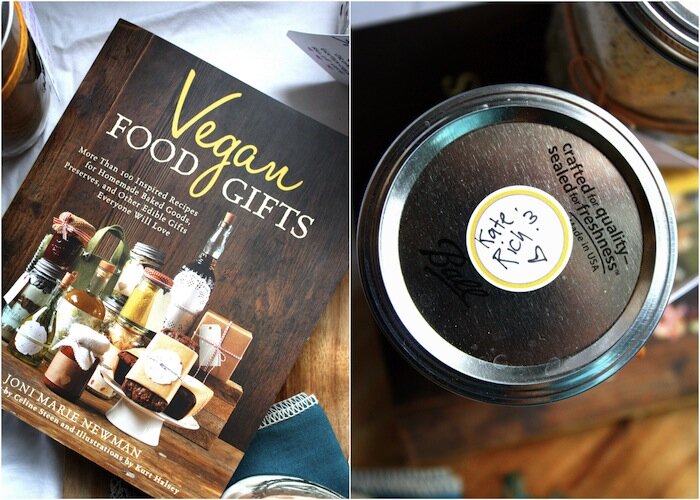
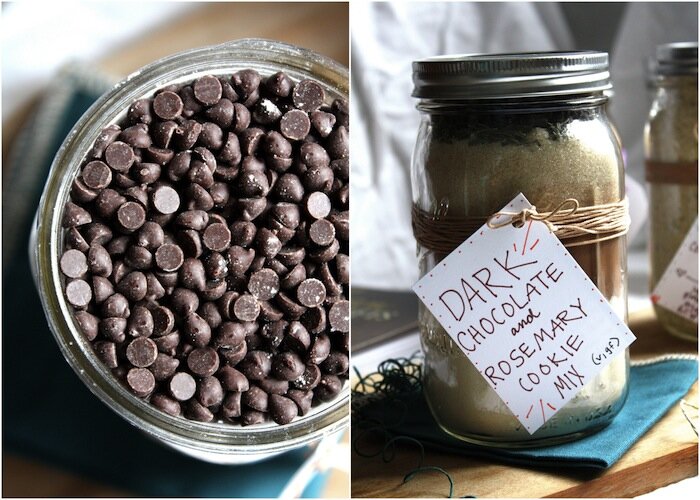
We picked up Vegan Food Gifts by Joni Marie Newman earlier in the year and totally loved all of her cute packaging ideas. Plus, she puts awesome stuff in jars I never would've thought of like TVP taco 'meat', flavored simple syrups, and popcorn toppings. The book was great inspiration and is highly recommended. But since we write our own recipes, we filled our jars with recipes we had tried and tested. Some friends got coconut bacon, some cornbread or pancakes mixes. But our favorite jars to fill were with our Dark Chocolate Rosemary Cookie Mix. They're the perfect, flavorful Holiday cookie- ultra chewy and filled with chocolate! We hand-made our jars cards with the recipe name on the front and instructions on the back. We hand-wrote it all because it was fun and we like coloring, but you could always type up and print out a tag too. We'll include a PDF at the bottom where you can print the tutorial and copy and paste your tags from there, if you wish. 
Picture
You'll need:
1 quart sized glass jar (per cookie mix)2 cups all purpose gluten free flour mix
(We used 1 cup teff flour+1 cup almond flour- our favorite blend. Whole wheat works here, too!)
2/3 cup cocoa powder
1 tablespoon + 1 teaspoon ground flax seeds
1 teaspoon baking soda
1/2 teaspoon xantham gum
1/2 teaspoon salt
1 1/2 cups sugar
2 teaspoons dried, chopped rosemary
(if using fresh rosemary, substitute 2 tablespoons) 
3/4 cup dark chocolate chips or chopped bar chocolate

Layer items in a quart sized jar in the order listed, beginning with the flour and finishing with the chocolate chips.Once the jar is filled, cover with a lid and close tightly. Decorate with string, ribbon, bows, and anything else you have on hand. We used leftover card stock to make tags, but you can use pre-made labels, stickers, or print your own if you prefer. Cookie Jar mixes last indefinitely, but are best used within a few months of gifting. This recipe is vegan, and when made with GF fours, gluten-free as well.

On an included tag, write the instructions as follows:
Preheat oven to 350 degrees. In a large mixing bowl, combine jar of cookie mix 1/2 cup softened coconut or vegetable oil, 1/2 cup non-dairy milk, and 2 teaspoons vanilla extract. Mix well, until a soft dough forms. Scoop 1 inch balls of dough onto a greased cookie sheet and bake for 10-12 minutes, until edges crisp and tops being to crack. Makes 20 cookies. Happy Holidays!
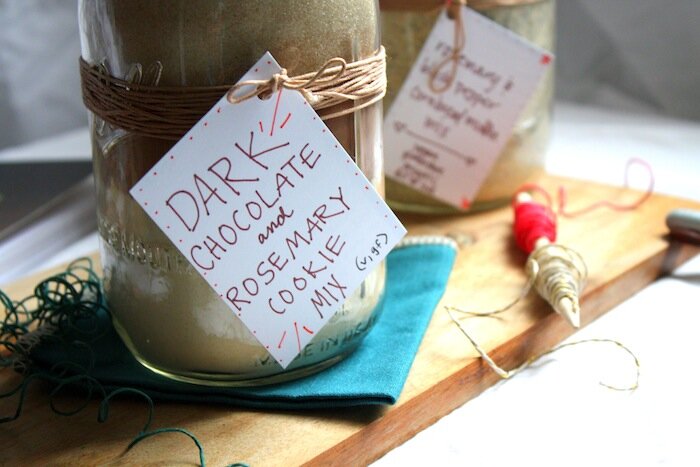
print tutorial & instructions
Picture
3 Comments

DIY 2-Ingredient Christmas Ornaments!

12/3/2013

8 Comments


DIY 2-Ingredient Christmas Ornaments!

Picture
When I was a little girl, my Mom was all about doing simple, kid-friendly DIY projects like this. She introduced me to the 2-ingredient ornament project, and we've been doing it for years. The recipe is pretty standard, and you probably made these way back in elementary school, yourself. But now you're an adult, and you get to totally wow a kid of your own (or just one you like) by being the coolest and knowing how to make your own fancy Christmas Ornaments. I love this craft because its quick to throw together, easily rolled out and cut, and it makes the house smell amazing! You have enough other things to do over the holidays- keep the extra projects fun & simple.
Picture
I enlisted the help of my adorably pregnant friend, Maggie, to help me. She's got the perfect round belly for balancing the mixing bowl, so I pretty much made her do all the work (kidding!). But in reality, she's slowly prepping the house for the arrival of that sweet little bundle and pre-proofing the Christmas tree is just one less thing she'll have to do later. These ornaments won't break very easily and are edible, though I wouldn't recommend it.
 (Anyone ever heard of the cinnamon challenge? 'Nuff said.)
Picture
I found a pack of single alphabet letters at Target for $1, and we punched little holes in the tops to attach to different stars. They were perfect for personalizing ornaments. Or, use the letters in succession to spell something out. We liked "XMAS", "PEACE", and "JOY", because there were no double letters, but get creative with it.
After the letters, we paid $2 for string, also at Target, and spent about $8 on the cinnamon and applesauce at the grocery store. A grand total of $11 to complete the project from start to finish.
 And I would highly recommend buying the cheap store brand version of the cinnamon and applesauce; no need for organic here, there'll be no consumption and certainly no need to spend extra!
Picture
You'll need:
1 cup applesauce
1 1/4 cups ground cinnamon

rolling pin
cookie cutters or free-handing tools
a toothpick or chopstick
string or ribbon, for hanging
decorative letters (optional)

DIY:
In a large mixing bowl, fork together the cinnamon and applesauce until completely combined, forming a cookie-dough like texture. If the dough is too sticky, add a little extra cinnamon. You could also do this in a mixer, but it wasn't hard work mixing it by hand. I made the pregnant lady do it, remember? ;) 
Once the batter is mixed, form it into a ball, sprinkle a clean, flat surface like a counter or cutting board with cinnamon, and roll the dough out. Roll until dough is about 1/4 thick, then use cookie cutters to cut out shapes. We used a 3-inch star cookie cutter and a gingerbread man cookie cutter. Once shapes have been cut, use the toothpick or chopstick to poke a small hole completely through at some place on the ornament. We mostly made holes at the top of the ornaments, but on some of the stars we made holes in the middle. This is where the string will go.
Once all the dough has been cut, lay the shapes onto a parchment-lined cookie sheet.  We got about 15 or 16 ornaments from a single batch.
Bake ornaments at 200 degrees for 1.5-2 hours, until ornaments have hardened completely, or leave the cookie sheet in a warm, dry place and let them dry out over the next few days.
Once the ornaments have hardened, they're finished! Loop some string through the holes, add decorative letters if you're doing so, and hang 'em on the tree. They make the house smell amazing and they're the perfect, easy DIY to include the kids in. They'll last until next year if you pack them away, but its so easy- why not just make more next year? Enjoy!
Picture
8 Comments

A Thanksgiving DIY: Clove-Spiked Apples & video- 'kids say the vegan-est things!'

11/16/2013

0 Comments


A Thanksgiving DIY: Clove-Spiked Apples 
& video- 'kids say the vegan-est things!'

Picture
Thanksgiving is 12 days away. Unlike in past years where I show up wildly unprepared, this year I'm playing host-and I googled, pinned, and planned my little heart out. We have a barrage of dishes to prepare on the big day, but I want to get as much done beforehand as I can. That includes the decorations.
Now don't get me wrong, going simple with a few candles and a cranberry garland would still be lovely, but I wanted to get classy and adult-like this year and do something creative. 
We needed a simple project with big results. 
And preferably one we could do with my sweet cousins who were visiting.
We picked some late-season apples from the orchard beside our house, dug out the cloves, and got to work.
Picture
We opted for a spin on an old classic: cloved-spiked oranges. Alex's Mom owns and runs an adorable French antique shop back in California, and her holiday decorations are the gold-standard by which we judge our own. She has an excellent eye and gets pretty creative with the table settings. 
We think our locally collected, eco-friendly ornaments would make the cut at her holiday table.
Picture
We loved that this was a project we could include our little friends in. Small hands are perfect for pushing those little cloves into soft apples, and just getting the apples themselves became somewhat of an adventure. We were lucky enough to be able to cross the field and pick some very late season apples from the trees and ground on a nearby orchard, keeping our costs and environmental impact low. You can always buy a cheap bag of apples at the grocery store, the softer the better, just not TOO soft- they need to last 'til the big day! 
No apples? Get creative with pears or grapefruit, or get classic with oranges.
Picture
First things first: decide what your message will be. The girls and I brainstormed words and phrases that made of think of Thanksgiving. Squash, Food, Pilgrims, and Family all made the list, but we settled on a simple, smart saying: 'give thanks'. We used 10 apples to spell it out, and used a couple extras as testers and mistakes. Our format for 'materials needed' will be set up to write the same message we did. If you want to write something different, simply increase or decrease your apples and cloves amount. The letters we traced were about 2 inches in height.

Materials Needed:
1/4 to a 1/2 cup whole cloves (we used closer to a 1/4 cup)
10 apples, plus a few extras for mistakes
a permanent marker
Picture
Method:
Wash and dry the apples to remove any dirt, or in our case, spiderwebs from the grass. Use a permanant marker to draw letters on the apples. We aimed for our letters to all be about 2 inches tall in uppercase lettering, so they would be uniform. Feel free to use fancy lettering if you can freehand it. Just remember- kids work best in straight lines. Once your letters are ready, push cloves into the lines, small flat end first. Push the clove gently, grasping more by the sides than the top, until it is completely pushed in and the ball of the clove is flush with the skin of the fruit. The tops can break off if too much pressure is applied directly to the top when pushing down- so be careful! A few broken cloves is fine, but overall the goal is to include the whole thing. 
Once all the letters have been traced over with cloves use a towel or rag to wipe any dripping juices from the apple.
 Arrange the apples onto a large plate or serving platter, or spread them around the celebratory table. They look great against wood and shades of cream and they'd be really cute hung from the ceiling!
Picture
We arranged our finished apples on a large white serving dish with accents of pine boughs and pinecones. The clove smell is surprisingly pleasant; you can smell a hint of fall all through the kitchen without being overwhelmed. The apples should last up to about a week once cloved. Remember, since you poked holes in the apples, they will turn more quickly. To slow this process store them in a cool place until they're table ready.
Picture
And now the video!  My two adorable cousins, Natalie (7) and Emma (6), love to talk. Especially on camera, where they can watch themselves. Its pretty cute, watching them preform for the camera. We started talking to them about veganism on camera and kept the cutest bits for you. Enjoy!
0 Comments

    Categories

    All
    2013 Holiday Wish List
    2014-holiday-gift-guide
    2015 Holiday Wish List
    Amsterdam
    Anxiety
    App
    Bachelorette
    Bergen Tote
    Big Sur
    Birthday
    California
    Camping
    Canopy Verde
    Cinco De Mayo
    Cleanse
    Cookbooks
    Crystals
    Decorating
    D.I.Y. Projects
    Donuts
    Eating-out-in-maine
    Edibles
    Energy
    Events
    Expo West
    Family
    Featured On
    Fitness & Workouts
    Food
    Food As Medicine
    Fullerton
    Gifts
    Giveaways
    Guest Posts
    Haircare
    Hair Washing
    Hawaii
    Healing
    Health
    Hiking
    Holidays
    Holland
    Home Care
    Homestyle Vegan Cookbook
    Honeymoon
    Infusing
    Instagram
    Jet Boil
    Juice
    Lightroom Presets
    Listen
    Maine
    Mammoth
    Marijuana
    Matcha
    Meal Prep
    Medical Marijuana
    Oktoberfest
    Our Wedding Video
    Palm Springs
    Party Planning
    Pet Food
    Pets
    Photo Editing
    Photo Presets
    PlanetBox
    Podcast
    Pop-up
    Products
    Products We Love
    Projects
    Pumpkin
    Real Good Podcast
    Recipe Round Up
    Recipe Round-up
    Recipes
    Reviews
    Reynauds
    Road Trip
    Self Care
    Self-care
    Skiing
    Sleep
    Squeeze Pods
    Taco Cleanse
    Tacolepsy
    Tacos
    Thanksgiving
    The GOOD Fest
    The Maine Move
    Travel
    Travel Diary
    Ultimatevegancookbook
    Vegan Food
    Vegan Wedding
    Video
    Wedding
    Wedding Planning
    Weekend Things
    Wellness
    Yoga
    Zoku

    RSS Feed

G O O D  S A I N T

© 2019, Good Saint, All Rights Reserved.

    S T A Y  F R E S H  +  S U B S C R I B E

Subscribe
  • CLASSES
  • BLOG
    • HEALTH
    • LIFESTYLE
    • TRAVEL
  • PODCAST
  • SERVICES
  • RECIPES
    • BREAKFAST
    • APPS + SNACKS
    • MAIN DISHES
    • SALADS
    • SOUPS
    • BREADS + SCONES
    • SWEETS + TREATS
    • DIPS + SPREADS
    • DRINK UP
  • RESOURCES
    • BRAND PARTNERS
    • SHOP