Lemon Sugar Cookie Cake
My favorite way to celebrate any holiday is with FOOD, and this 4th of July I wanted to crack into some of that summer nostalgia from when I was a kid with one of my favorite summertime treats! I finally called Mom to get the recipe she always used to make for us when we were kids; She would always make a giant cookie layer base, slather it in frosting and cover it in fresh fruit. Usually a summertime snack for it's portability and use of that fresh, seasonal fruit I’ve been craving this Lemon Sugar Cookie Cake ever since I made it a few weeks ago! I simplified and slightly health-ified her original recipe and got something I think is even better. Sorry Mom!
I shared the simplified recipe on IG when I made it, but wanted to share an easier-to-read, printable version for all my regular readers here, too. It really is the perfect, easy, crowd pleasing summer dessert! Would love to hear your thoughts if you try it - and my Mama would, too! Scroll on down for the recipe and some notes before you bake, too. Enjoy, babes!
INGREDIENTS:
COOKIE BASE RECIPE 2 1/4 cups AP flour 1/2 teaspoon baking soda 1/2 teaspoon baking powder 1/2 teaspoon salt 3/4 cup (non-dairy) butter 1/2 cup sugar 1/2 cup monk fruit sweetener* 1 egg (vegan if you prefer) 1 teaspoon vanilla 2 tablespoons lemon juice Zest of 1 lemon Strawberries, blueberries + raspberries for topping CREAM CHEESE FROSTING 8 oz. plain, non-dairy cream cheese 2-3 tablespoons lemon juice Zest of half a lemon 1 teaspoon of vanilla extract Maple syrup and/or monkfruit sweetener to taste DIRECTIONS: Preheat your oven to 375 degrees and line a round pan (or baking sheet) with parchment paper. In a large sized bowl combine the flour, baking soda, baking powder, and salt together. In a smaller, separate bowl combine the sugars, egg, vanilla, lemon juice + lemon zest. Add the wet ingredients to the dry, mixing completely. Once the dough has formed, roll it evenly into a round shape on the pan, about 1/4-1/2 inch thick. Bake for 10 minutes or until edges begin to brown, then let cool completely. While the cookie layer cools, mix the frosting and chop up the fruit. Once cool, frost the cookie like a pizza and top with fruit. Enjoy babes! NOTES: You can use real butter, eggs and milk here if you prefer. I adapted this recipe from my Mom's original which did in fact use the original versions with great success. Leftovers last up to 2 days on the counter and up to 4 days in the fridge, but - like most things in life - is best enjoyed fresh. *You can also sub the monk fruit sweetener for stevia or more real sugar.
3 Comments
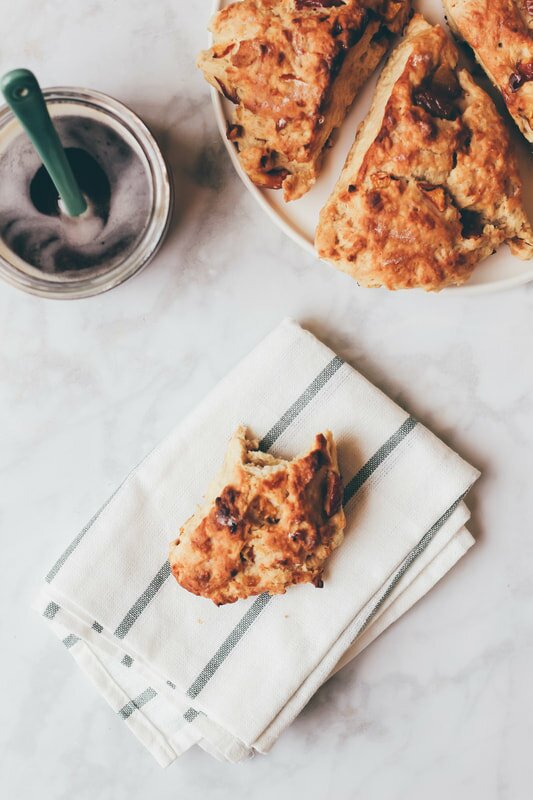
Fresh Cherry Scones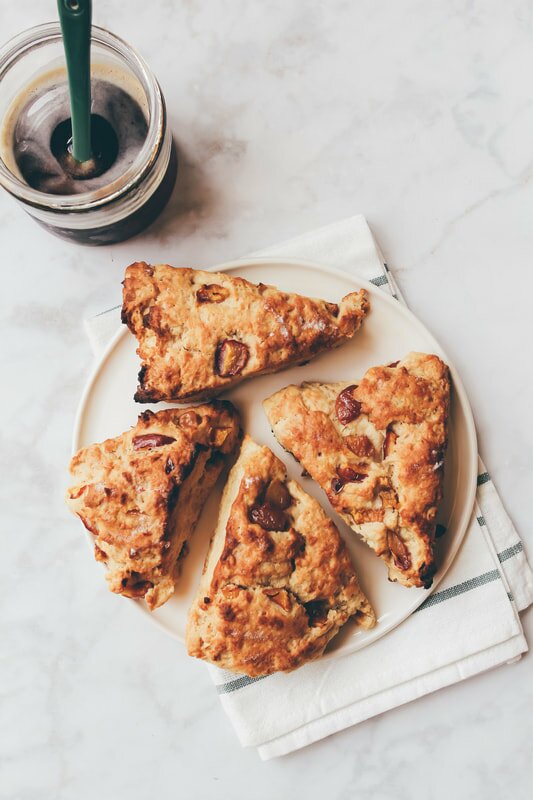
Guys, I love breakfast. It is my FAVORITE meal of the day. I love it sweet, savory, salty, sticky, soupy - any which way, I'm here for it! I'm also a HUGE fan of fresh cherries. As soon as they're in season I make my way to my farmer's markets and buy them up by the slightly overpriced pound. It's my favorite time of the year! So I combined my favorite meal with my favorite season and got these sweet, delicate, delicious beauties!
They're light and sweet but full of flavor and just the right amount of 'scone dry' - perfect alongside a glass of milk or a cup of tea. I kept them lower sugar and you can keep them even lower in sugar by skipping the maple drizzle altogether - your choice! Best of all, this scone recipe is super versatile so you can mix it up by adding in different fruits or flours and will always have success. I love it! I've thrown in raspberries, blueberries, even peaches, and they always come out totally brunch- and instagram- worthy.
If you love a good scone (and who doesn't?) then this recipe is for you. Just the right amount of moist and 'scone' dry, they whip up super easily and are easily made when you're ready to eat them but also last well overnight so you can bake ahead and sleep in before brunch, no stress. What're we doing still chatting? You've got some baking to do, babes!
INGREDIENTS
Cherry Scones 2 cups AP or whole wheat pastry flour 1 tablespoon baking powder 1/2 teaspoon ginger 1/2 teaspoon salt 6 tablespoons cold (vegan) butter 3/4 cup mashed banana or 2 eggs 1/4 cup almond milk 2 tablespoons maple syrup 1 teaspoon vanilla 1 heaping cup pitted and chopped fresh cherries Glaze 1/4 cup maple syrup (OPTIONAL - or check out our other scones glaze recipes below) DIRECTIONS Preheat the oven to 425ºF. Line a baking sheet with parchment paper. To make the scones, in a large mixing bowl, whisk together the flour, baking powder, ginger and salt. Using a pastry cutter or fork, cut in the cold vegan butter until small crumbs form. Pour in the mashed banana (or eggs), almond milk, maple syrup and vanilla and stir together with wooden spoon until a sticky dough forms. Fold in the fruit gently. Turn the dough onto a lightly floured surface and form a 1-inch thick disk. Cut the disk into 8 equal scone wedges, like a pizza. Place the scones on the prepared baking sheet and bake for 14-16 minutes, until golden. Place the scones on a wire rack to cool. While they cool, prepare the maple glaze by beating the maple syrup until it begins to aerate and get a little creamy. Drizzle the glaze over completely cooled scones and enjoy! NOTES Makes 8 scones. Leftovers save well sealed in an airtight container on the counter for up to 3 days. Longer than that, save frozen and heat in the toaster oven when ready to enjoy. Check out other scone recipes here: Vanilla Glazed Matcha Scones, Mini Chocolate Chunk Scones. Strawberry Basil Hand Pies
These are maybe one of the yummiest things I’ve ever made. They take a little work, but they are SO SO worth it. Basically a healthier, adult-friendly pop tart, these sweet little guys are packed with fruit and drizzled in sweet vanilla glaze. They’re buttery, rich, and taste WAY BETTER than store-bought! That I can promise. These babes first debuted in my Homestyle Vegan Cookbook two years ago, but they've become a Sunday morning staple in our house ever since! They're easy to whip up, and are a total crowd pleaser. Who doesn't love pop tarts?!
My second cookbook, a collaborative effort titled 'Vegan Bible' will be out later this year, in October. Lots more fun new recipes coming your way! In the meantime, I thought I'd revisit one of my favorites in case you haven't gotten your copy of the cookbook yet. Seriously cannot wait to hear what you guys think when you try them. And know that if strawberries and basil together isn't your favorite flavor combo, you can always ditch the basil, sub out the strawberries for another fruit, or come up with your own flavor combination entirely! No matter what you decide, they're gonna be good. Let’s bake!
INGREDIENTS
Hand Pies: 1 heaping cup (210 g) fresh or frozen strawberries, sliced 1 tablespoon (15 ml) water (ONLY IF USING FRESH BERRIES) 1 tablespoon (3 g) fresh basil, finely chopped 1 teaspoon sugar 1 teaspoon cornstarch 2 cups (315 g) whole wheat pastry flour 1/8th teaspoon salt 2/3 cup (150 g) cold vegan butter 2-4 tablespoons (30-60 ml) ice water Vanilla Glaze: 6 tablespoons (48 g) powdered sugar 1/4 teaspoon vanilla 1-3 teaspoons (5-15 ml) unsweetened almond milk DIRECTIONS Preheat the oven to 375º. Line a baking sheet with parchment paper. Place the strawberries, water (ONLY IF USING FRESH BERRIES), basil, sugar and cornstarch in a small saucepan over medium heat. Cook for 5-8 minutes, stirring occasionally and smashing down the fruit as it cooks. Remove from heat and set aside. In a large bowl, mix together the flour and salt. Cut in the cold butter with a fork or pastry cutter until small crumbs form. Drizzle ice water over the mixture about a tablespoon at a time, mixing with a wooden spoon, until a dough begins to form. The dough should be moist but not sticky. Turn the dough onto a lightly floured surface and shape it into a disc. Use a rolling pin to roll the dough into a large, 1/4 in. thick rectangle. Use a sheet of plastic wrap over the dough to prevent cracking as you roll it out, if needed. Cut the rectangle into 12 equal squares (or rectangles) and move half of them to the lined baking sheet. Scoop about 1 tablespoon of filling onto the 6 laid squares, leaving about 1/4 inch of space around the edge. Using your finger, dab a bit of water around the edges to help seal them. Top each square with its matching other half, pressing around the edges with a fork to seal them. Use a toothpick to poke a poke a few small holes in the top, then bake for 20-25 minutes, or until golden brown. While they cook, prepare the glaze by mixing together the powdered sugar, vanilla and unsweetened almond milk. When the hand pies are finished, let them cool on a wire rack for 5-10 minutes before topping with glaze. TIPS Makes 6 hand pies. Leftover hand pies taste great cooled - no need for reheating! You can sub in any berries you prefer here and if basil isn’t for you, go ahead and leave it out. Prefer a lower sugar option? Ditch the glaze! Wild Blueberry Overnight Oats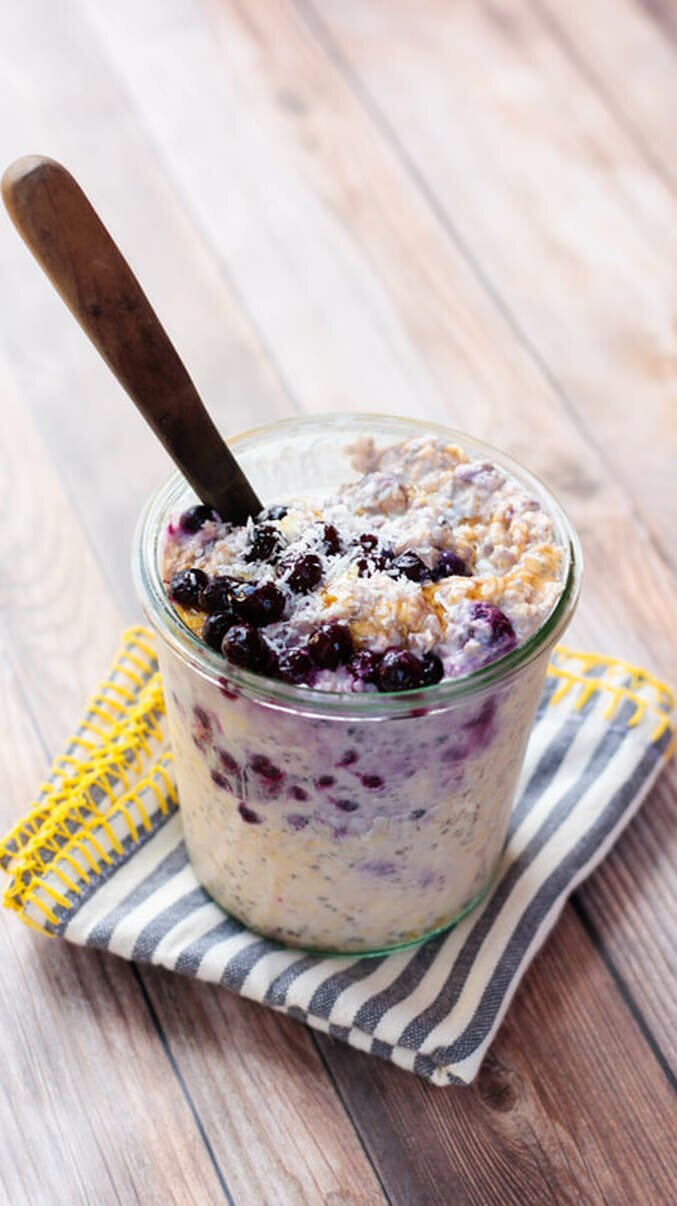
This is a super simple recipe, but sometimes those are the best recipes. I get into food moods all the time, and lately I've been super busy and hooked on easy, on-the-go breakfasts and lunches that pack some real nutrition and can keep me filled up when I have to teach back to back classes with no snack time in between. Being a Maine girl at heart my berries of choice were of the small, tart, and wild variety - but you can sub in whatever fruit or berries you prefer here, instead. The addition of coconut butter adds healthy, hearty, good-for-you fats that'll help keep you moving and the chia seeds add just a little extra texture (and a whole lotta omegas!) to the mix. All you'll need is a few simple ingredients that you probably already have on hand, a glass jar, and a serious appetite. Let's eat!
Before you make your way down to the recipe, a quick reminder that I'm currently teaching 4x a week at CorePower Yoga in Brea, if you're looking to get your sweat on - and soon will have my own yoga vids for you guys to access on my YouTube whenever you need to flow! Send me your flow requests and I'll try to make them happen. Alright - keep scrolling! 
INGREDIENTS:
1/2 cup almond milk 2 teaspoons chia seeds 1 tablespoon coconut butter (or nut butter of choice) 1 tablespoons maple syrup 1/2 cup (GF) rolled oats 1/2 - 1 cup wild blueberries (fresh or frozen) DIRECTIONS: In a mason jar or small bowl, combine the almond milk, chia seeds, coconut butter, and maple syrup and stir or shake to combine. The coconut butter doesn't need to be completely mixed with the almond milk - and you'll get swirls of coconut butter to enjoy the next day! Add the oats and blueberries and stir or shake a few more times. Make sure all of the oats are saturated in the wet mixture. Cover and place in the fridge overnight or for at least 6 hours to set. When ready, simply pull out the oats, give 'em a stir and enjoy! You can add extra fruit or toppings as desired. Enjoy! NOTES: Leftovers last in the fridge up to 2 days, but are best enjoyed within 24 hours. Serves 1, but recipe is easily doubled. 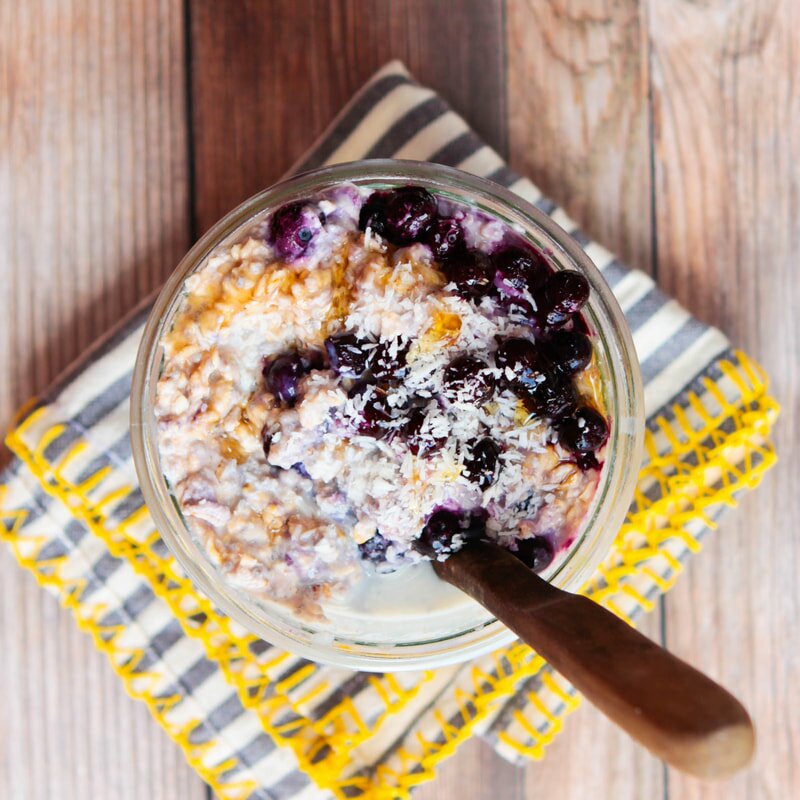
Healthy Matcha Waffles
I was always a pancakes-kind-of-girl growing up. Every Sunday morning my family would pile into the car and drive to our local diner, Brownies, for some really greasy, disgustingly delicious brunch food. Picture the most quintessential diner heart attack food - now you're there! Haha. I would order a stack of flapjacks with butter and syrup and always got an extra side of syrup. I usually also got a side of corned been hash or bacon, and literally could almost finish it all - even at 10 years old. Yikes! These days, my kind of brunch usually involves much more of the color 'green', at least a few vegetables, and usually a mimosa or two. But sometimes, you just want to go back and have those childhood favorites - without the guilt or greasy food hangover!
These days I prefer the snap of a crispy waffle more a pile of soggy pancakes, and lucky for me we just got a new waffle iron for Christmas! It was time to test it out and make some crispy waffles to satisfy my cravings. I didn't just want any old waffles, so I used my sugar-free protein batter base and added a pop of color and antioxidants with the addition of matcha powder! The matcha powder turned them a lovely shade of green, too. Might have to whip these back out in time for St. Patty's day this year!
I can promise you after rounds and rounds of testing - nothing binds together the batter AND gives the cooked waffles a crispy edge like adding in some protein powder. Plus, all of a sudden my waffles carry a protein content of over 20 grams. BONUS! Now they're not only a great breakfast addition, but the perfect post-workout snack, too. The freeze and reheat really well, and I've taken to making a double or triple batch and freezing the leftovers for easy grab-and-go breakfasts. Let's get out the waffle iron and get cooking!
INGREDIENTS
1 cup all-purpose or whole wheat flour (both work well! For GF use 1/2 c almond + 1/2 c Teff flour) 1/4 cup vegan protein powder* 2 tablespoons matcha powder 2 teaspoons baking powder 1/2 teaspoon salt 1 1/3 cups water 2-3 drops vanilla stevia (optional, for a sweeter waffle) 1 tablespoon oil DIRECTIONS In a medium mixing bowl combine the flour, protein powder, baking powder and salt. Create a well in the center of the mixture, and pout into it the water, stevia and oil. Whisk the mixture together until the batter just comes together. Its okay if there are a few lumps! Do not mix until smooth - unless you want flat, chewy waffles. Ick! Let the mixture set for about 5-10 minutes, let scoop the appropriate amount of batter into your waffle iron and let it cook up until the waffle is perfectly fluffy with crispy edges. Keep it going until all your waffles are cooked up. Enjoy! (I like mine with butter and syrup or a bit of peanut butter and fruit!) Leftovers freeze and reheat really well - I highly recommend making a double batch and sticking some in the freezer for easy toaster breakfasts later! NOTES Makes 2-4 waffles, depending on the size of your waffle iron. *I use Sprouts brand Vegan Vanilla Protein Powder. It's pea protein based and has just 1 g of sugar per serving, which is how I am able to keep the sugar in these waffles nearly nonexistent. Use your favorite protein here, but account for textural differences if it is not pea protein. I usually use softened coconut oil here, but you can sub in any flavorless oil you like. PB+J SMOOTHIE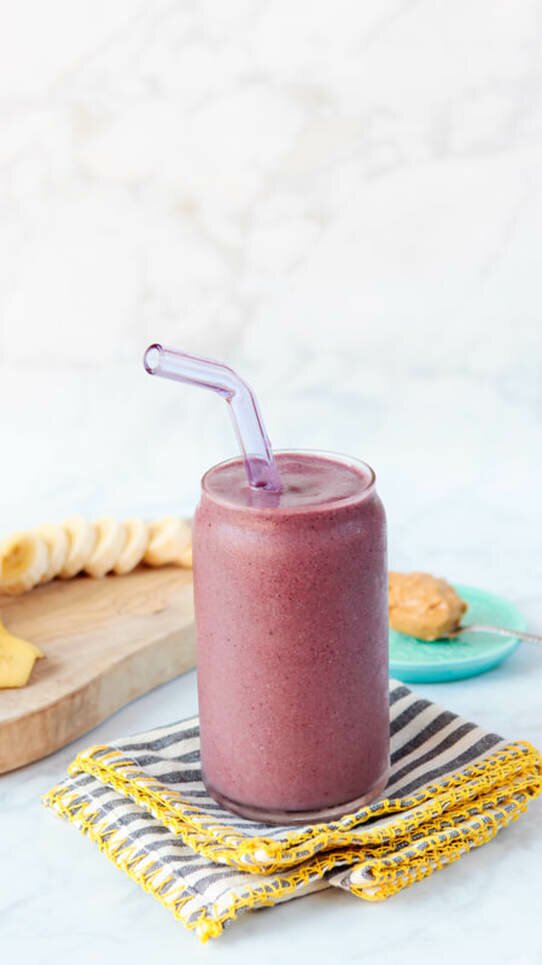
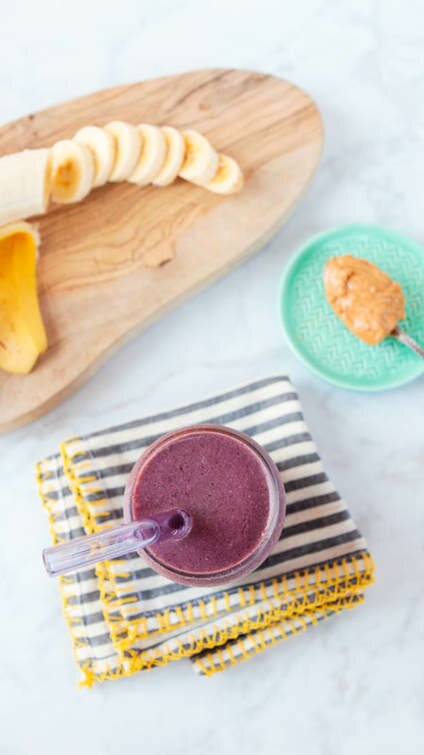
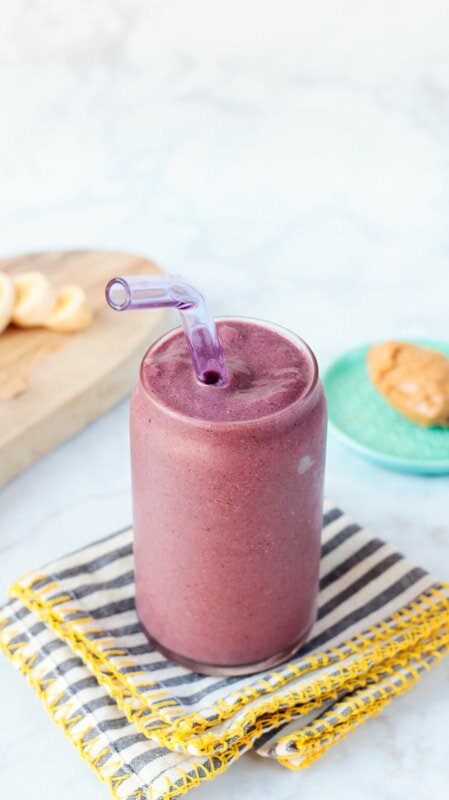
Good morning friends! I'm a serious sucker for smoothies, and a well-known regular at the Whole Foods juice bar. I even recreated one of my favorite smoothies from them - the Green + Glowing - and posted it here because I needed to stop spending $8 a day on a smoothie I could make myself. Well we're back! Kind of. This isn't a smoothie I found at Whole Foods, but I'm sure they've got one like it. I wouldn't know, because until recently I refused to have nut butter in a smoothie. I don't know why! Actually - I hate the chocolate and fruit combination, and I think I just assumed that since chocolate and peanut go so WELL together, that peanut butter and fruit would also be awful. Except deep down in my brain I knew that couldn't be true - because otherwise I wouldn't have eaten a PB+J nearly everyday from ages 4-8!
One morning recently I went to whip up my normal morning smoothie and realized I was out of two of the main ingredients - frozen mango and frozen pineapple. I emptied the bags the day before and had totally forgotten to replace them. Whoops! Luckily, I had seen frozen strawberries and blueberries in the freezer, so I grabbed them instead. I kept the smoothie base the same but after whipping it all together it was just missing something. It was too light and needed some thickness. I almost threw in some coconut in and then thought - welllll, I do have this mostly empty jar of peanut butter...should I try it? I'm so glad I did! It gave the smoothie more thickness, protein, and a ton of great flavor! This might be my new go-to morning fuel. It's packed with protein - seriously, kids will love it. Let's blend, babes!
INGREDIENTS
1 1/2 cups coconut water or unsweetened almond milk 1 frozen banana 1 cup frozen strawberries 1/2 cup frozen blueberries 1-2 cups fresh spinach 1 tablespoon peanut butter 1 tablespoon ground flax 1 tablespoon psyllium husk 1-3 teaspoons MCT coconut oil (optional - just what I add into mine for some healthy fats) DIRECTIONS Toss it all in a high-speed blender (we use a Vitamix) and blend until it is smoooooooth. Then pour it in a large glass and enjoy! NOTES Serves 2. Sub in what you need or what you’ve got to suit your preferences. Fresh fruit works great, but you may need to add some ice to get it nice and creamy. If you use coconut water, the smoothie will be a bit lighter, whereas using almond milk will result in a thicker, creamier smoothie. I like them both, but I actually prefer it with coconut water! 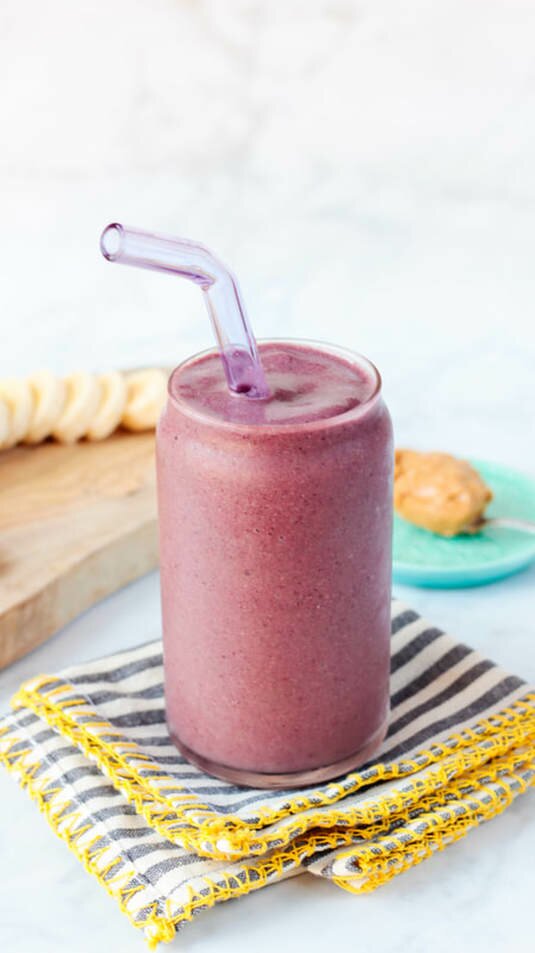
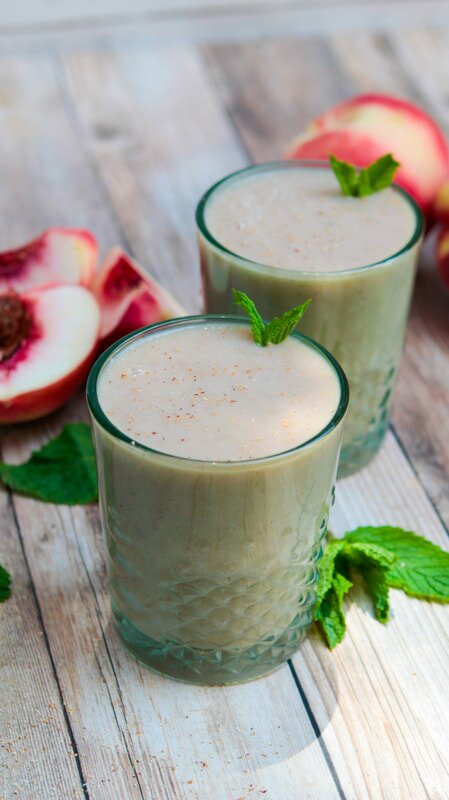
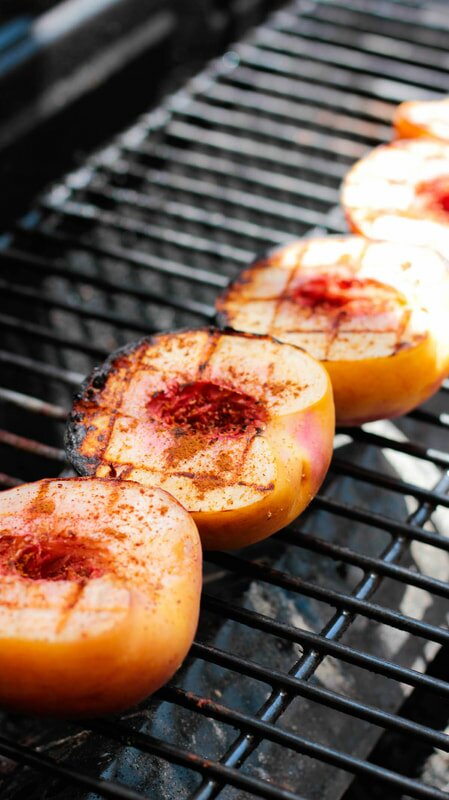
GRILLED PEACH SUMMER SMOOTHIE
I can't believe how quickly summer's gone by! It's nearly over and I'm just not ready, you feel me? I need more beach days, more cozy nights under the stars, more s'mores, more tan lines. I've been so busy with yoga teacher training and transferring the new site over (hope you dig it!) the last few weeks I just haven't enjoyed summer enough! I'd love to get to the beach this afternoon, but today the best it's getting is this sweet, simple summer sipper - and that's totally okay with me. If you haven't grilled peaches before friends, you are missing out. They're one of my summer must-haves! As soon as fresh, fuzzy peaches make their way into our farmers markets I buy as many as I can get my hands on, halve them up, and throw 'em on the grill! They're great just like that - don't get me wrong - but if you wanna really step up your summer game and enjoy grilled peaches for breakfast, too, then you've just gotta start making smoothies with them. And with So Delicious' new Peach Coconut Milk Yogurt you can make the peachiest, creamiest smoothies! I love this yogurt. It's not my everyday go-to because it is a little sweeter, but that's why it's perfect here. A little more decadent, rich in flavor, and with flecks of real peach inside - it takes this smoothie from good to delicious. You're going to love it! And seriously, grilling peaches couldn't be easier. It takes just a few minutes on each side and will make you question ever eating a raw peach again. The ingredients are simple but you'd better hurry - summer's almost over! Find out more about So Delicious Dairy-Free Products + grab a $1 OFF coupon for your yogurt here!
INGREDIENTS
3 fresh peaches, halved with pits removed 1/4 teaspoon fresh ground nutmeg 1/4 teaspoon ground cinnamon 1/2 cup So Delicious Peach Coconut Milk Yogurt 1/2 cup cashew milk (or non-dairy milk of your choice) 1 heaping cup ice (option to sub in a frozen banana or some frozen, steamed sweet potato here for creaminess) 1 tablespoon psyllium husk fresh mint, for garnish DIRECTIONS Sprinkle your fresh, halved peaches with the nutmeg and cinnamon and grill them over medium heat 3-4 minutes per side, or until fork tender with visible grill marks. Place your grilled peaches, So Delicious Coconut Milk Yogurt, cashew milk, and ice or banana into the blender and blend it all up until it's nice and creamy. Pour it into 1 large or 1 smaller glasses and drink it up. Enjoy! NOTES A full container of So Delicious Peach Coconut Milk Yogurt is jusssst over 1/2 cup. Use it all or take a bite and pour the rest in the blender! You can use white or yellow peaches here - your choice! Psyllium husk is great for digestion but also totally optional here. Green + Glowing Copycat Smoothie
I'm gonna go ahead and be honest - this recipe is a total RIP OFF! Even the name. But at least I'm being honest about it, right?! Ever since I've started ordering this smoothie at my local Whole Foods juice bar, I knew I could recreate it at home for much cheaper. So I totally creeped on the juice bar girl and chatted her up a bit to confirm a few ingredients and I've finally nailed it at home. If you've been watching my instagram stories, you probably already knew this. I've been working out a lot lately and loving rehydrating after a super sweat sesh with a big, nutrient-packed green smoothie. And this smoothie is the ultimate in green smoothies. It's not at all bitter, full of good-for-you ingredients and nutrients, great for digestion and WAY freaking cheaper to make at home than it is to order it at WF. Seriously - you can get all of the basic ingredients in this smoothie for the price of a large one at the juice bar. Go figure! Plus, no waiting in line AND you get to drink everything in the blender, not just what fits in the cup. It couldn't be easier to whip up, and it's a smoothie that everyone will love. It's fruity without tasting too 'green' - the spinach flavor totally fades - and all you're left with is the reminder from the bright green hue just how many greens you're squeezing in. This smoothie's so good, I bet it'll make into your regular rotation too. Cheers, babes!
INGREDIENTS
1 1/2 cups coconut water or unsweetened almond milk 1 frozen banana 1-2 cups fresh spinach 1 tablespoon ground flax 1 tablespoon psyllium husk 1 cup frozen mango 1/2 cup frozen pineapple 1-3 teaspoons MCT coconut oil (optional - just what I add into mine for some healthy fats) 1-2 tablespoons shredded coconut (optional - for more coconut flavor) DIRECTIONS Toss it all in a high-speed blender (we use a Vitamix) and blend until it is smoooooooth. Then pour it in a large glass and enjoy! NOTES Serves 2. Sub in what you need or what you’ve got to suit your preferences. If you use coconut water, the smoothie will be a bit lighter, whereas using almond milk will result in a thicker, creamier smoothie. I like them both, but I actually prefer it with coconut water! Strawberry Chia Pudding Parfait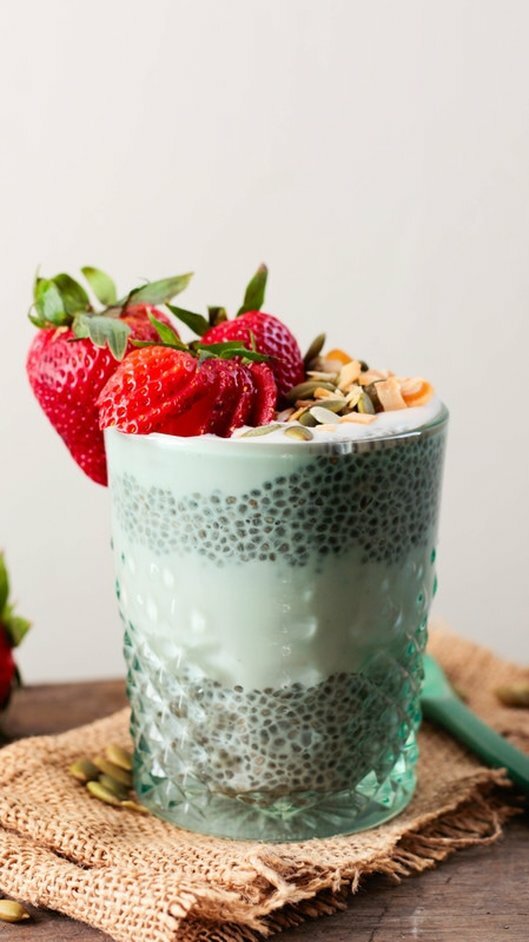
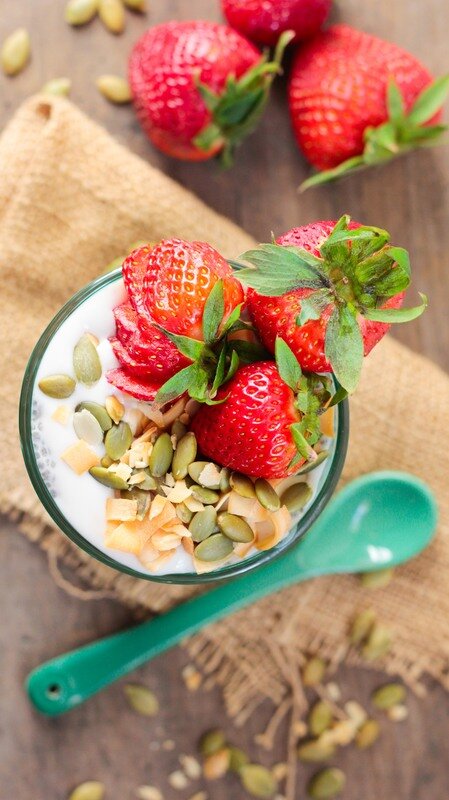
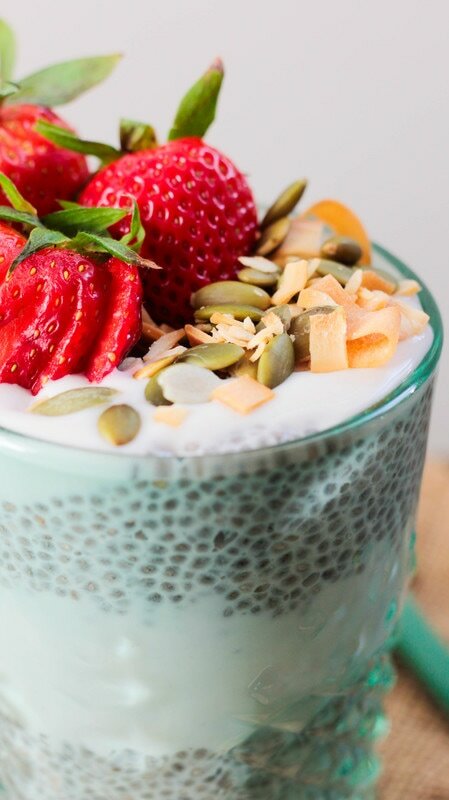
It feels like summer here in LA and we've got just about 80 days left on the wedding countdown, so we're keeping the snacks as light, healthy, and sugar-free as possible! This easy chia parfait has been my go-to snack lately. It's light enough to make a great breakfast or guilt-free dessert, but hearty enough to kill your sweet cravings and make a great post-workout meal. The chia seeds are packed with fiber, protein and Omega-3 fatty acids and are considered a superfood - so we could all use more of them in our diets! Plus, they make an excellent stand in for thick, creamy pudding. We are totally crushing on Forager's new unsweetened, cashew-based yogurt right now and used it to make our parfait. You can use whatever yogurt you like, but try to choose one without added sugar or preservatives. The real-er, the better. Especially when you're snacking! Strawberries are already in season here in California, but you can sub in whatever fruit makes you swoon. Toppings are customizable too, so you do you babes. The real point here is make a healthy, hearty, on-the-go snack that you can feel good about eating. And this one you for sure can!
Looking for other strawberry recipes this season? Try our Strawberry Lemon Crisp, Strawberry Cheesecake Smoothie, Strawberry Rhubarb and Rosemary Galette, and Peanut Butter and Berry Acai Bowl!
INGREDIENTS
Vanilla Chia Pudding 1/3 cup chia seeds 1 1/2 cups unsweetened almond milk 1-3 drops of liquid stevia (or sweetener of your choice) 1/2 teaspoon vanilla Chia Pudding Parfait 1/2 cup vanilla chia pudding 1/2 cup unsweetened non-dairy yogurt 1/4 cup fresh strawberries, sliced coconut chips, garnish pepitas, garnish DIRECTIONS In a large bowl whisk together the chia seeds, almond milk, stevia (or sweetener) and vanilla. Let sit about 30 minutes, stirring occasionally, until the mixture is thick - the texture of pudding. Set aside. Chop your strawberries and prep your toppings. If you don't have (or like) coconut chips and pepitas, you can sub in nuts, granola, other fruits - whatever you've got on hand! To make the parfait, layer alternating 1/4 cups of chia pudding and yogurt into a cup or dish, and top with your favorite toppings and sliced strawberries. Easy peasy! NOTES Leftovers last in the fridge about 3 days in an airtight container. This recipe serves 1, but can be easily doubled or quadrupled for sharing! 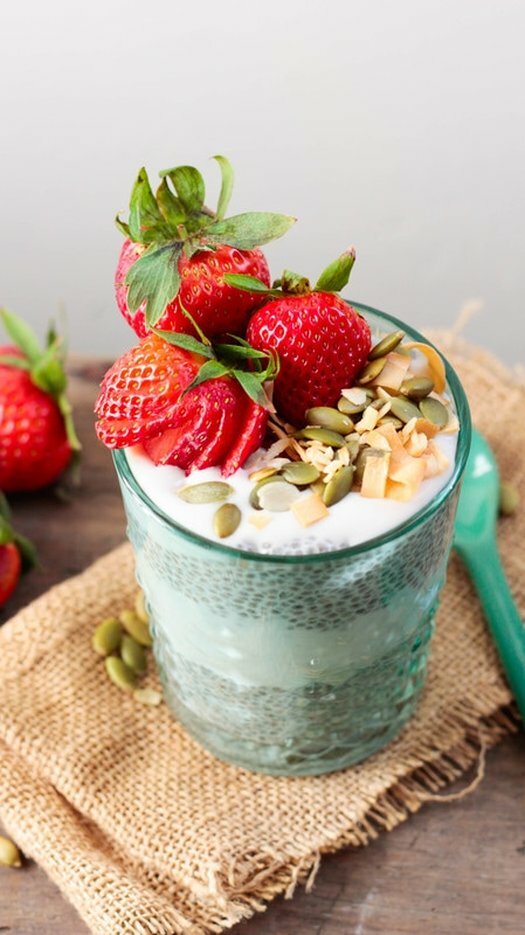
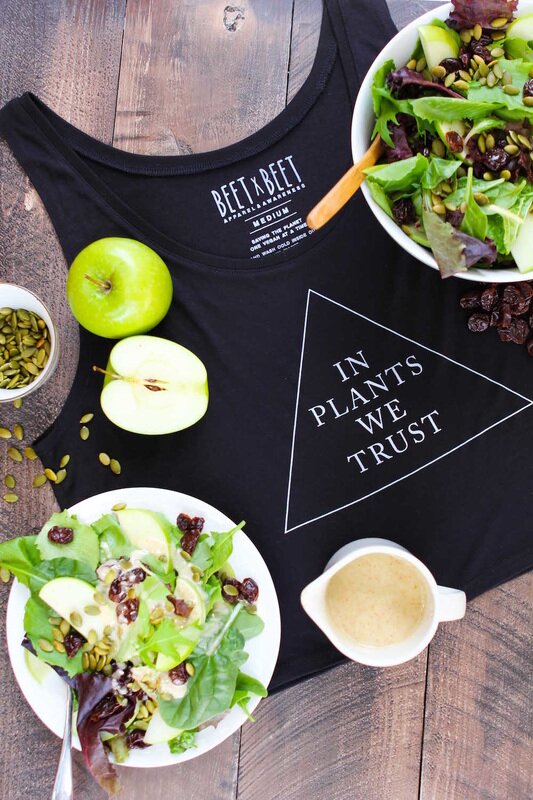
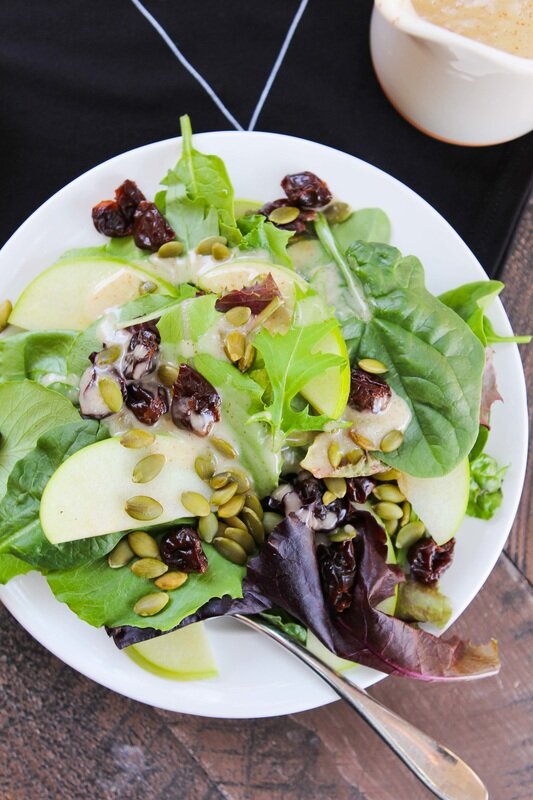
Cranberry Apple Salad with Pepitas and Apple Cider Vinaigrette
|
tagsAll  RSS Feed RSS Feed
|