Chickpea NOodle Soup
Whether you’re sick with a fever or a broken heart, this soup is the answer. We replaced the chicken in this classic comfort food with chickpeas to give you the protein you need to help recover when you’re feeling sick, and the broth filled with fresh thyme and garlic will smell so good your sinuses will want to clear up all on their own! If you’re still heartbroken, a little ice cream probably wouldn’t hurt, either! This recipe is straight from my new cookbook, The Ultimate Vegan Cookbook! (Which, by the way, is 45% OFF today for Cyber Monday! 🙌) It made a sneak appearance in my last cookbook too - it's THAT good, guys. This soup is single-handedly the most requested sick-day recipe in our home, and it's the one dish I always make for friends and family when they need a little pick-me-up, too.
It whips up easily and tastes so much like the real thing - with no chicken at all! Still packed with protein from the chickpeas and tons of flavor from all the fresh herbs, this soup is a serious crowd-pleaser. Scroll down and let's eat!
INGREDIENTS
2 tablespoons (30 ml) olive oil 4 cloves garlic, minced 2 medium onions, chopped 4 medium carrots, thinly sliced 4 celery ribs, thinly sliced 6 - 8 sprigs fresh thyme 1 bay leaf 2 quarts (1892 ml) vegetable broth 8 ounces (227 g) whole wheat rotini noodles 1 cup (240 g) cooked chickpeas salt + pepper to taste chopped fresh parsley, garnish crackers or bread, garnish DIRECTIONS In a cast-iron dutch oven or large soup pot, heat the coconut oil over medium heat until melted. Add onions, carrots, celery, garlic, fresh thyme & bay leaf and sauté until veggies are softened, but not browned. Add vegetable broth and bring to a boil. Once the soup is boiling, add the noodles and chickpeas and cook about 8 minutes, until the noodles are almost completely cooked (don’t worry, they’ll continue cooking in the water). Add salt and pepper to taste. Remove from heat and serve with freshly chopped parsley and salty crackers or bread! TIPS Serves 6. Leftover soup can be refrigerated up to a week or frozen indefinitely and reheated as needed. You can sub gluten-free noodles here, if you prefer!
2 Comments
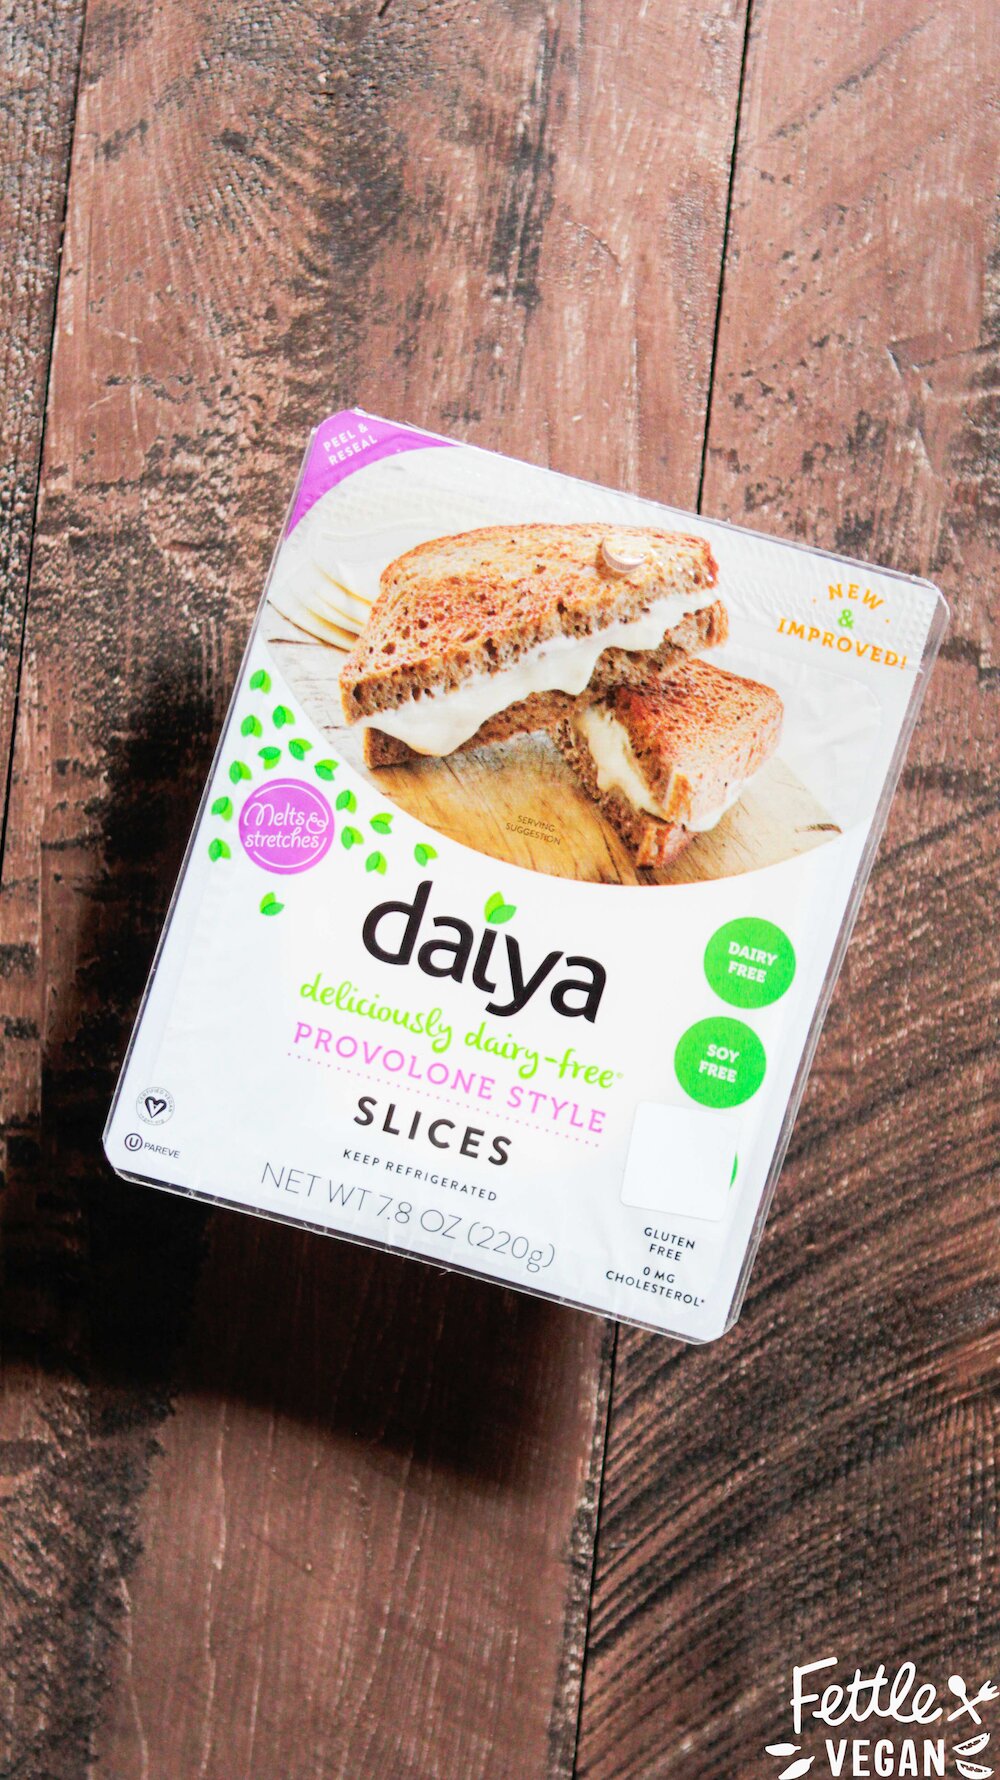
Jackfruit Philly Cheesesteaks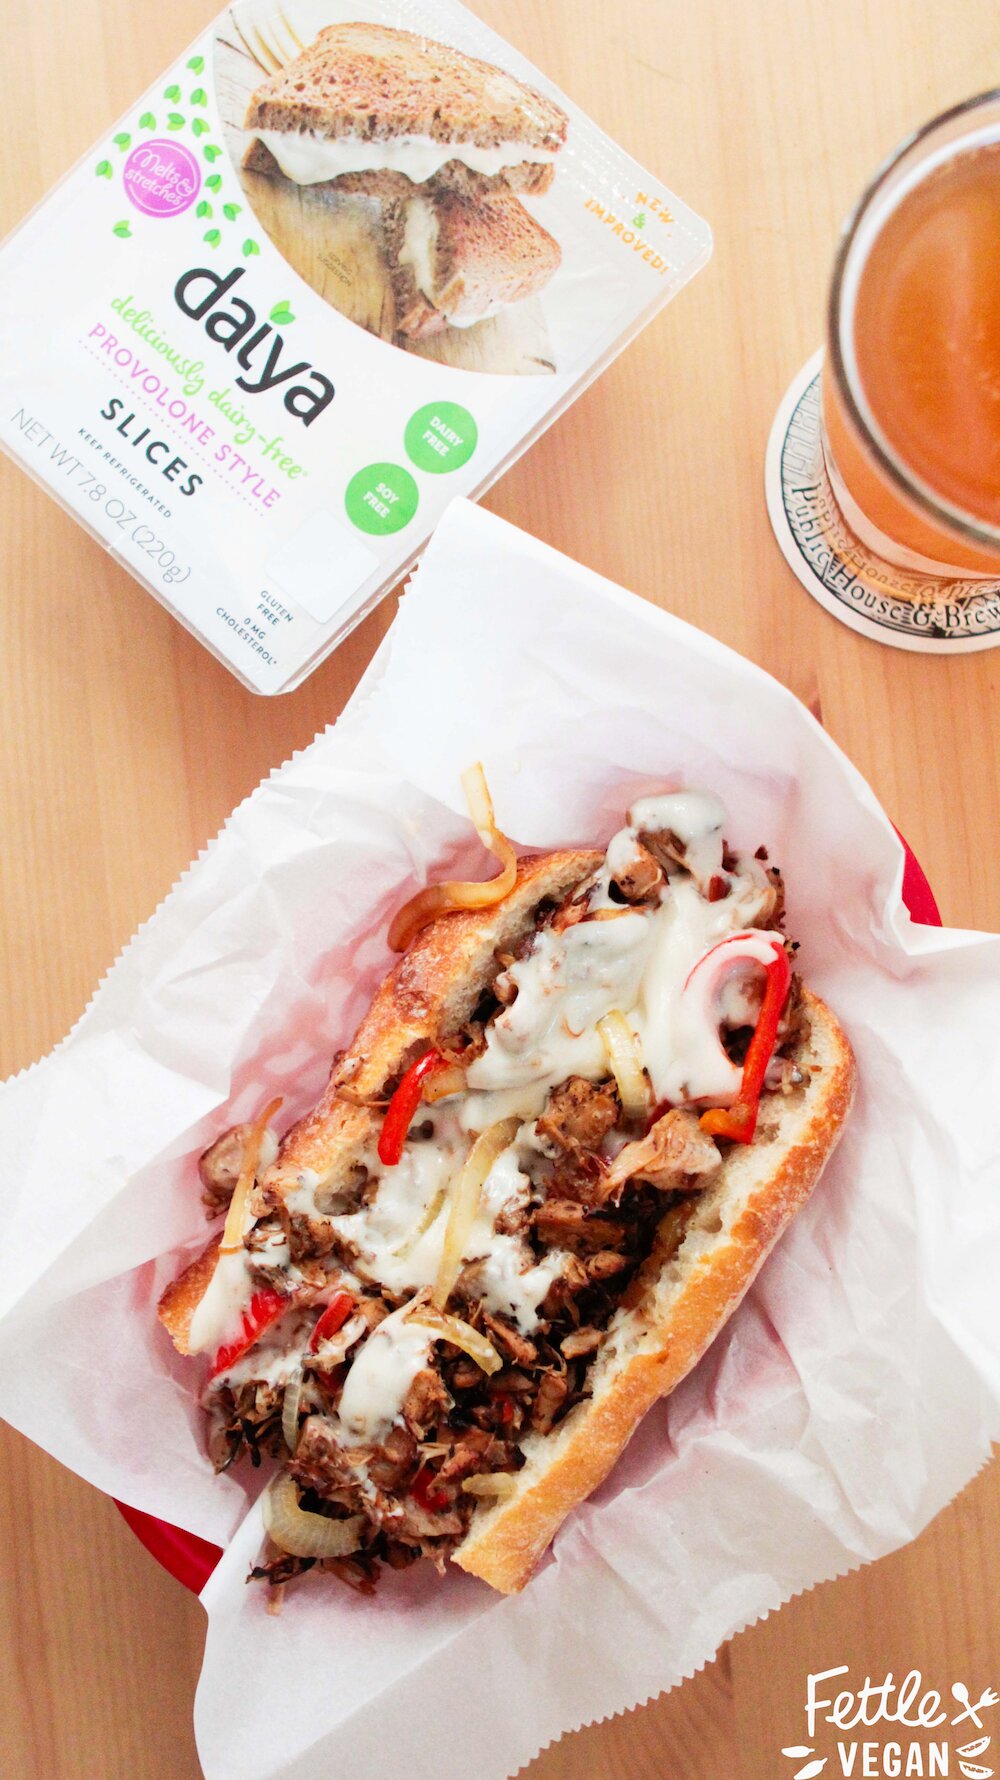
When I first met Alex there wasn't a Philly Cheesteak he wouldn't eat for lunch. He LOVED them! He was a sucker for the 'traditional' - although clearly it's debatable what the traditional version is exactly. He's always considered the melted provolone slices, not the cheeze whiz sauce, the original version - and the chef in me wants to hope he's right. So when he told me he'd sort of been craving that familiar old sandwich, we knew we could make a vegan version that was just as friggin' good. And I think we nailed it on this one. The secret? The cheesier-than-ever Daiya provolone slices! They're the perfect sub for the ooey-gooey, melty cheese that makes the original so memorable. The slices melt and stretch just like real cheese, but are a delicious, plant-based alternative for anyone looking to eat better, whether they’re dairy-intolerant, allergic, vegan, or simply living a healthy lifestyle.
The jackfruit makes the perfect substitute for a shaved steak, and was super like the original once we got a little char on the jackfruit. Our best tip is to cook in cast iron if you can - you'll get nice, crispy edges on the jackfruit. Once you get the jackfruit cooked up you toss in the grilled veggies and cheese, and voila! You've got yourself a super yummy, way healthier Jackfruit Philly Cheesesteak Sub! These sandwiches are so yummy served up fresh, but can be easily wrapped in paper and taken along on a picnic. Either way, do yourself a favor and cook these up for yourself. The recipe makes enough for two, so you can make one for someone you really like or have leftovers for day two. Oh, and people usually ask - we find our jackfruit at local Asian markets, but you can usually find it, though overpriced, at Whole Foods as well. Enjoy! 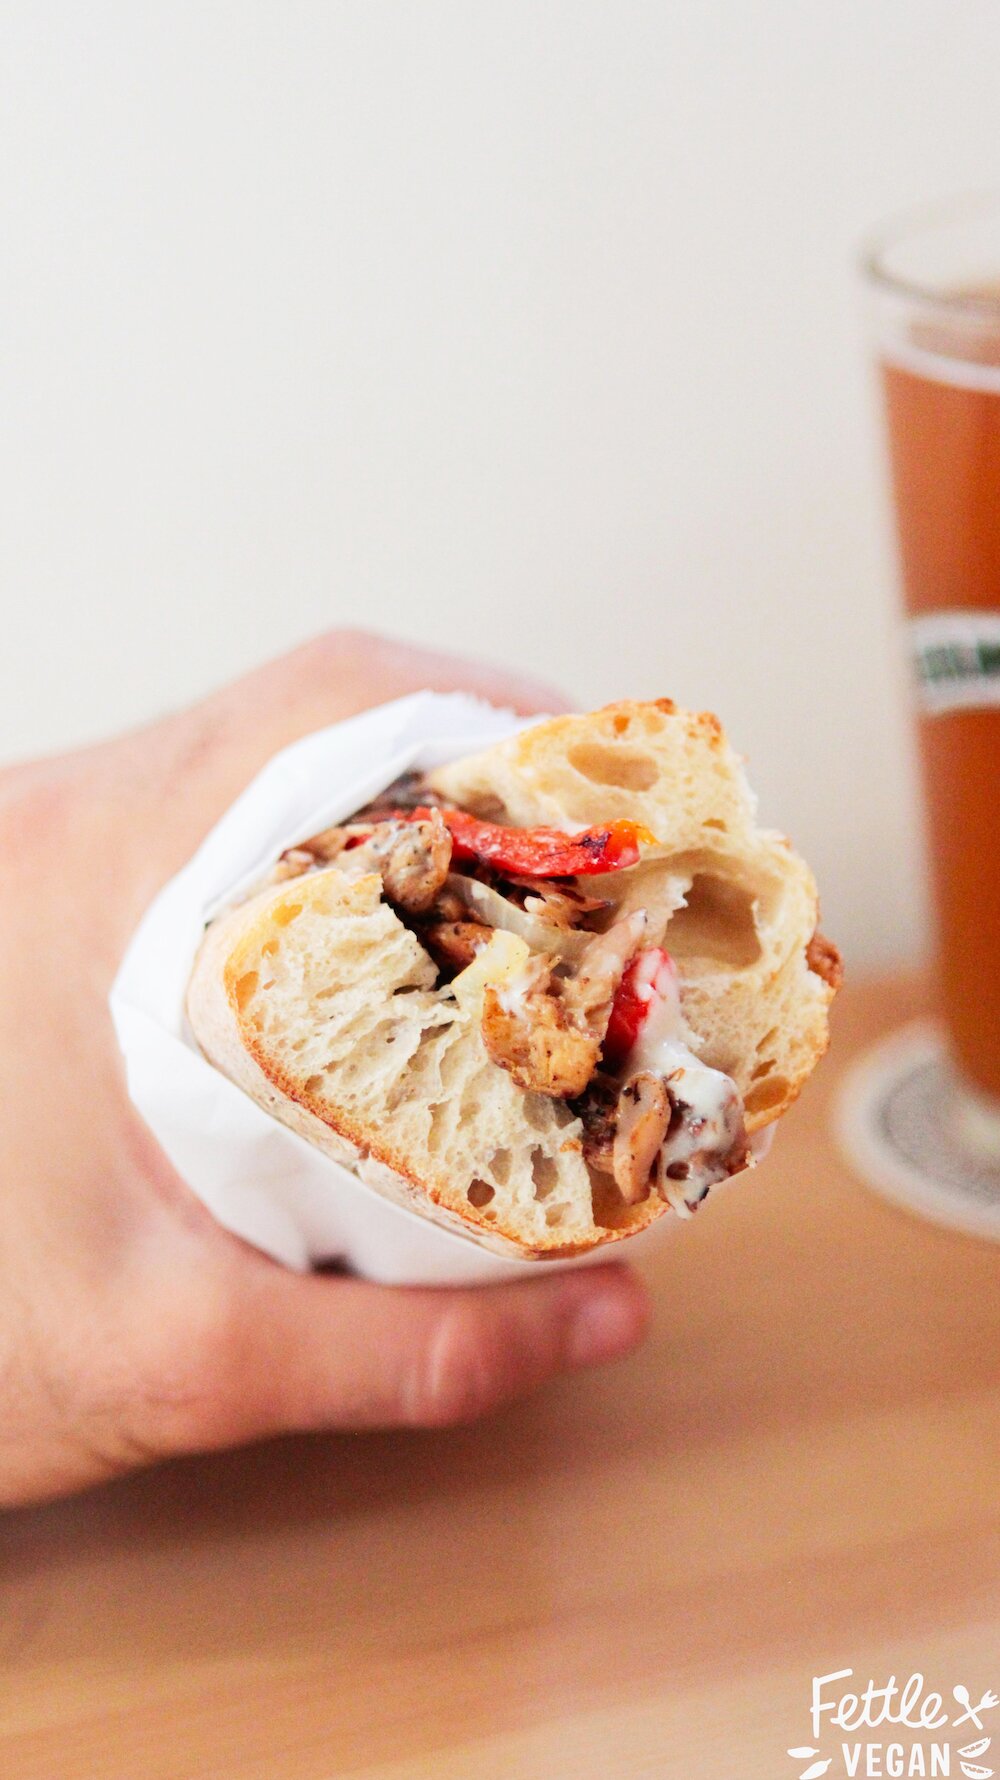
INGREDIENTS
Daiya vegan provolone cheese slices 1 loaf Italian bread or 2 large sub rolls, sliced 1 teaspoon coconut oil 1 medium yellow onion, thinly sliced 1 red bell pepper, thinly sliced 1 teaspoon coconut oil 2 - 20 oz. cans jackfruit, drained and shredded 1/2 cup water 1 large clove of garlic, minced 1 teaspoon liquid smoke 1 teaspoon maple syrup 1 tablespoon white cooking wine 1/2 teaspoon smoked paprika 1/2 teaspoon onion powder 1/2 teaspoon soy sauce salt + pepper to taste DIRECTIONS Place the Daiya slices and sub rolls to the side, you'll need them after the filling is prepared. Heat coconut oil in a medium-sized pan over medium heat. Sauté the thinly sliced onions and peppers until softened, about 8-10 minutes. Remove from heat and set aside. Begin heating the next bit of oil in a large skillet over medium heat. As it heats up, pour in the shredded jackfruit, water, minced garlic, liquid smoke, and maple syrup. Sauté until the liquid reduces to about half, then add the white cooking wine, smoked paprika, onion powder, soy sauce, salt and pepper. Stir to combine, and continue to cook over medium heat until the liquid has completely reduced and the jackfruit is beginning to brown. Throw the onions and peppers into the pan with the jackfruit and toss to combine. Line the mixture into a straight line across the middle of the pan. Place Daiya provolone slices onto the mixture (we used 2 per sandwich), then cover the pan with a lid for about 30 seconds to a minute, or until the cheese has become melty on top of the jackfruit mixture. Use a spatula to scoop the mixture onto your sub rolls and enjoy! NOTES Leftover filling will last in the fridge, covered, for a few days. Traditional cheesesteaks are served on soft bread, but all we could really find was a french baguette. While soft sub rolls are my recommendation, use what you can find. 
Herbed Lemon Tahini Potato Salad
'Tis the season of potato salad! Seriously, I've made more cole slaw and potato salads this month than I think I ever have...which is fine with me! We've had a lot of BBQ's, backyard parties, and things to celebrate this summer so we've been loving experimenting with different ingredients, and until last week, I had never thought to toss tahini in my the mix. I know - WHAT?! I LOVE pouring tahini on all things potato normally, and literally make a snack out of baked potatoes with tahini, lemon and dill on the regular. So how had I never poured any in my potato salad and served it up? Well, it was love at first taste. The addition of crunchy veggies and a little vegan mayo for creaminess makes it next-level good. I've been eating the leftovers all week! You AND your dinner guests will love it, too, I promise. So what're we waiting for?! Let's eat!
INGREDIENTS
2 lbs. red potatoes, chopped 1/2 red onion, chopped 3 ribs of celery, thinly sliced 4 green onions, thinly sliced 1 cup vegan mayo 1 cup tahini 2-4 tablespoons of lemon juice 3 tablespoons freshly chopped dill 1 teaspoon salt 1/2 teaspoon pepper DIRECTIONS Place the potatoes in a large pot of water over medium heat and bring to a boil. Cook for 10-15 minutes, or until the potatoes are fork tender. Drain and set aside to cool. While the potatoes are cooling, chop up the onions and celery and them set aside. Whisk together the mayo, tahini, lemon juice, dill, salt and pepper in a large mixing bowl. Toss in the potatoes, chopped red + green onions and celery, and toss to combine. Serve + enjoy immediately or keep it in the fridge up to a week! NOTES Serve 6-8. Leftovers may need to be tossed as the lemon juice and tahini will separate slightly overtime. Creamy Baked Kale + Artichoke Dip
We’re big fans of Sir Kensington’s all natural, non-GMO mustards and ketchups in our household - their spicy ketchup is my FAVORITE on french fries and breakfast potatoes! Last month at Expo West we were lucky enough to get a taste of a brand new product they’ve been experimenting with, and it sort of blew our minds. The secret product had everyone at the show raving and had us going back for samples each day we attended. The secret product? A totally vegan, aquafaba based mayonnaise called Fabanaise! It is literally the BEST vegan - dare I say ANY? - mayo I have ever had. It is light, it is creamy…it is perfect. It comes in two flavors - original and it’s spicier sister, chipotle. And unlike most gloppy eggless mayos, this one has a great, tangy flavor that compliments everything from potato salad to a loaded veggie sandwich. My favorite way to enjoy it is spread thinly over a slice of plain sourdough bead, topped in thinly sliced cucumbers and ground black pepper. It’s almost TOO good, and is the perfect light snack! Anyway, I’m obsessed with it. They generously hooked us up with a few jars after the show and we’ve been slathering it on everything we can since.
In case you’ve been living under a proverbial vegan rock for the last year, aquafaba is a viscous, egg-like binder made of the liquid from cooked beans such as chickpeas, navy or black beans. We’ve used it as an egg replacer in our recipes for Cranberry Orange Clafoutis and Easy Chickpeasy Breakfast Burritos with great success. It is super light and foamy when whipped and takes on whatever flavors it is mixed with, making it the perfect egg-free substitution in this mayo.
Fabanaise will be coming out in stores soon and we cannot wait for you guys to get your hands on it! To celebrate, and because this is our new miracle product in the kitchen, we wanted to share this delicious dish we whipped up using the original flavor - it’s too good NOT to share! Our Baked Kale + Artichoke Dip is creamy, cheezy, and totally decadent. The mayo in the recipe gives the dip the perfect amount of smooth, rich texture but it still light enough to enjoy with thick, crusty bread. It whips up in about an hour and is a total crowd pleaser. Perfect for parties or a movie night-in, you’re going to be blown away by this dip. So, let’s get cooking!
Creamy Baked Kale + Artichoke Dip INGREDIENTS 1 1/2 cups (about 1 - 15 oz. can) cooked white beans 1 cup Sir Kensington's Fabanaise Vegan Mayo 1/4 cup nutritional yeast 1/4 cup roasted red peppers 2 tablespoons lemon juice 1 teaspoon fresh basil, chopped 1 teaspoon salt 1 teaspoon cayenne pepper 1 tablespoon oil or vegan butter 4 cloves garlic, minced 1 medium yellow onion, finely chopped 1 heaping cup artichoke hearts, roughly chopped 3 packed cups de-stemmed kale, leaves roughly chopped 1/2 cup panko breadcrumbs (use GF if you prefer) DIRECTIONS Preheat oven to 375º. In a food processor, combine the white beans, Fabanaise, nutritional yeast, roasted red peppers, lemon juice, fresh basil, salt and cayenne pepper until smooth. Scoop the mixture out into a bowl and set aside. In a medium cast iron pan, melt the oil or butter over medium heat. Sauté garlic and onions together 3-5 minutes, until softened. Pour in the chopped artichokes and stir to combine. Pour in the kale about a cup at a time, stirring to wilt. When the kale has wilted, shut off the heat and pour in the blended white bean mixture. Stir to combine completely. Pour the panko bread crumbs over the top of the mixture, then cover the pan with aluminum foil. Bake for 15 minutes. Remove the foil and bake for another 10-15 minutes, until the mixture is bubbly and hot. Let cool 5 minutes, then serve with bread, chips or sliced vegetables!
You can find Sir Kensington’s products, including their ALL NEW vegan mayo, at a natural retailer near you or at your nearest Whole Foods. And you can use this link for a $1 discount! For more info and recipe ideas, head to SirKensingtons.com or find them on Facebook, Twitter and Instagram at @SirKensingtons.
*Product provided by Sir Kensingtons. Thoughts, opinions, recipe and photos are my own.*
Shredded Kale + Brussels Salad
This simple salad was originally something I though might make it into my upcoming cookbook, Homestyle Vegan, but didn't make the cut. It's delicious and one of my favorite ways to get my greens in, but wasn't quite the caliber of comfort food I wanted in the book, so I'm serving it up here instead! I know what you’re thinking - so many GREENS! But I promise, this salad is a game changer. It’s incredibly simple to make but packs a ton of good-for-you ingredients and tastes incredible. We dress it in a light, tangy champagne vinaigrette that’ll leave you craving more.
Looking for other salad inspiration? Try our Golden Beet Salad with Balsamic + Cashew Ricotta, Strawberry Walnut Kale Salad with Creamy Champagne Vinaigrette, or Mexican Wheat Berry Salad!
INGREDIENTS
Salad: 5 ounces (135 g) lacinato kale, rolled and thinly sliced 5 ounces (150 g) brussels sprouts, trimmed and shredded 3/4 cup (50 g) green onions, thinly sliced 1/2 cup (70 g) pine nuts Champagne Vinaigrette: 1/4 cup (60 ml) olive oil 1 small garlic clove 2 tablespoons (30 ml) champagne vinegar 1 tablespoon (15 ml) maple syrup 1 1/2 teaspoons (8 ml) lemon juice 3/4 teaspoon dijon mustard pinch each of salt + pepper DIRECTIONS Place prepared kale, brussels, green onions and pine nuts in a large bowl and toss to combine. Prepare the dressing by blending olive oil, garlic, champagne vinegar, maple syrup, lemon juice, dijon mustard, salt and pepper in a high-speed blender or food processor until creamy. Drizzle the dressing over the salad and toss to coat. Enjoy immediately! NOTES Don’t have any champagne vinegar? Use whatever vinegar you have on hand, instead! You can prepare the veggies and dressing separately ahead and dress as needed. Serves 4. Smoky Kale + Butter Bean Soup
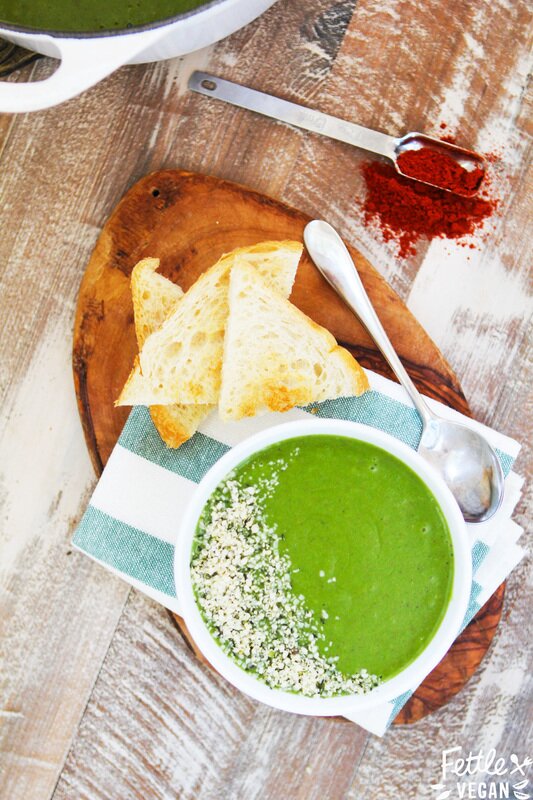
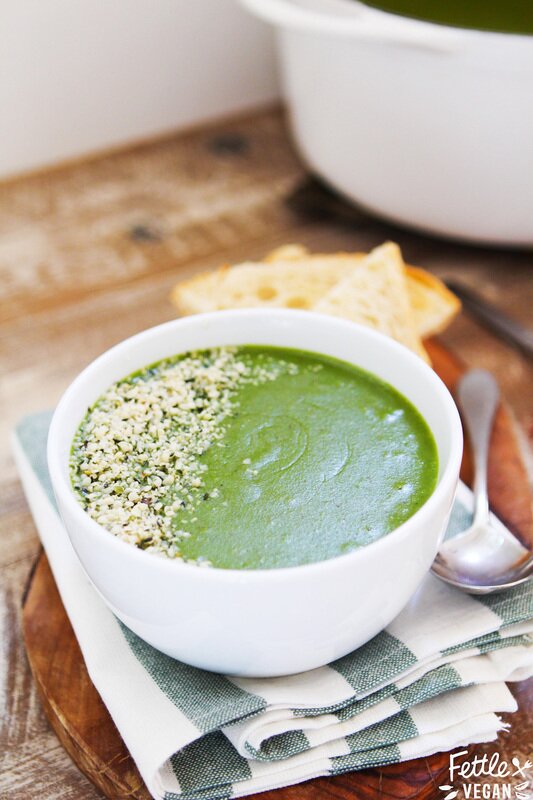
I know what you're thinking - GREEN kale soup?! Am I crazy?? I'm not, and I promise - this soup is kind of mind-blowingly good. Years ago at a restaurant I had a thick, green soup with a ton of spice. I doubt it was vegan, but I've been thinking about it ever since. And while I never got the secret recipe, I did do my very best to match the flavors and textures from that soup in this one. And I think I came pretty close. This creamy soup is packed with kale (so it's basically a salad, right?) and potatoes for creaminess, with a smattering of butter beans throughout and a ton of rich, smoky flavor. It tastes fantastic alongside a slice of crusty bread or topped with hemp seeds or oyster crackers for a little crunch. Alex gave this soup some pretty dirty looks before he took a bite - but he was totally pleasantly surprised! If he's a convert, I think I can make you one too. Either you're in or you're out at this point...so let's get cooking!
INGREDIENTS
1 tablespoon olive or coconut oil 2 cloves garlic, minced 1 medium yellow onion, chopped 2 cups red potatoes, cut into 1-inch cubes 4 cups vegetable broth 2 teaspoons smoked paprika 1 teaspoon salt 1/4 teaspoon black pepper 2 1/2 cups cooked butter (lima) beans 3 packed cups kale, stems removed hemp seeds, for garnish DIRECTIONS Heat the oil in a large pot or dutch oven over medium heat. Sauté the garlic and onions together until fragrant, 3-5 minutes. Pour in the potatoes, vegetable broth, smoked paprika, salt and pepper. Continue cooking over low-medium heat about 20-30 minutes, until the potatoes are fork tender. Add in the beans, reserving a 1/2 cup to the side, and the kale. Stir to combine, and cook 5-10 more minutes. Remove from heat. Blend the soup with an immersion blender or in batches in a high-speed blender until smooth. Pour in the remaining butter beans and stir. Serve immediately with a garnish of hemp seeds or crackers! NOTES Serves 6. Butter beans are also known as lima beans, so use whichever. You can also sub white beans here. Leftovers last about a week in the fridge or in the freezer indefinitely. 
The BEST Guacamole
If you're into football you're probably getting ready for the big game next weekend! The Super Bowl, at least for my family, was always more about the food than the football. The focus was always on creating delicious, snack-able dishes to enjoy with our guests, but always included a TON of fried food. Ick.
Now that we're adults and can watch the game at our own place, we're more interested in making delicious dips and snacks that don't make us feel crummy or guilty about eating wayyyy too much. Because I inevitably will eat way too much. Luckily, we're gearing up some super delicious, healthier-for-you, gameday recipes to share with you all week...starting with our recipe for the BEST guacamole! This guacamole is our absolute favorite. We''ve been making this version for a few years, and it's pretty similar to Chipotle's style, if you're familiar. There are a million different ways to make this green gold, but we like ours full of fresh lime juice, red onion and cilantro. We serve it up at every taco night, take it to parties, and munch it on gameday, too! It's going to become your NEW favorite guacamole. Let's get dippin'!
INGREDIENTS
4 medium, ripe avocados 3 tablespoons red onion, finely chopped 1-2 tablespoons fresh cilantro, chopped 1-2 tablespoons freshly squeezed lime juice 3/4 teaspoon salt 1 small jalapéno pepper, seeded and finely diced OR 1/4 - 1/2 teaspoon cayenne pepper (optional, for spiciness) DIRECTIONS Slice the avocados in half lengthwise, tossing the seed and scooping the green innards into a large mixing bowl. Mash the avocado with a fork or potato masher until it reaches your desired consistency; my recommendation is to keep it a little chunky. Pour in the red onion, cilantro, lime juice, salt and peppers, if using. Stir to combine. Serve immediately with chips or as an accompaniment to tacos or fajitas! Serves about 4. NOTES DON'T go squeezing (and ruining for everyone else) all the avocados at the store! If it has a little give and the stem doesn't just fall off, you're good. If it is overly softened or the stem falls off easily, revealing a dark or black area underneath, skip it. The best way I've found to save leftover guac without it turning too brown is to cover it with plastic wrap, but push the plastic wrap against the guac in the bowl, so no air can stay trapped between the two. Alternately, you can try one of the million tricks found on the internet. Again though, the plastic wrap trick works pretty well. So does scraping off the brown layer and eating the perfectly good guac underneath.
Easy Pickled Onions
When I stayed in Jackson Hole for Thanksgiving this year, I had a hard time finding meals that were vegan-friendly. While I was there I ate a lot of salad, french fries, and avocado toast from room service. The avocado toast was a tiny, beautiful portion covered in baby radishes and pink pickled onions. I'd need like four of said portions to actually fill me up, but the onions were just SO good on top - I knew I'd have to recreate them at home. After that, I sort of forgot about them for awhile. Lately, I've gotten back into my avocado toast obsession and craved a little extra snap on top, so I decided it was time I make my own.
Their flavor is so much lighter and sweeter than a typical onion, but these pickled onions still have a great crunch. They're perfect on burgers, tacos, sandwiches, salads, or - you guessed it - avocado toast! If you follow us on instagram, you might've seen the recent picture (shown below) featuring them. I'm totally addicted! I even like them straight from the jar. The best part? They really couldn't be easier to make. A little chop and pour is really all you need to do! They last about a couple weeks in the fridge, and they're so easy to whip up this'll become one of your new favorite 'condiments'. I promise. Let's eat!
INGREDIENTS
1 medium red onion, thinly sliced 1 medium clove garlic, quartered (optional) 3/4 cup apple cider OR rice vinegar 3/4 cup warm water 1 teaspoon sugar 1 teaspoon salt DIRECTIONS Place the sliced onion and garlic, if using, in a jar capable of holding at least 20 ounces. We used a round weck jar, but any kind that closes will do. Whisk together the vinegar, water, sugar, and salt in a medium-sized bowl until the sugar and salt are fully dissolved. Pour the mixture over the onions and garlic and let sit at room temperature for at least 1-4 hours. Cover the jar with a lid and place it in the refrigerator for at least 1 day to pickle. The longer it pickles, the sweeter and softer the onions will be. Use the pickles on whatever you like! Pickled onions will last for a few weeks stored in their jar in the refrigerator. Cranberry Apple Walnut Stuffing
For years, the only stuffing I'd ever eaten was the weird, kinda mushy, from-a-box version that only came out at our place on Thanksgiving and Easter. And it was okay, but I had no idea what I was missing. I don't remember the first time I had a crusty, moist homemade stuffing, but it changed my mind forever. Once you've had the real thing, you just can't go back. This year I'm tackling stuffing and officially making it my favorite side dish. It tastes great smothered in mashed potatoes and sopping up gravy, and packs much more flavor than you'd imagine for such a quick + easy recipe. It's sweet and savory and looks lovely with all the color from the vegetables peeking out. The walnuts add just a touch of texture and earthy flavor, and the apples and cranberries balance everything out. Missing an ingredient? Sub in something else you love! This recipe is easy to make your own and tastes great just about anyway you serve it. Let's eat!
INGREDIENTS
8 cups stale sourdough bread, cut into 1-in. cubes 2 teaspoons coconut oil 2 cloves garlic, minced 2 celery stalks, thinly sliced 1 medium red onion, chopped 1 medium red apple, cored and chopped 1/4 cup fresh cranberries 1/4 cup walnuts, roughly chopped 2 tablespoons fresh sage, finely chopped 1 teaspoon each salt + pepper 2 cups vegetable broth DIRECTIONS Preheat oven to 350 degrees. Cube up your stale bread and set it aside in a large mixing bowl. In a large cast iron skillet, melt the coconut oil over medium heat. Sauté the garlic, celery and onions until softened and fragrant, about 5 minutes. Add apples and cranberries and continue to cook until apples soften, about 3-4 more minutes. Sprinkle in walnuts, sage, salt and pepper and toss to incorporate. Pour the vegetable mixture into the bowl with the cubed bread, and stir. Pour vegetable broth over the mixture, stirring to evenly coat all the bread with liquid. The bread will absorb most of the liquid, but there should be some left. Pour the entire stuffing mixture into a greased baking dish and bake for 30 minutes, until stuffing is becoming golden brown and making the kitchen smell delicious. Pull it from the oven and serve immediately. Enjoy! NOTES To reheat, you can place the entire baking dish back into the oven covered in foil, removing the foil about halfway through cooking. Or if you have a microwave, feel free to use that. If you don't want to use sourdough bread you can substitute your stale bread of choice.
Roasted Butternut Squash + Apple Soup
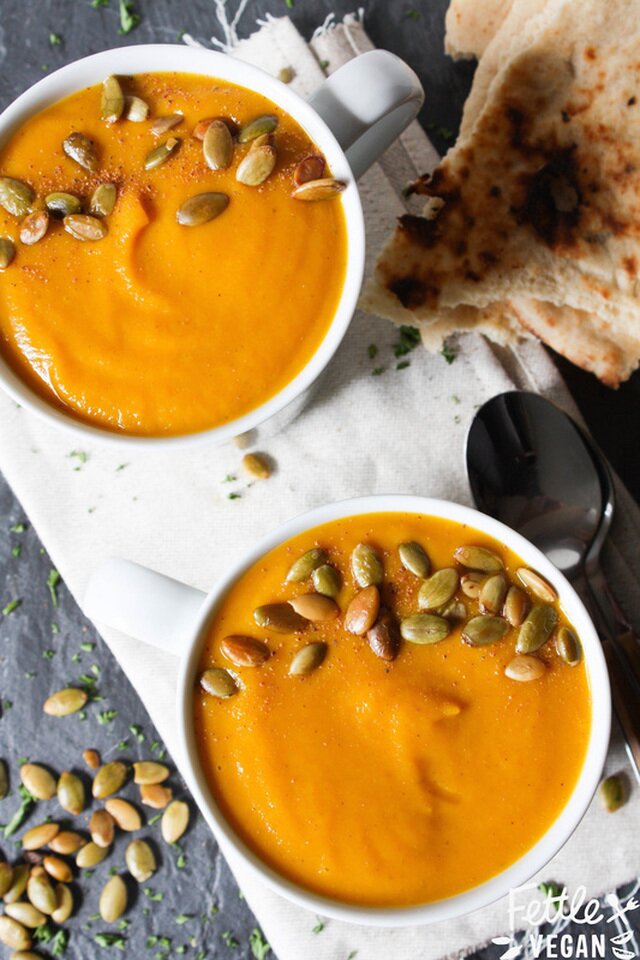
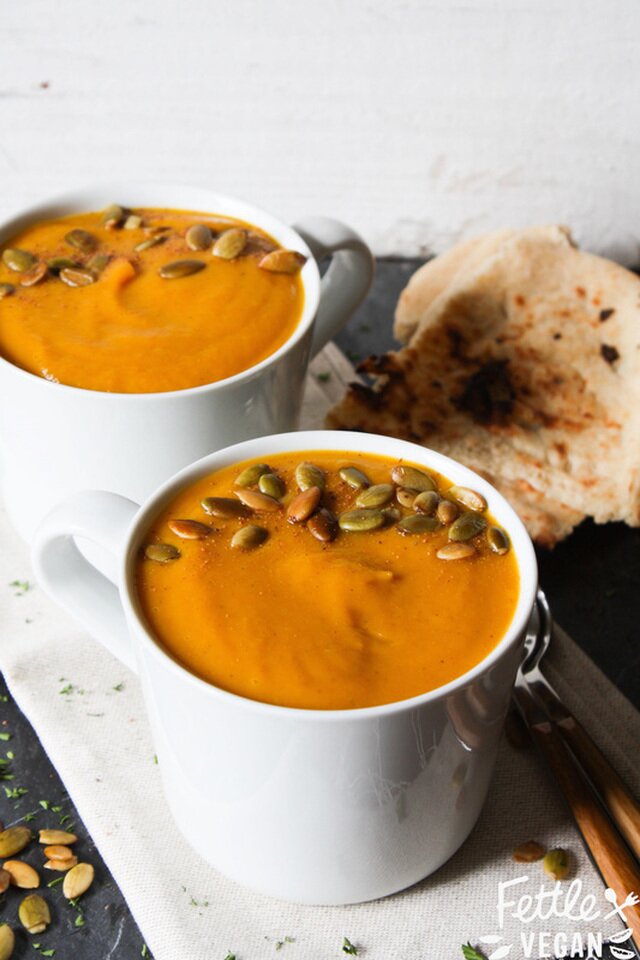
We're in the full swing of autumn and I'm taking every chance I get to make and eat soup. I love soups of all kinds, shapes, and sizes and will put just about anything into a pot with some vegetable broth. One of my favorite cozy fall soups right now is this super easy Roasted Butternut Squash + Apple Soup. It packs a ton of flavor into a ridiculously easy recipe, and is such a great way to throw some beta carotene-rich butternut squash into your diet! We like to use tart green apples, but you can use whatever apples you have on hand. We also like to blend the soup to an ultra velvety texture in our blender, but keeping some chunks in it is great if that's your style, too. It tastes great paired with naan or crusty bread and a sprinkle of toasted pepitas and nutmeg. Make a batch for dinner tonight or pour it into a thermos and take it for lunch at work all week long. Let's get cooking!
INGREDIENTS
1 teaspoon coconut oil 1 - 3 lb. butternut squash, peeled, deseeded and cut into 1 inch cubes 1 tablespoon coconut oil 2 small yellow onions, chopped 2 cloves garlic, minced 2 medium carrots, sliced 2 celery stalks, sliced 2 tart green apples (any apples work though), cored and chopped 4 cups vegetable broth or water 1 teaspoon salt 1/2 teaspoon pepper pinch of nutmeg toasted pepitas, garnish (optional) sprinkle of nutmeg, garnish (optional) DIRECTIONS Preheat oven to 400 degrees. Peel and cut butternut squash into 1 inch cubes and place on the parchment paper-lined baking sheet. Drizzle with 1 teaspoon coconut oil and a sprinkle of salt + pepper and bake for about 30 minutes, flipping halfway through. Set aside to cool. While squash roasts, heat 1 tablespoon of coconut oil over medium heat in a large pot or dutch oven. Sauté onions and garlic about 5 minutes, until they because fragrant and softened. Toss in carrots and celery and sauté together with the garlic and onions another 2-3 minutes. Toss in apples, vegetable broth and spices and bring to a boil. Reduce heat, cover, and simmer for 30 minutes. Remove from heat, toss in roasted squash, and blend using an immersion blender or (for extra creamy soup) a high-speed blender. Blend in batches, if needed. Pour blended soup back into the pot and serve immediately with toasted pepitas and a sprinkle of nutmeg for garnish. Saves well in the fridge for about a week, and freezes indefinitely. Enjoy! NOTES Don't have butternut squash? Substitute any type of squash you like, or use sweet potatoes!
<
|
tagsAll  RSS Feed RSS Feed
|