Purple Sweet Potato Pie Bars
Last week Alex and I took a day to start wedding planning together - FINALLY! So far, we have a venue, at The Riverbed Farm in Anaheim, and a date - June 10th, 2017, but other than that we've got nothing planned. Whoops! Time seems to be flying by at this point so my next big things to mark off the checklist are our save the dates and invitations, finding a caterer and finalizing details like the drink menu and decor. I'll have a post up soon on all the details and what we've learned so far in planning our vegan wedding!
In the meantime, a girl's gotta eat, and I've been loving all the fall produce we've been getting in our CSA box + seeing in supermarkets lately. We went on a date day last and ended up at a cute little kombucha + fermented goods bar in Costa Mesa called Farm + Culture Co. that served these yummy bites made with purple sweet potato and I was totally inspired. I wanted to create something similar, but with a little more focus on something sharable for the Fall season - so we came up with these Purple Sweet Potato Pie Squares. These pie squares are an incredibly gorgeous color - shockingly purple! - that just make you wanna eat 'em up. These bars are:
The sweet potatoes are paired with warm fall flavors like maple, cinnamon, and ginger on a chewy cashew-date-macadamia crust that makes them irresistible and much like a traditional sweet potato pie - but far healthier! They're are totally naturally sweetened, and you can omit the maple syrup if you prefer to keep them date-sweetened only. Eat them on their own or top them with a bit of whipped cream and a sprinkle of fresh nutmeg for the perfect fall treat. They're an indulgence you don't have to have any guilt about, so go ahead - have two!
INGREDIENTS
Cashew Date Macadamia Crust Layer: 1 1/2 cups cashews 1 cup macadamia nuts (or skinless almonds) 1 cup pitted dates 3 tablespoons coconut oil Purple Sweet Potato Pie Layer: 1.5 lbs purple sweet potatoes, boiled, skinned + mashed (about 2 1/2 cups mash) 3/4 cup unsweetened almond milk 3 tablespoons maple syrup 1 tablespoon coconut oil 1 tablespoon lemon juice 1 teaspoon vanilla 1/2 teaspoon ground ginger 1/2 teaspoon cinnamon 1/8 teaspoon nutmeg 1/8 teaspoon salt DIRECTIONS Cashew Date Macadamia Crust Layer: Soak the cashews and macadamia nuts in warm water for at least one hour. Drain off the liquid, and pour the soaked nuts into the food processor. Add in the pitted dates and coconut oil and process until a sticky crust forms. Grease or line a 9x9 inch glass baking dish. Scrape the crust mixture into the baking dish and use a rubber spatula to spoon to press the mixture firmly and evenly into the pan. Refrigerate or freeze to set the crust, about one hour, before topping with the sweet potato mixture. Wipe the processor bowl out with a paper towel and set aside. Purple Sweet Potato Pie Layer: Place the sweet potatoes into a large pot of water and bring to a boil. Cook until the potatoes are fork tender, about 10-15 minutes. Remove from the water and let cool completely. Once cooled, remove the skins and toss 'em into the compost or trash bin. Place the sweet potatoes into the processor bowl with the almond milk, maple syrup, coconut oil, lemon juice, vanilla, ginger, cinnamon, nutmeg, and salt. Process on high until the mixture is completely combined and smooth. Pour the mixture over the cooled crust layer and spread it evenly around. Place the baking dish back into the freezer to firm - they'll be much easier to slice this way. Once they're firm, about 3+ hours later, slice the bars even squares. Serve immediately or let soften in the fridge until you're ready to enjoy! NOTES Makes 16-20 bars. Leftovers can be saved in the fridge for several days or the freezer indefinitely. Purple Sweet Potatoes are different than Japanese Sweet Potatoes, which are purple on the outside but white on the inside. Make sure you double check or your pie squares - while delicious! - certainly won't come out looking like ours.
6 Comments
Strawberry Phyllo Strudels
I'm officially dubbing these 'lazy girl pop tarts'. They are SO simple to make, don't require you to whip up any dough, are ready in less than half an hour, and are made of just 6 simple ingredients. Plus, they're actually pretty healthy! We didn't add any sugar, just fruit to the filling, and brushed the stacked layers of phyllo with melted coconut oil. The cream cheese glaze, while optional, is rich, perfectly sweet, and really takes these to the next level. These flaky strudels are portable too, making them perfect for on-the-go munching. They're perfect for summer stuffed with fresh strawberries, but you can sub in whatever fruit you have on hand. I think a mixed berry version would be delicious! And if the cream cheese glaze isn't really your thing, I bet a dollop of homemade coconut whip would be great, too. These are better-for-you toaster strudels without the toasting necessary, and made much healthier. So let's eat!
INGREDIENTS
1/4 cup coconut oil, melted 12 large phyllo sheets, (mine were 13" x 18") divided and folded in half 2 cups fresh strawberries, washed, hulled and chopped 1/2 cup plain vegan cream cheese 3 tablespoons maple syrup 1 teaspoon vanilla DIRECTIONS Preheat the oven to 400ºF. Line a baking sheet with parchment paper. Layer the folded phyllo sheets on the prepared baking sheet, brushing each sheet with the melted coconut oil before adding the next. Brush the 6th sheet with coconut oil and spread the strawberries, leaving about a 1-inch border around the edges. Layer the remaining 6 phyllo sheets, continuing to brush with coconut oil. Once the top layer has been brushed, use a large sharp knife or pizza cutter to slice the pastry into 8 equal rectangles. (You do this because once the pastry has baked, the phyllo will become slightly crisp and brittle and if cut after baking, will crumble quite a bit. ) Place the baking sheet into the oven and bake for 12-16 minutes, or until golden brown. While the pastries bake, prepare the cream cheese glaze by whisking together the cream cheese, maple syrup and vanilla until smooth. When the pastries are finished, let them cool at least 10 minutes before drizzling with the cream cheese glaze. Enjoy! NOTES Makes 8. Leftovers last without glaze, on the counter for up to 3 days. With glaze, in the fridge they'll be good for 1-2. So go ahead and have a second or third...☺️ The easiest way to get that drizzle evenly over the whole thing (IMO) is to scoop the cream cheese glaze into a small zip top sandwich baggie, cup the corner off with scissors and - voila! - you have yourself a DIY icing bag. S'mores Brownies
It's officially feels like summer here in So Cal with temps in the low 90s this week. Ugh. On the plus side, it's been warm enough that we've started planning our first camping trips of the season. And I can't wait! Sometimes dragging all the ingredients for s'mores - the vegan chocolate, marshmallows, and graham crackers, and of course a good stick! - can be a pain in the butt. And often, I end up forgetting at least one of the necessary ingredients! These days, I save myself time and space in the cooler by just pre-making a tray of these fudge, ooey-gooey S'mores Brownies instead. They whip up quickly, taste BETTER (yup, I said it) than the traditional version, and make late-night campfire munching a breeze! Instead of graham crackers, the marshmallows and chocolate chunks are nestled into rich, chocolatey brownie batter - no stick needed. I like to put them in the fridge for a bit before cutting into them for even fudgier brownies. And they couldn't be easier to travel with: they last sealed in a ziplock bag in the car or on the counter up to 3 full days. Pack up the tent and preheat the oven - we've got some s'mores to eat!
INGREDIENTS
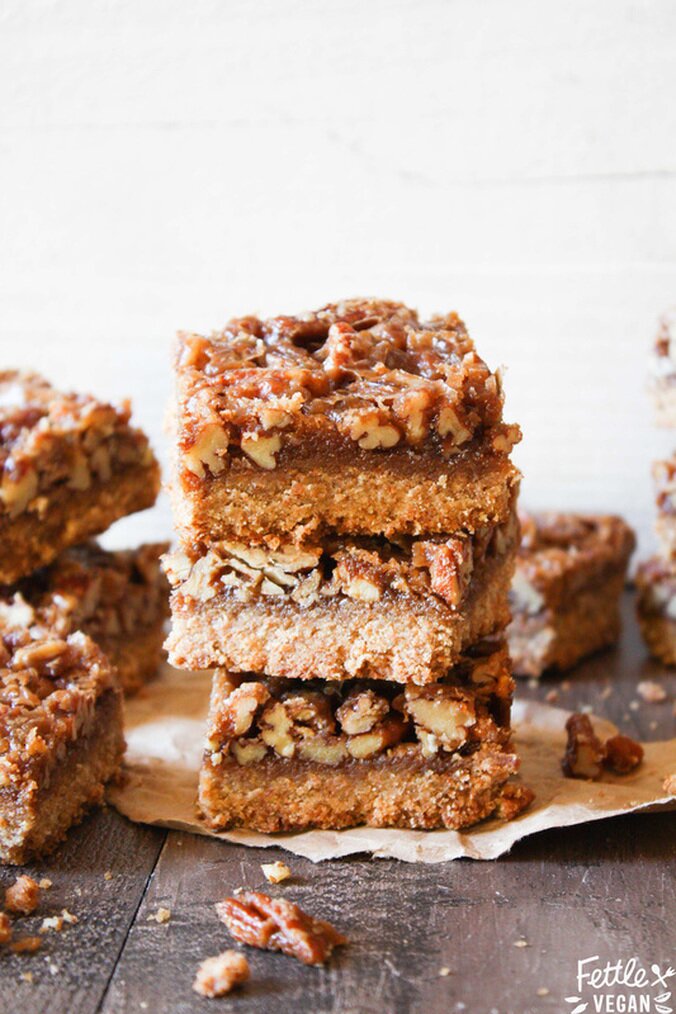
1 tablespoon ground flax + 3 tablespoons warm water 1 cup sugar 1/2 cup unsweetened almond milk 1/2 cup vegetable oil 1 teaspoon vanilla 1 cup all purpose flour 1/3 cup cocoa powder 1/2 teaspoon baking powder 1/2 teaspoon salt 1/2 cup chocolate chunks 1/2 cup vegan marshmallows (we used Dandies!) DIRECTIONS Preheat the oven to 350ºF. Grease or line an 8x8 inch baking dish. In a small bowl which together the ground flax and warm water. Set it aside to gelatinize. In a medium mixing bowl, whisk together the sugar, unsweetened almond milk, vegetable oil and vanilla. Add in the flax mixture and stir well to combine. In a separate large mixing bowl combine the flour, cocoa powder, baking powder and salt. Make a well in the center and pour in the wet ingredient mixture. Whisk together until a smooth batter forms. Fold in the chocolate chunks and marshmallows and pour the mixture into the prepared baking dish. Bake for 20-30 minutes, until an inserted toothpick comes out clean. Let cool completely before slicing. Enjoy! NOTES Makes 12 brownies. For even fudgier brownies, fridge the cooled brownies at least 2 hours before cutting into them. Pecan Pie Bars11/24/2015 Pecan Pie Bars
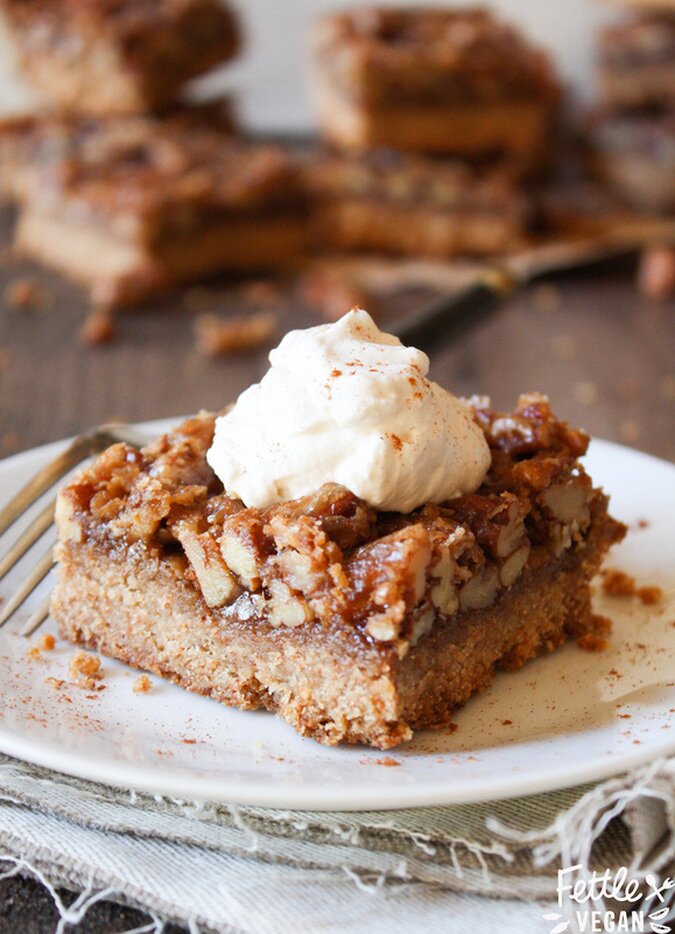
When I was in the 4th grade, I had a Southern teacher who always explained to us that "Pee-cans are kept under the bed, and puh-cahns are baked in a pie." She hated when if you said otherwise, and she would tease anyone who disagreed. I hated standing out, so I just agreed. And now that I'm older, I think she was right. Because really, who wants to think about urine when they're talking pie? Anyway, it's something that always stuck with me, something I remember every time I see pecans in any form. And yes, I pronounce it 'puh-cahn'. Because it seems right. But however you pronounce them, you probably like them. Pecans are a rich, earthy nut that pairs well with all kinds of fruit - but like most things, tastes best drowned in a sugary syrup and baked on a crust. Pecan pies are great, but things in mini-form are cuter and easier to share. Plus, at our age we're mostly celebrating Friendsgiving's and less formal family dinners, and pre-sliced goodies are easier to pack into doggy bags for your friends. These bars are super easy to whip up and are as equally as delicious as their round cousin, but better because there's more crust - and that's my favorite part. You're friends will be impressed when you bring these to the table, and even more impressed if you get fancy and top 'em with a bit of homemade coconut whipped cream. But you get it, so I'll shut up while you preheat the oven. Let's bake!
INGREDIENTS
Crust: 1 cup vegan butter (we used Earth Balance) 1/2 cup packed brown sugar 2 1/2 cups whole wheat flour 1/2 teaspoon salt Topping: 1/2 cup vegan butter 1 cup packed brown sugar 1 tablespoons coconut cream* 1 teaspoon vanilla 2 cups chopped pecans Whipped coconut cream, for serving sprinkle of ground cinnamon, for garnish DIRECTIONS Preheat oven to 350 degrees. To make the crust, cream together the butter and brown sugar in a stand up mixer or with beaters. Add flour and salt and mix until crumbly. Press into a parchment-lined 9x13 inch pan. Bake for 20 minutes or until golden. While the crust bakes, prep the pecan topping by whisking together butter, brown sugar, coconut cream, and vanilla in a medium saucepan over medium heat until everything melts and combines, about 5 minutes. Once the mixture comes completely together, add the chopped pecans and mix them in. Continue cooking over low heat, stirring occasionally until the crust is finished cooking. When the crust finishes, remove it from the oven and pour the pecan mixture over the crust. Return the pan to the oven and bake for an additional 20 minutes. Remove from the oven, let cool completely, then slice into 12 (or more) equal squares. Enjoy! NOTES Makes 12 3x3 in. squares. Coconut cream is the thick white cream layer from the top of a can of full fat coconut milk. We also like using Trader Joe's brand coconut cream. Leftover bars can be saved in an airtight container on the counter for up to a week. 
Strawberry Cheesecake Squares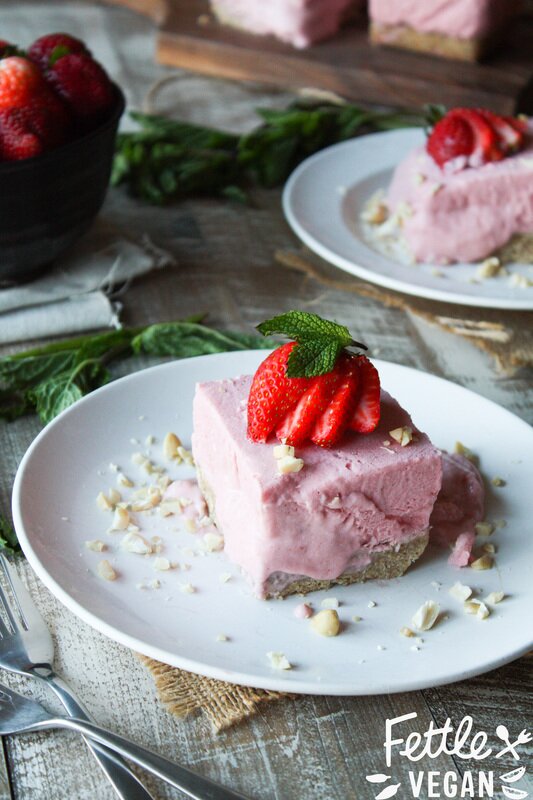
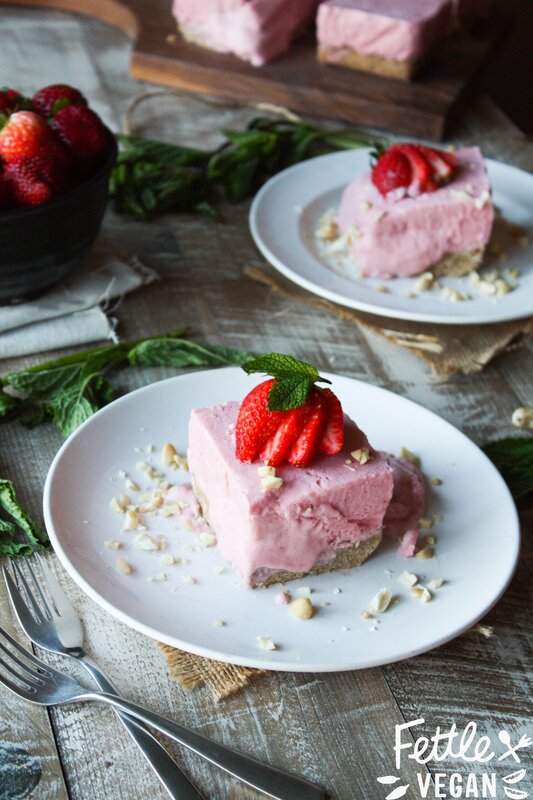
It's the hottest time of the year just about everywhere right now, and Southern California is no exception. In fact, most Angelinos will tell you that the past month has included some weird very june-gloom-esque weather. Lots of cloudy, humid mornings leading to sunny, hot afternoons. Basically, every afternoon becomes an excuse for me to run to the grocery store and pick up a pint of DF Mavens Mint Chip (my latest obsession) Ice Cream and then come home and eat it all, justifying that without it, I would be a puddle! The problem? I still kind of puddle out around 3 pm when the heat reaches its peak, but I've also eaten 600 calories worth of ice cream and my daily allotment of sugar. Whoops! This week I'm giving up the ice cream and packed the freezer with these sweet, low sugar Strawberry Cheesecake Squares. They're just the right amount of sweet on top of a chewy date-oat-nut crust, and make the perfect afternoon cool-down treat or late-night snack. They're packed full of good fats from the nuts and coconut milk, and are a nice break from a traditional round cheesecake. Easier to serve + share! Plus, when it's as hot as it has been here lately, you only want to have to pull out a piece at a time because, you know, MELTING. As you can see as proof above (well, and below), things got a bit melty under photography lights in the hot hot afternoon, but it still tastes amazing. If its that hot, keep them in the freezer until ready to serve. Otherwise, you can soften them a bit in the fridge, but since coconut milk/cream is so melty, the cooler the better for these babies. Let's eat!

INGREDIENTS:
Crust 1½ cups cashews 1½ cups oats 1 cup pitted dates 6 tablespoons melted coconut oil Cheesecake 4 heaping cups strawberries, green tops removed 1 - 14 oz. can coconut cream OR 2 cans coconut milk, refrigerated overnight + liquid drained 1 teaspoon vanilla ½ cup melted coconut oil 2-4 tablespoons maple syrup OR agave nectar DIRECTIONS: Crust Soak cashews in warm water for at least one hour. Blend all ingredients together in a food processor or high speed blender. Grease or line a 9x9 inch glass baking dish. Press date & nut mixture into the bottom of the baking dish. Refrigerate or freeze to set coconut oil, about one hour. Cheesecake Blend strawberries, coconut cream, vanilla, coconut oil and maple syrup in a high speed blender until completely combined. Remove crust-filled baking dish from the fridge and fill evenly with the cheesecake mixture. Cover + place in the freezer or fridge to set for at least 3 hours or overnight. When ready, remove from the fridge, cut with a large knife into 12 even squares, and plate. Sprinkle with crushed cashews, fresh strawberries, and a bit of coconut whipped cream, if you like. Since coconut cream can get melty in the heat (like in some of the photos above!), this dessert is best left in the fridge or freezer until you are ready to eat it. It lasts indefinitely covered in the freezer, and makes 12 medium-sized or 15 small cheesecake squares. Enjoy!
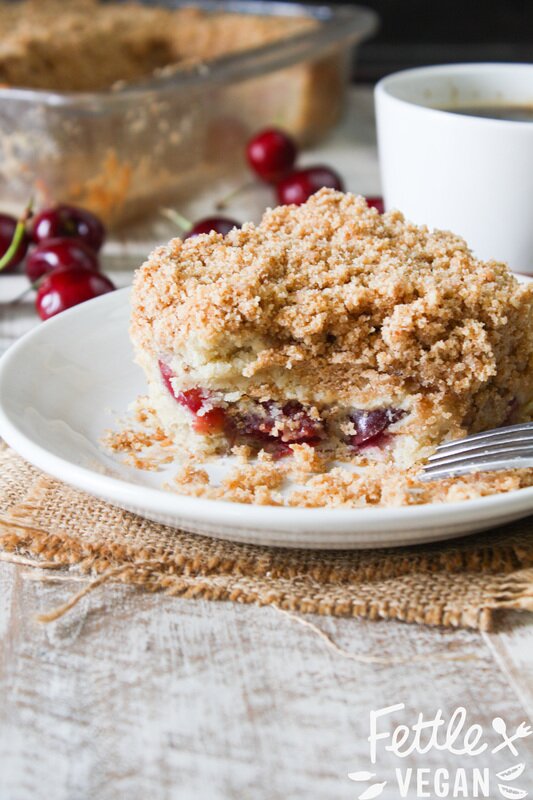
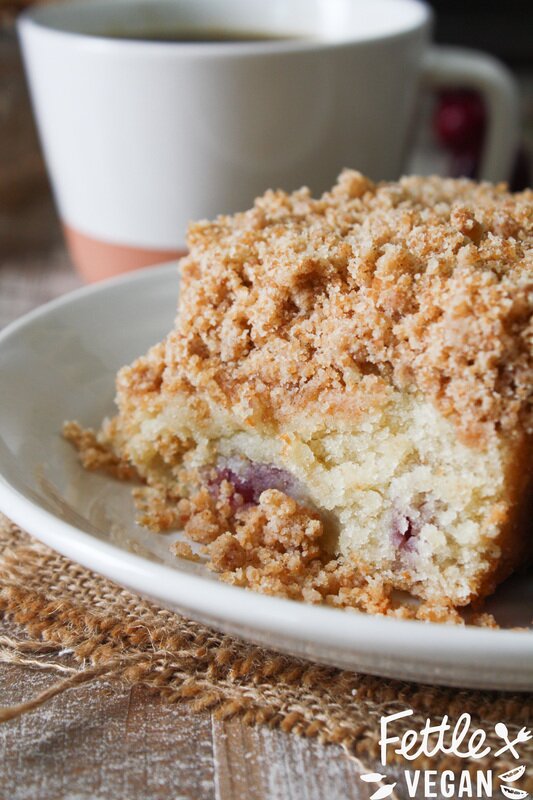
Sweet Cherry Coffee Cake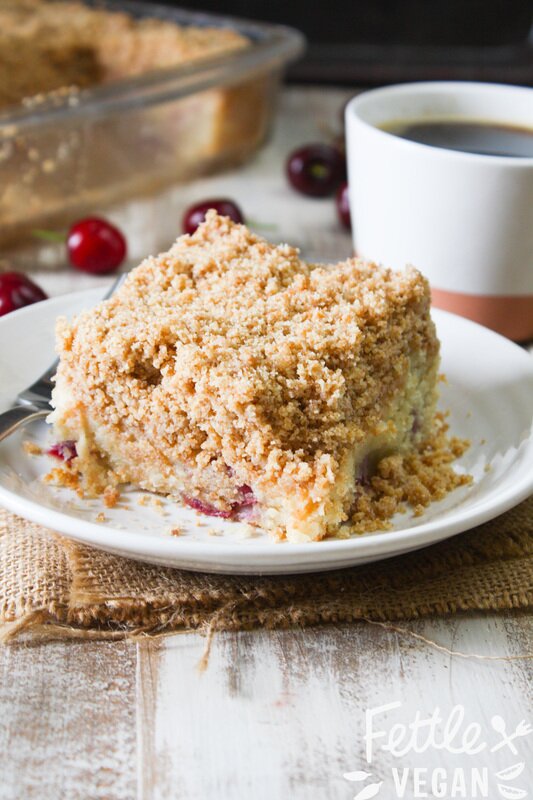
'Tis the season for bright, juicy, super overpriced cherries! But I love 'em, so I don't even mind paying like $6/lb. Especially since I started baking with them. I love them fresh, but they just have such a great, sweet flavor for baked goods! And in this recipe, they compliment the crumby brown sugar + cinnamon topping so perfectly. This cake comes out moist, lightly sweet, and stuffed full of the sweetest summer cherries. Its my favorite cake, of any kind, that I've had in a while. We tried to keep the sugar low in the cake mixture because of the super sweet crumb topping, but its still a splurgy breakfast for sure. I've been super dedicated in my workouts lately (and am even considering trying to get my yoga teaching certification) so I felt no guilt indulging in more than one slice - and you shouldn't either! And even though coffee cake sounds like a morning thing, to definitely tasted just as good at ten o'clock at night. You could probably sub in any summer berries here for a tasty seasonal treat, and we will definitely be making versions of this recipe year-round. Let's get bak(ed)ing!
INGREDIENTS
Crumble Topping: 1½ cup all-purpose flour* ½ cup brown sugar 1 teaspoon cinnamon pinch of salt ½ cup coconut oil or vegan butter, softened Coffee Cake: 6 tablespoons vegan butter or coconut oil 6 tablespoons coconut butter ½ cup sugar 1 cup non-dairy milk 1 tablespoon ground flax meal 1 tablespoon corn starch 1 teaspoon apple cider vinegar 1½ cups all-purpose flour *(GF may work too, but we haven't tried it!) 2 teaspoons baking powder ½ teaspoon baking soda ½ teaspoon salt 1 heaping cup sweet cherries, pitted and halved DIRECTIONS Preheat oven to 350 degrees. Grease a 9x9 inch glass baking dish and set aside. Wash, pit, and halve 1 heaping cup of sweet cherries. To make the crumble, mix together flour, brown sugar, cinnamon, & salt a medium-sized mixing bowl. Pour in softened coconut oil or butter and use a fork to combine the mixture until small crumbs form. In a separate mixing bowl, cream together the butter or oil, coconut butter and sugar. Add the milk, ground flax, corn starch and apple cider vinegar and stir until completely combined. In a third mixing bowl, combine flour, baking powder, baking soda, and salt. Pour the milk mixture into the flour mixture and stir until just combined. Don't overmix! Fold in the sweet cherries. Pour the prepared batter into your greased baking dish and spread the crumble mixture evenly over the top. Bake for 25-30 minutes until an inserted toothpick comes clean of cake and the crumble mixture has turned a nice golden brown. Let cool at least 20 mins before serving. Enjoy! Leftovers can be saved in an airtight container on the counter for 3 days and in the fridge for about a week.
Stone Fruit Crumble Squares
Summer is here and so are the stone fruits! We've been seeing gorgeous plums, peaches, nectarines and apricots (and all their sub-varieties) popping up at grocery stores and farmers markets and we couldn't resist making something sweet to showcase just how yummy they are. I love eating them raw or mixed into my oatmeal and smoothies, but baked into these low-sugar crumble bars is a great way to mix it up! Plus, they're shareable and perfect party food- easy to eat and packed with a little extra chia seed goodness. We served ours with a sprig of fresh mint, but a dollop of soy or coconut whip would be perfect here too. The colors of the mixed stone fruit oozing out the sides is gorgeous and drool-worthy. This is a great desert for impressing your friends - and since it whips up fast, it'll look like you work a lot harder on this one than you actually had to. And that is always a good thing. More time for summer cocktail sipping! Go grab a bag of the juiciest, plumpest summer stone fruits you can find and let's eat!
INGREDIENTS:
2 cups (GF certified) oats 2 cups gluten-free flour (whole wheat works here, too!) 3 tablespoons organic sugar 2 tablespoons chia seeds 1/2 teaspoon salt pinch of xantham gum, optional (for use with GF flours) 2/3 cup coconut oil, softened 4 cups stone fruit, pitted + chopped (we used plums, peaches + nectarines) 2 tablespoons lemon juice 1 tablespoon corn starch DIRECTIONS: Preheat oven to 375 degrees. In a large mixing bowl combine oats, flour, sugar, chia seeds & salt. Add in softened coconut oil and stir until crumbs begin to form. Set aside. In a separate mixing bowl, toss your cut stone fruit in the lemon juice and corn starch until evenly coated. Grease an 8x8 (or 9x13, for slightly thinner bars) glass baking dish, then pour a a little over 1/2 of the oat crumble mixture into the bottom of the dish. Press gently into the sides. Top with the stone fruit mixture, spreading evenly. Finally, pour the rest of the crumble mixture on top, distributing that evenly as well. Put crumble into the oven and bake for 35-45 minutes, until the crumble topping becomes golden and fruit mixture bubbles. Remove from oven and let cool completely before cutting into squares. To help squares stay firm, refrigerate until ready to cut. If you like it warm and fresh out of the oven, say to heck with the squares and have a pile of crumble goodness. We're not here to judge. Makes 9-12 squares depending on size, saves well in the fridge for up to a week. Enjoy!
Strawberry season is my favorite season. You may have noticed I'm a bit of a fan with recipes like our Homemade Strawberry Ice Cream, Strawberry Rhubarb Pie, Strawberries & Cream Chia Pudding, and our recent Strawberry Lemon Crisp. Yup, we're a litttttle obsessed over here. Nothing screams summer like fresh, ripe, red strawberries...and just about nothing tastes as sweet, so we love to eat 'em up as much as possible while they're in season. The combination of strawberry with rhubarb balances out the sweet with a slight tartness. The crunchy oat crumble topping is the perfect contrast to the soft, carmelized fruit, and it tastes great fresh out of the oven or after being refrigerated a day or two. This recipe makes an 8x8 tray of thick bars, but use a wider, thinner pan like a 9x13 if you want more, thinner bars. Keep it gluten-free if that's your thing, or use what you have on hand. Either way, plan on sharing- you'll gain major brownie (strawberry?) points for it.
Ingredients:
2 cups (GF certified) oats 2 cups gluten-free flour (whole wheat works here, too!) 1/2 cup organic sugar 3/4 teaspoon salt pinch of xantham gum, optional 2/3 cup coconut oil, softened 2 cups strawberries, hulled and quartered 2 cups rhubarb, chopped 2 tablespoons lemon juice 2 tablespoons organic sugar 1 tablespoon corn starch Directions: Preheat oven to 375 degrees. In a large mixing bowl combine oats, flour, sugar, salt & xantham gum. Add in coconut oil and stir until crumbs begin to form. Set aside. In a separate mixing bowl, toss your strawberries and rhubarb in the lemon juice, sugar, and corn starch until evenly coated. Grease an 8x8 (or 9x13, for slightly thinner bars) glass baking dish, then pour a a little over 1/2 of the oat crumble mixture into the bottom of the dish. Press gently into the sides. Top with the berry mixture, spreading evenly. Finally, pour the rest of the crumble mixture on top, distributing evenly. Put crumble into the oven and bake for 35-45 minutes, until crumble topping becomes golden and berry mixture bubbles. Remove from oven and let cool completely before cutting into squares. To help squares stay firm, refrigerate until ready to cut. If you like it warm and fresh out of the oven, say to heck with the squares and have a pile of crumble goodness. We're not here to judge. Makes 9-12 squares depending on size, saves well in the fridge for up to a week. Enjoy!
Coconut Cookie Butter Bars
We're finally getting settled into our new place in Long Beach, and totally loving it. We have both a Trader Joe's and a Jamba Juice within walking distance (melt my heart!), and have gotten back to our daily runs, which is great for both my rear end and Maddie's. Alex and I have been dating almost 5 years (holy cow!) and this is our first place we've lived just the two of us. And seriously, we're loving it. I finally don't feel guilty about setting up a food shoot on the counter and not picking it up for hours, or for filling the fridge with vegan goodies and crowding out my roommates food stores. This is gonna be a great move for us. And to celebrate our first new recipe in our new kitchen, I got a little splurgy. This sweet treat is a celebration of independence and deliciousness, of new beginnings and late night snacking- and man, it is good. But I won't lie, its a dessert you may want to eat in moderation. Its rich, fudgy, and filled with crunchy, sweet cookie butter...perfect for celebrating, and even better when shared with your significant other.
Before we go any further, a couple quick notes:
1) We used Trader Joe's brand crunchy speculoos cookie butter, which is NOT gluten-free. In our recipe, we offer both a GF and regular flour mixture as options, but to keep this recipe totally gluten-free, try making your own cookie butter from Foodie Fiasco's tried and true recipe. 2) This recipe is a little time consuming, with all the refrigeration. To make it easier on yourself, cook the base the night before, and prep the rest in the morning when the cake has had all night to set. 3) This is a seriously decadent dessert. We cut our bars into about 12 large squares, but each time we eat one, Alex and I end up splitting it, so feel free to cut these into much smaller-even bite sized- pieces. Ingredients: Sugar Cookie Layer: 2 1/2 cups whole wheat flour OR gluten-free all purpose flour 1/2 teaspoon xantham gum (only if using GF flour) 1 teaspoon baking powder 1/2 teaspoon salt 2 cups organic sugar (we used coconut sugar, which is why our batter is slightly browner than usual) 1 cup coconut oil or vegan butter 2 teaspoons vanilla extract 2 mashed, ripe bananas (medium sized) 1/2 cup shredded coconut Cookie Butter Layer: 1/2 cup coconut oil or vegan butter 1 cup cookie butter Chocolate Layer: 1/2 cup coconut oil or vegan butter 1 cup chocolate chips or chopped bar chocolate
Directions:
Sugar Cookie Layer: Preheat oven to 350 degrees. In a medium sized mixing bowl, combine flour, xantham (if using), baking powder and salt. Set aside. In a stand mixer, beat together sugar and coconut oil (or butter) until whipped, about 1 full minute on high speed. Add in vanilla and bananas, and continue to mix until combined. Add in dry ingredients and mix again, until a batter forms. Toss in shredded coconut and mix one last time to distribute it throughout the batter. Pour batter into a greased or lined 8x8 glass baking dish (for thinner bars, feel free to use a 9x13 inch pan), and bake for 30 minutes, or until an inserted toothpick comes clean. When finished, let cool on the counter for at least an hour (but up to overnight), or in the fridge for at least 30 minutes to set. While cooling, make cookie butter mixture. Cookie Butter Layer: In a small saucepan, combine the coconut oil or vegan butter and cookie butter over low heat. Stir frequently, until mixture melts together, then promptly remove from heat and let cool and thicken. Once thickened to the consistency of slightly thinned cookie butter, pour/ spread mixture over cooled cookie base. Immediately store in the fridge or freezer, to set cookie butter layer, for about 30 minutes. While setting, begin chocolate layer. Chocolate Layer: In a small saucepan, combine chocolate and coconut oil or vegan butter over low heat, stirring frequently until mixture melts together. Remove from heat and pour chocolate mixture over chilled cookie butter layer, immediately placing bars back into the fridge or freezer for about 30 more minutes to set completely. Once the entire cake has set, remove from fridge or freezer, and cut. If frozen, allow cake to warm slightly to room temperature so the chocolate doesn't crack. Cut into 12 (or more) squares, and serve. Saves well in a covered container in the fridge for about a week, or in the freezer indefinitely. Enjoy!
|
tagsAll  RSS Feed RSS Feed
|