Quick Pickled Radishes
A while back we posted a recipe for Easy Pickled Onions, and it was maybe the simplest, most satisfying recipe I've ever posted. It's certainly not a challenging recipe, but spending just 5 minutes making a dish that lasts for weeks in the fridge and can brighten up just about any meal is worth it's weight in gold. I love radishes and knew I needed to do something similar to both make them last a bit longer in the fridge and give them a bit more flavor. These pickled radishes taste much lighter and sweeter than a typical radish, but still have a great crunch. I like to add them to everything from sandwiches and burgers to salads and avocado toast- as you'll see below. I'm addicted! But the best part? They really couldn't be easier to make! A little chopping and pouring is really all you need to do. They last about a couple weeks in the fridge, and they're so easy to whip up this'll become one of your new favorite 'condiments'. I promise. Let's eat!
INGREDIENTS
8 ounces radishes, thinly sliced 3/4 cup apple cider OR rice vinegar 1/2 cup hot water 2 teaspoons salt 1 teaspoon sugar DIRECTIONS Thinly sliced the radishes using a sharp knife or a mandolin slicer. Place the sliced radishes in a jar capable of holding about 16-20 ounces. We used a round weck jar, but any kind that closes will do. Whisk together the vinegar, water, sugar, and salt in a medium-sized bowl until the sugar and salt are fully dissolved. Pour the mixture over the radishes and let sit at room temperature for at least 1-4 hours. Cover the jar with a lid and place it in the refrigerator for at least 1 day to pickle. The longer it pickles, the sweeter and softer the radishes will be. NOTES Use the pickles on whatever you like! Pickled radishes will last for a few weeks stored in their jar in the refrigerator.
2 Comments
Shredded Kale + Brussels Salad
This simple salad was originally something I though might make it into my upcoming cookbook, Homestyle Vegan, but didn't make the cut. It's delicious and one of my favorite ways to get my greens in, but wasn't quite the caliber of comfort food I wanted in the book, so I'm serving it up here instead! I know what you’re thinking - so many GREENS! But I promise, this salad is a game changer. It’s incredibly simple to make but packs a ton of good-for-you ingredients and tastes incredible. We dress it in a light, tangy champagne vinaigrette that’ll leave you craving more.
Looking for other salad inspiration? Try our Golden Beet Salad with Balsamic + Cashew Ricotta, Strawberry Walnut Kale Salad with Creamy Champagne Vinaigrette, or Mexican Wheat Berry Salad!
INGREDIENTS
Salad: 5 ounces (135 g) lacinato kale, rolled and thinly sliced 5 ounces (150 g) brussels sprouts, trimmed and shredded 3/4 cup (50 g) green onions, thinly sliced 1/2 cup (70 g) pine nuts Champagne Vinaigrette: 1/4 cup (60 ml) olive oil 1 small garlic clove 2 tablespoons (30 ml) champagne vinegar 1 tablespoon (15 ml) maple syrup 1 1/2 teaspoons (8 ml) lemon juice 3/4 teaspoon dijon mustard pinch each of salt + pepper DIRECTIONS Place prepared kale, brussels, green onions and pine nuts in a large bowl and toss to combine. Prepare the dressing by blending olive oil, garlic, champagne vinegar, maple syrup, lemon juice, dijon mustard, salt and pepper in a high-speed blender or food processor until creamy. Drizzle the dressing over the salad and toss to coat. Enjoy immediately! NOTES Don’t have any champagne vinegar? Use whatever vinegar you have on hand, instead! You can prepare the veggies and dressing separately ahead and dress as needed. Serves 4. Golden Beet Salad with Balsamic + Cashew Ricotta
Beets are definitely one of the most underrated root vegetables. Most people think they don't (or KNOW they don't) like them, and most restaurants won't put a dish on the menu that nobody will order. It's a sad cycle, and beets usually get the short end of the stick. But unlike their earthier, more bitter, urine-dying red beet cousin, the golden beet is a sweet veggie that tastes great whether you pickle, bake, brine, roast or juice it. It has a mellow flavor (and color) that pairs really well with tangy, acidic flavors like balsamic vinegar and richer textures like crunchy walnuts and creamy cashew ricotta - which is why we paired them together! Plus, yellow beets are packed with good-for-you vitamins and minerals like fiber, iron, potassium and folic acid. If you haven't tried golden beets, or have just been waiting for the right recipe to test them out in, make this salad. It comes together super easily and tastes great, plus it somehow totally looks and sounds like a dish you'd only find at a fancy restaurant. Let's eat!
INGREDIENTS
1/2 cup walnuts, chopped 1 cup raw cashews, soaked in warm water 2 tablespoons water 1/4 teaspoon salt 4 medium golden beets 4 cups arugula balsamic vinegar, as needed for serving DIRECTIONS Preheat the oven to 350º. Spread the chopped walnut onto a lined baking sheet. Bake for 8-10 minutes, stirring once. When finished, set aside to cool. Soak the raw cashews in warm water for at least 30 minutes. Drain the nuts and pour them into a food processor. Pour in the water and salt and pulse until a fluffy, chunky texture is achieved (similar to ricotta cheese). Set aside. Trim the ends of the beets, then place them into a medium-sized pot of water. Bring to a boil, then lower heat and cook over medium heat until fork tender, about 20-30 minutes. Drain the water and let cool slightly before using your fingers to slide the skins off. Toss the skins in the compost or trash and thinly slice the cooked beets. Spread the arugula between two large plates and top with the toasted walnuts, a couple tablespoons of the cashew ricotta, sliced golden beets and a drizzle of balsamic vinegar. Serve immediately! (Or, just prep it and take it for lunch to work all week!) NOTES Serves 2. Leftovers last up to a week in the fridge. Easy Pickled Onions
When I stayed in Jackson Hole for Thanksgiving this year, I had a hard time finding meals that were vegan-friendly. While I was there I ate a lot of salad, french fries, and avocado toast from room service. The avocado toast was a tiny, beautiful portion covered in baby radishes and pink pickled onions. I'd need like four of said portions to actually fill me up, but the onions were just SO good on top - I knew I'd have to recreate them at home. After that, I sort of forgot about them for awhile. Lately, I've gotten back into my avocado toast obsession and craved a little extra snap on top, so I decided it was time I make my own.
Their flavor is so much lighter and sweeter than a typical onion, but these pickled onions still have a great crunch. They're perfect on burgers, tacos, sandwiches, salads, or - you guessed it - avocado toast! If you follow us on instagram, you might've seen the recent picture (shown below) featuring them. I'm totally addicted! I even like them straight from the jar. The best part? They really couldn't be easier to make. A little chop and pour is really all you need to do! They last about a couple weeks in the fridge, and they're so easy to whip up this'll become one of your new favorite 'condiments'. I promise. Let's eat!
INGREDIENTS
1 medium red onion, thinly sliced 1 medium clove garlic, quartered (optional) 3/4 cup apple cider OR rice vinegar 3/4 cup warm water 1 teaspoon sugar 1 teaspoon salt DIRECTIONS Place the sliced onion and garlic, if using, in a jar capable of holding at least 20 ounces. We used a round weck jar, but any kind that closes will do. Whisk together the vinegar, water, sugar, and salt in a medium-sized bowl until the sugar and salt are fully dissolved. Pour the mixture over the onions and garlic and let sit at room temperature for at least 1-4 hours. Cover the jar with a lid and place it in the refrigerator for at least 1 day to pickle. The longer it pickles, the sweeter and softer the onions will be. Use the pickles on whatever you like! Pickled onions will last for a few weeks stored in their jar in the refrigerator. Savory Stuffed Mushrooms
Until a few years ago at a holiday party, I thought I hated stuffed mushrooms. I'd never actually tried them before that but I wasn't a huge fan of mushrooms and it seemed to me like no matter what you stuffed them with, they could't possibly taste that great. I was very, very wrong. The older I get, the more I like mushrooms - they're still not my favorite on their own, but the earthy, rich, almost meaty flavor they lend to dishes is both impressive and delicious, as far as I'm concerned.
Anyway, a friend brought some stuffed mushrooms to that holiday party a few years ago, I tried them, and before I knew it I was popping button mushrooms in my mouth like they were going out of style. I was hooked! But that was over two years ago, and this is the first time I've made a stuffed mushroom recipe since that is just so out of this world I had to share it with you guys. I know there are tons of recipes for this dish online, but I promise this one is really good. And pretty easy, too! It's packed with flavor, the filling has great texture, and the homemade parmesan cheese on top adds some fanciness and helps keep the filling moist. The whole things comes together in your mouth like WOAH. This is a recipe worthy of sharing at your next Holiday party - it's a serious crowd-pleaser! Let's get cookin'.
INGREDIENTS
Stuffed Mushrooms: 24 ounces cremini mushrooms, stems removed 2 tablespoons coconut oil 4 cloves garlic, minced 2 shallots, chopped 4 cups fresh spinach 1 cup wild rice, cooked 1/2 cup roasted red peppers, chopped 1/2 cup walnuts, finely chopped 1/2 cup bread crumbs 1/2 cup fresh parsley, chopped 1 tablespoon + 2 teaspoons balsamic vinegar 1 teaspoon salt 1/2 teaspoon pepper fresh chopped parsley, for garnish Parmesan Cheeze: 1 cup cashews 1/4 cup nutritional yeast 3/4 teaspoon salt 1/4 teaspoon garlic powder DIRECTIONS Preheat oven to 375 degrees. Gently wash the mushrooms and remove the stems. Place them cap down onto a lined baking sheet and set aside. In a large cast iron pan, melt the coconut oil over medium heat. Sauté the garlic and shallots until soft and fragrant, about 5 minutes. Add the spinach, stirring continuously until it has wilted. Remove the pan from heat and pour the cooked veggies into a large mixing bowl. Stir in the wild rice, roasted red peppers, walnuts, bread crumbs, parsley, balsamic vinegar, salt and pepper. Toss the mixture together and set it aside to cool for a few minutes. While the mixture cools, you can prepare the parmesan cheeze by placing all of the ingredients into a food processor and pulsing until the mixture becomes a fine meal. Save some (about 1/4-1/2 cup) to sprinkle over the mushrooms and save the rest in an airtight container in the fridge up to 2 weeks. When the mixture has cooled enough to handle, use a spoon, ice cream scoop, or your fingers to scoop the mixture into the cap of each mushroom. The amount you use will vary depending on the size of the mushroom cap. Once all the caps are filled, sprinkle the reserved parmesan cheeze over the top. Bake the stuffed mushrooms for 20-25 minutes, until tender. Remove from the oven, let cool slightly, and serve immediately! NOTES It was hard to come up with just how many people this serves since it really depends on how big the shrooms are, how many people are around, and how many each person eats BUT this recipe gave me 1 packed baking sheet full of stuffed mushrooms. Leftovers can be saved in the fridge up to 3 days. They are best reheated in a microwave or in an oven at about 350 degrees for 10-15 minutes, though they may get slightly softer after reheating. 
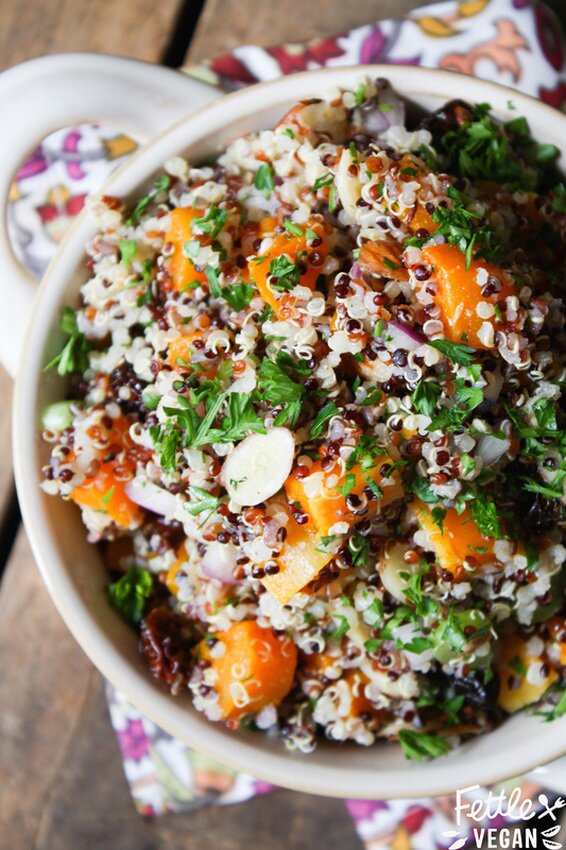
Fall Quinoa Salad with Roasted Butternut Squash and Golden Berries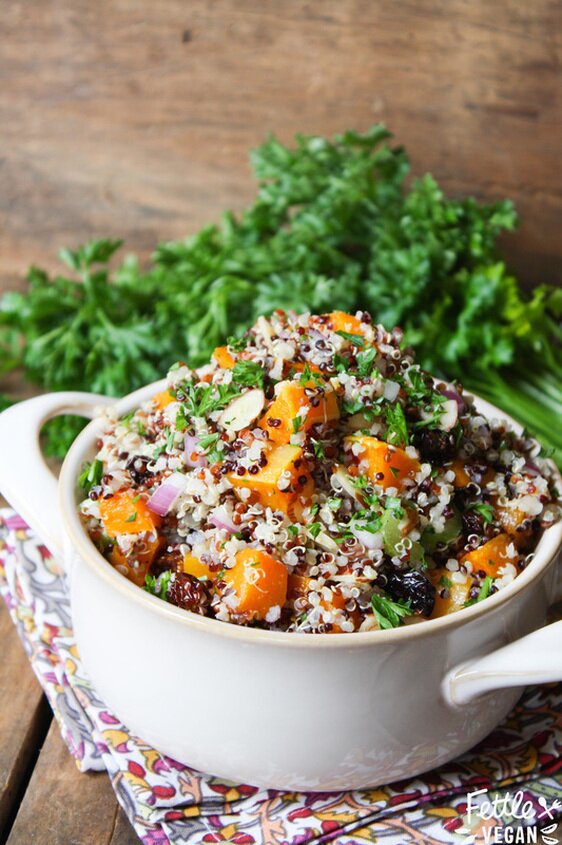
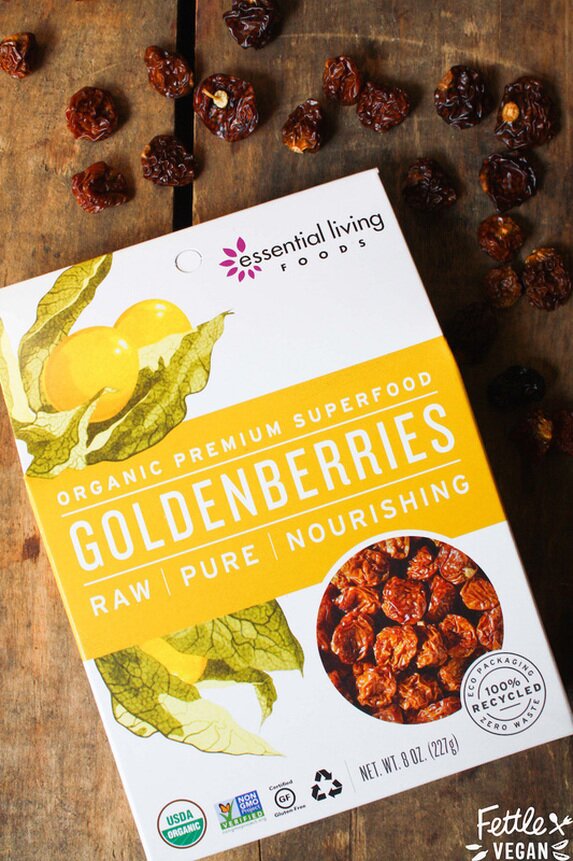
I love fall for the weather, changing colors (okay not so much now that I'm living in California), and delicious, sweet, pumpkin-y baked goods. Which is also the problem...a girl can only eat so many of those baked goods before your belly is like WHOA GIRL and you just need to eat something a little healthier, a little lighter. We're trying to balance our Pumpkin Oatmeal Cookie and Pumpkin Zucchini Bread intake with this savory, flavorful salad. It'll wake your tastebuds up and remind you that healthier dishes can taste pretty damn good, too! It's a great dish for detoxing the crap that has accumulated in your system all month and because quinoa is a complete protein, it'll keep you full longer than you'd expect. This salad has a great mix of sweet (golden berries, roasted butternut squash) and savory (celery, onions, parsley) that makes it a real crowd pleaser. We love using Essential Living Foods Golden Berries in this salad 'cause they keep their foods completely raw, organic, and full of superfood goodness...and they taste amazing! (We're huge fans, and you can check out their complete line of superfoods for yourself here.) It's perfect as a Thanksgiving side dish or a packed-lunch for the week, and we just know you're gonna love it so let's EAT!
INGREDIENTS
3 cups butternut squash, peeled and cut into 1/4 inch cubes 2 cups water 1 cup rainbow (or really any kind) quinoa 1/3 cup celery, sliced thinly 1/3 cup red onions, diced 1/3 cup golden berries, roughly chopped 1/3 cup sliced almonds 3 tablespoons fresh parsley, chopped 2 tablespoons lemon juice 1 tablespoon olive oil 1 tablespoon champagne or apple cider vinegar 1 teaspoon dijon mustard 1 teaspoon maple syrup 1/2 teaspoon salt 1/2 teaspoon ground pepper DIRECTIONS Preheat oven to 400 degrees and line a baking sheet with parchment paper. Peel and cut butternut squash into 1/4 cubes and place on the parchment paper-lined baking sheet. Drizzle with olive oil and a sprinkle of salt + pepper and bake about 30 minutes, flipping halfway through. While squash bakes, place quinoa and water in a medium saucepan. Bring to a boil, reduce to a simmer, then cover with a lid and cook until liquid is absorbed, about 20 minutes. Prepare celery, red onions, golden berries, sliced almonds, and fresh parsley and place it into a large bowl. Set aside. In another small bowl, whisk together lemon juice, olive oil, vinegar, dijon, maple syrup, salt and pepper. When squash and quinoa have finished cooking and cooled, pour the quinoa and roasted butternut squash into the large bowl of veggies and gently toss with a wooden spoon. Drizzle the vinaigrette mixture over the salad and toss again to combine. Serve immediately or save in the fridge up to 3 days in an airtight container. Serves 6-8. Enjoy! NOTES If you don't have/ don't like golden berries or almonds or any other ingredient, sub it out for something you LOVE! This salad is super customizable and you should totally take advantage of that based on your preferences and what you have in the pantry.
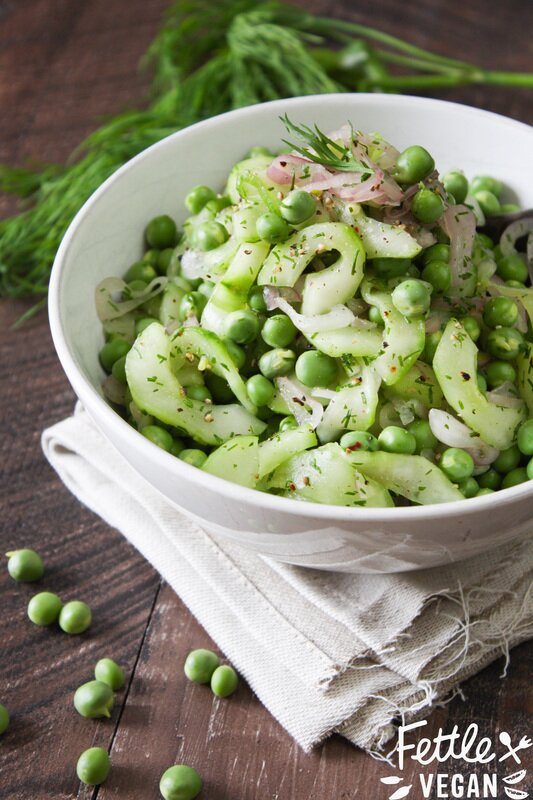
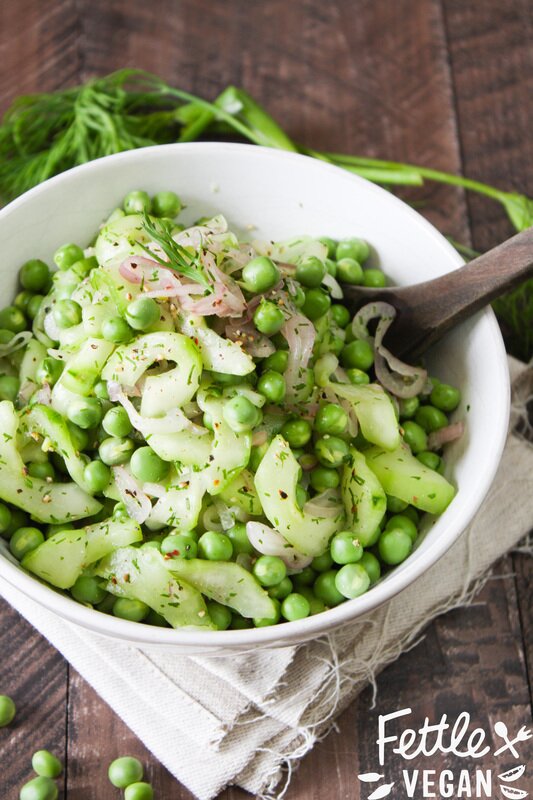
Pickled Cucumber Salad with Peas and Fresh Dill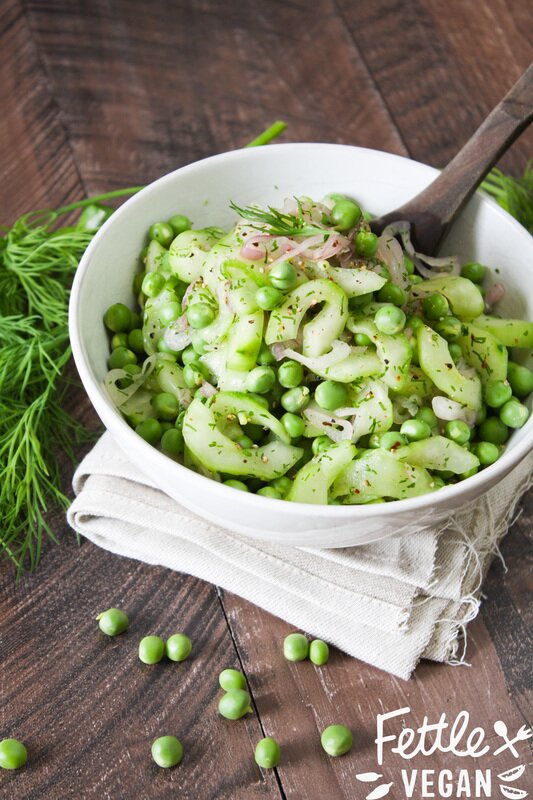
Its been a great week for us. We spent the last week vacationing in Maine, where Amber originally grew up. While there we hiked to the top of Maine's tallest mountain, Mt. Katahdin (about 4,000+ft elevation), successfully rafted Class V rapids on the Penobscot river, and spent time catching up with friends and family. We'll have a post coming up all about that trip and the amazing food we ate, but for now, we're just happy to get back to our regular routine. Nothing like sleeping in your own bed after a week of air mattresses and futons! We were able to find plenty of fresh fruits and veggies in season and farmers markets being held in Maine, which means it if OFFICIALLY summer. To celebrate, and to get our bodies back on track after a week of travel and extreme workouts, we're munching this easy-to-whip-up summer salad with quick-pickled cukes, crunchy English peas, spicy shallots, and a bunch of fresh dill to kick it up a notch (you know, Emeril-style). It's a great recipe for eating up garden-grown goodies and for feeling a little reset after a week of treatin' yo'self, like we did. Let's eat!
INGREDIENTS
-2 large cucumbers, peeled, deseeded, and sliced (about 3 cups) -1 large shallot, thinly sliced -1½ tablespoons sea salt -1½ tablespoons champagne vinegar OR apple cider vinegar -1 teaspoon organic sugar -2 tablespoons fresh dill, finely chopped -1 cup uncooked english peas -¼ teaspoon ground black pepper DIRECTIONS Wash and peel cucumbers. Remove ends and cut lengthwise, using a spoon to scoop out the seeds from the middle so you have two boat-like halves. Slice the halves thinly into little crescent moon shapes. Place into a medium sized colander. Thinly slice the shallot and add to colander. Toss shallots and cucumbers in the salt and let sit about 20 minutes. Once ready, squeeze the veggies to drain excess liquid and rinse the veggies well under cool water. Place drained + rinsed veggies into a medium mixing bowl and set aside. In a small bowl, combine vinegar with sugar and stir well. Toss into cucumber + shallot mixture and stir in dill, peas, and pepper. Toss to combine, and serve immediately with an extra sprig of fresh dill. Leftover can be refrigerated up to 3 days. Enjoy!
Peanut Butter Chocolate Chunk Banana Bread
Summer is here and our CSA boxes have been packed with tons of fresh fruit! We love getting locally grown goodies sent to our door each week, but sometimes we don't make it through the whole box before things start to get a little...brown. Like our bananas! I like bananas just as much as the next girl, but they're not my favorite, and sometimes they get a little too brown before we have a chance to gobble 'em up. Turning mushy, overripe bananas into banana bread is probably my real favorite way to enjoy my bananas, so I never really mind letting them get to that point. And in this combo- mashed with peanut butter + sweet chocolate chunks? ITS AMAZING. And basically a few sprinkles of coconut bacon short of an Elvis sandwich! We've been noshing this loaf all week, but my favorite way is to stick a piece in the warm oven for a few minutes to let the chocolate get a little melty then slather a little butter on it and mmmm...you get it. It's foolproof- and even works well with gluten-free substitutes. Let's eat!
INGREDIENTS:
2-3 bananas, mashed (about 1 1/2 cups) 1/3 cup oil 1/4 cup sugar 1/4 cup peanut butter 3/4 cup non-dairy milk 1 teaspoon vanilla 1 teaspoon vinegar 2 cups whole wheat flour (we have also used a GF flour blend here, but used about 1 3/4 cup) 1/2 teaspoon baking soda 1/2 teaspoon baking powder 1/2 teaspoon salt 3/4 cup chocolate chunks (or chips!) DIRECTIONS: Preheat oven to 350 degrees. In a large bowl, mash your bananas. Set them aside. In a large mixing bowl or in an electric mixer whisk together the oil, sugar, milk, peanut butter, vanilla, and vinegar. Let sit for 3-5 minutes, while you grab a third bowl and combine the flour, baking soda & powder, and salt. Once the wet ingredients are ready, slowly add in the dry ingredients and stir to combine. Once the two are completely combined and a batter has formed, add the mashed bananas. Stir again. Finally, add in the chocolate chunks and mix once to combine. Pour into a greased, lined or non-stick loaf pan. [We used a non-stick pan with a little parchment paper, for easy removal.] Bake for 45-60 minutes, depending on your oven. Bread is finished when a toothpick comes clean. Remove from the oven and let cool at least 30 minutes before enjoying a piece. Cover and save up to a week, or freeze indefinitely!
Strawberry Walnut Kale Salad with Creamy Champagne Vinaigrette
INGREDIENTS
Champagne Vinaigrette: 1/2 cup olive oil 1 clove garlic 1/4 cup champagne vinegar 2 tablespoons maple syrup 1 1/2 teaspoon dijon mustard 1 tablespoon lemon juice 1/4 teaspoon each salt + pepper Salad: 4 cups kale, washed and gently massaged 1/2 cup thinly sliced strawberries 1/4 chopped walnuts 1/4 cup green onions 1/4 cup cucumber, thinly sliced fresh lemon, garnish DIRECTIONS In a blender combine online oil, garlic, champagne vinegar, maple syrup, dijon mustard, lemon juice, salt, and pepper. If you don't have a blender or would prefer more of an oil + vinegar style dressing, simply mince garlic and whisk all ingredients together in a bowl. Set aside. Remove leaves from stems by tearing the leaves downward. Toss kale stems in the compost (my dog loves to eat them, too!) and tear or rip kale leaves into bite-sized pieces. Wash in a colander, using to hands to gently squeeze and 'massage' the kale, so it becomes slightly less crunchy. Pat or shake off excess water, and toss kale into a large bowl. Add in chopped strawberries, walnuts, onions, and cucumber and gently toss to combine. Serve with champagne vinaigrette and a squeeze of fresh lemon. Extra dressing can be stored in an airtight container for up to 2 weeks in the fridge. Enjoy!
With less than a week 'till Easter, the days are getting longer and the trees are sprouting buds. Spring has officially sprung! I've been enjoying running with my pup Maddie in the warm, balmy weather, and here in California, our garden strawberries are even starting to ripen. That's where this recipe inspiration came from- have to eat up the strawberries before the caterpillars do! This is our simple, garden-fresh version of a classic strawberry walnut salad. The tangy champagne vinaigrette is my favorite and blending it helps keep it creamy and light. This sweet salad balances perfectly on a bed of slightly bitter, crunchy kale- though we do massage it to make it a little less intimidating. Add some green onions and a squeeze of lemon and let's eat!
Classic Backyard Potato Salad
A good potato salad recipe can save you from any disaster. Potatoes are almost always on hand in this house, and Alex considers my potato salad the very best (or so he tells me). Its been a solid 75 degrees most days since we've arrived, and its got me feeling like its mid-July. I whip up a batch of this potato salad anytime I'm feeling like eating something summery. Barbeques (veg-g-q's?), picnics, poolside- this is my go to snack. It'll fill you with some good stuff, and its cheap enough to make and share with a group. I usually use Veganaise brand vegan mayo, but we've made it before with both homemade vegan mayo (coming soon!) and the Trader Joe's brand, and both work fine. Add extra veggies if you like, or throw in a bit of smoked paprika, I guarantee it'll come out perfectly delicious everytime.
Ingredients:
6-8 medium sized red potatoes 1 teaspoon salt, for boiling 1/2 cup chopped celery 1/2 cup chopped green onions 1 1/2 cups vegan mayo 2 tablespoons apple cider vinegar 1 tablespoon lemon juice 1 teaspoon garlic salt 2 teaspoons dried dill 1 teaspoon salt 1/2 teaspoon cracked pepper 1/2 teaspoon cayenne pepper
Directions:
First, scrub those potatoes clean. Bring whole potatoes and 1 teaspoon of salt to a boil in a large soup pot for 20-30 minutes, until skins begin to crack and a fork in easily inserted. Try not to overcook the potatoes or they'll get crazy mushy. (You know they're overdone when the skins peel completely away from the flesh.) Once they're done, take them off the stove, drain the water out, and let them cool either on the counter or, preferably, in the fridge until cool. The colder the potatoes, the better the recipe will turn out (things are less likely to get mushy when mixed if they're cold), so if you have time to refrigerate the cooked potatoes overnight, do it. While the potatoes cool, chop the celery and green onions, and set 'em aside. In a small mixing bowl, whisk together the mayo, vinegar, lemon juice, and spices. Toss in the celery and onions, and toss to combine. When the potatoes have cooled, cut them into 1 inch chunks and toss them in a large mixing bowl. Add in the veggie-filled dressing, and gently toss to combine. Serve with a sprinkle of green onions or coconut bacon. Makes a bunch (you know, 6-8 potatoes worth), and saves well covered in the fridge for about a week. Enjoy!
<
|
tagsAll  RSS Feed RSS Feed
|